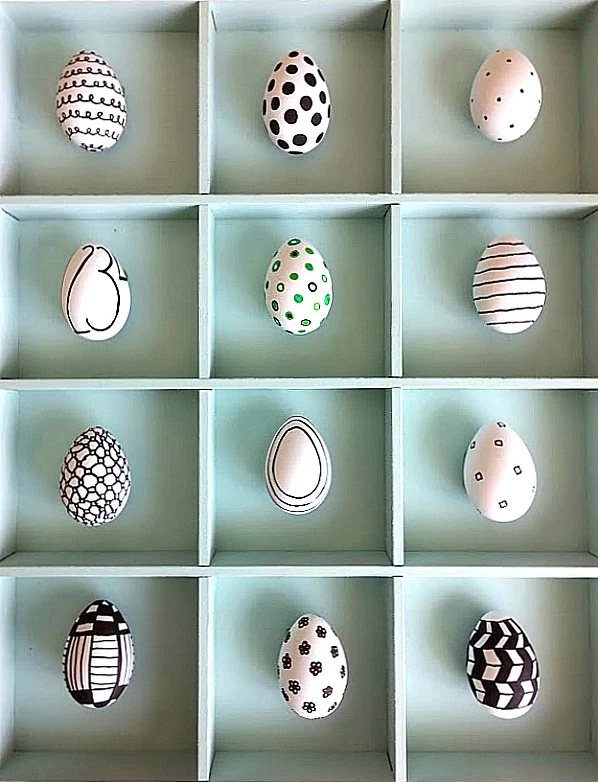
Graphic Eggs in Painted Cabinet
If you're like most American families, chances are you'll be gathering soon with your kids, grand kids, nieces and/or nephews for an afternoon of Easter egg decorating. Why not change things up this year and create Easter eggs that you can enjoy every year? Today's project was inspired by several different graphic egg designs I've seen floating around Pinterest, mainly this one by Obviously Sweet blog. Rather than displaying them in a basket or bowl, I decided to display each one like a piece of artwork by mounting them in a painted cabinet with cubbies.
The graphic eggs were easy to make and required only white plastic craft eggs and permanent markers.
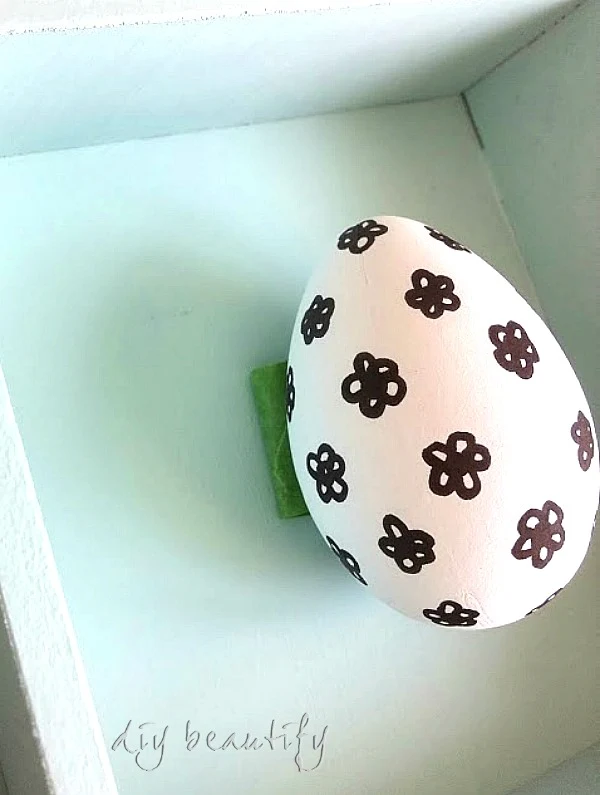
Drawing on the eggs did take a steady hand. My designs are far from perfect, but when they're all displayed together, look great. I singled one egg out from the rest and used colored markers just to add a bit of interest.
I decorated my eggs over a couple days, and even got Little DIY to help make a couple.
Once the eggs were done, it was time to repaint my cabinet. Last Easter, you might remember seeing this cabinet filled with eggs, nests and small ceramic bunnies.
It was cute, but I was over the 'damask wallpaper look' and wanted something with a simpler background that would really showcase the graphic eggs.
I decided to paint the outside of the cabinet with white chalk paint, and spray paint the cubbies with this awesome duck egg blue spray paint. Spray paint is a good choice when you need to paint a cabinet with cubbies and goes much faster than trying to paint it with a brush!
It was easy to stick the eggs to the back of each cubby by simply using a small roll of frog tape behind each egg. Frog tape isn't overly sticky and I can be confident it won't remove the paint from my cabinet when I remove the eggs.
I love how this collection of graphic eggs looks in my newly painted cabinet; each egg is unique and really stands out against the painted background of the cabinet. I can't wait to fill the cabinet with my collection of seashells this summer!
If you liked today's Easter egg craft, check out these:
Coming up on Friday, I'll be sharing a tour of my home decorated for Easter...I'll show you how I reused what I already had, and give you tips for displaying your own items in new ways.
bringing beauty to the ordinary,
Sharing with:
Elizabeth and Co., French Country Cottage, The Pin Junkie, Design, Dining and Diapers, Tatertots and Jello, PinkWhen, The Newlywed Pilgrimage, Blue i Style,


Your eggs and the way you displayed them is adorable! I am also really enjoying watching your laundry room transformation. It's looking great!
ReplyDeleteYou are so, so sweet to say so!! Thank you :)
DeleteLove these! :-)
ReplyDeleteThanks Sue, so glad you like :)
DeleteHi again Cindy. I hope you don't mind, but I love them so much I just included them in a roundup of some of my favourite Easter decor ideas (http://suzyhomemaker.co.uk/18-ridiculously-simple-easter-decorating-ideas/) - with proper credit, of course! Thanks so much for sharing your wonderful inspiration. Sue x
ReplyDelete