(VIDEO) How to Create a Boutique Hat for a Bargain Price!
Hey friends, I am so excited by today's project because it's a 'bargain basement' one! I've included a short video below to show you part of the process!
This is a project that anyone can do; it's a simple way to bring a custom, boutique look to a hat comparable to those you'll find in high end boutiques, but for a lot less (sshh!). You're going to want to wear your cute hat everywhere!
If you read my Country Living Fair recap, you'll recall that I spotted a hat there that I fell in love with; that hat inspired today's project. So let's get right to the tutorial because I know you're eager to see how to create this cute embellishment! This post contains affiliate links (*); click here for my complete Disclosure Policy.
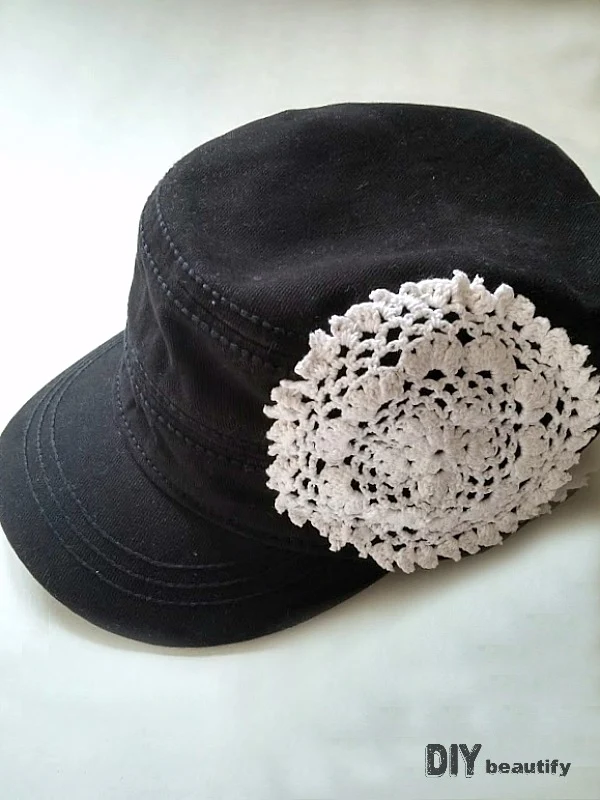
The first thing you'll need is a hat to embellish. I found this black newsboy cap at Target * for $9.99.
The cap will now look like this. It's really cute as is (in my opinion, the humble doily never looked so good!), and you can just leave it like this if you wish; but if you want to learn how to create a satin flower embellishment, continue to Step Three.
I recorded a short You Tube video (my first ever!) to show you how to create the satin petals...
(Tip: I mentioned in the video that you can use a slip for your satin. It's a great way to recycle an old slip! Turn it into a bunch of flowers!)
Initially I was going to use this cream satin that I showed in the video, and my flower was going to look like this (shown on the doily).
It's really pretty and fancy-schmancy, but I changed my mind and decided to go with an all-white flower that was much smaller so more of the doily would show, so I created some smaller petals in white satin. My flower ended up being 4 layers of satin petals in varying sizes with one lace circle for variation. It looks pretty plain here (shown without the doily background), but with the added pearl embellishment, ended up being just what I wanted!
Once you decide what you want, thread a needle and knot the back. Insert your needle from the back through all the layers to the front and and stitch up and down just a couple times, right through the center of all the layers, ending with your needle on the top. Here's a quick picture of the back, you can see the small stitches used.
Then lay the whole thing in the center of the doily and stitch again right down through the doily and the hat to secure well and knot.
The last step is adding the embellishment to the center of the flower. I prefer to stitch mine on, but you can hot glue it also. I just like the security that hand-sewing everything gives; to me that means it has longevity and isn't all going to blow off in a strong wind, lol!
Sorry I don't have a picture of this part; I got carried away and was so excited to finish my hat.
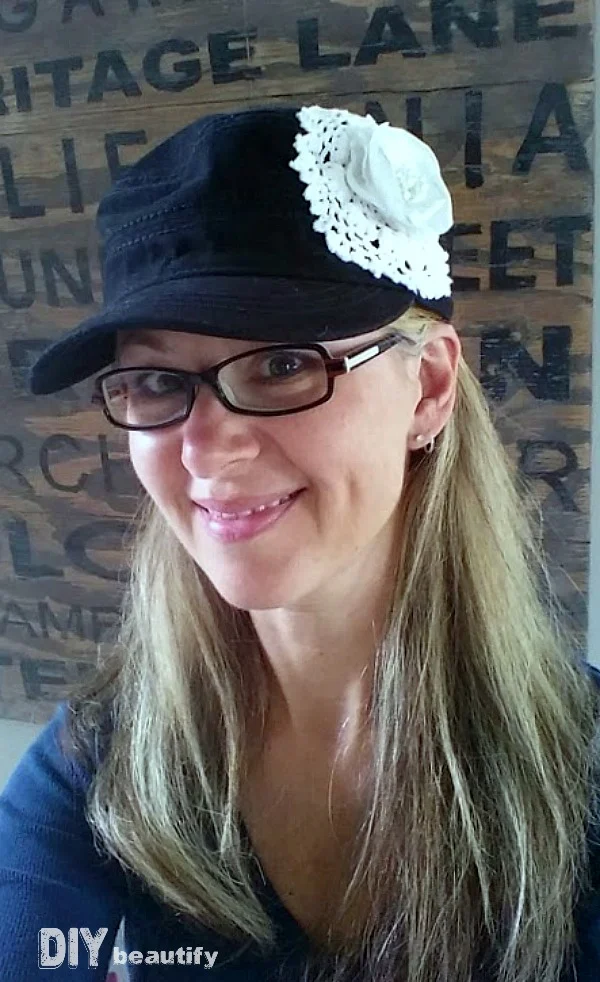
Here it is, all finished!
What do you think? Isn't it totally adorbs? Great for days when I don't feel like doing my hair! Or, just want to wear my awesome new hat!
I've gotta tell you that I'm really happy with my decision to go with all white! I'll have to do another hat in the future with other colors, but I'm loving this one just the way it is!
I plan to wear this hat all summer long! Ooh, and it'll be really cute in the fall when I pull out my cozy sweaters too!
What would you wear this hat with? I need your fashion suggestions!
Talk to me...Is this a project that you feel confident attempting?
I would love to know if you decide to make your own hat; please drop me a line and let me know!
bringing beauty to the ordinary,
Supply List
- black cap*
- small white doily
- white satin scraps
- scrap of lace
- needle and quilting thread
- pearl embellishment (or other embellishment of your choosing like old vintage brooch, earring, cabochon, etc.)
Step One:
Using sharp scissors, trim the outside edge from a small white doily so that you're left with the inside circle. This will be the base of the embellishment. Cutting a doily was a total experiment for me. I remember watching my mom crochet these when I was little, so I know it's intricate work. I wasn't sure if the whole thing would unravel when I cut it, but I have a small hoard of these (thrift store finds), so I was willing to give it a go...and obviously it was a success!!Step Two:
Play around with the placement of the doily piece until you like where it is on your cap. With needle and thread, tack it in place using small running stitches. I used white quilting thread* because it's thick and sturdy, guaranteed to hold up over time. I still doubled it, just to be safe. This is what the inside of the cap will look like. Knot and trim thread.The cap will now look like this. It's really cute as is (in my opinion, the humble doily never looked so good!), and you can just leave it like this if you wish; but if you want to learn how to create a satin flower embellishment, continue to Step Three.
Step Three:
Decide how big you want your satin flower to be and cut several circles out of the satin, both small and large. Obviously they will need to be smaller than the doily so that it will still be seen, so measure appropriately but there's no need to be exact. Remember that they will shrink slightly when we burn them. YES, we are burning them....read on!I recorded a short You Tube video (my first ever!) to show you how to create the satin petals...
Step Four:
Now that you've created a bunch of petals using the above method, it's time to create a flower. Simply layer the petals to your liking, beginning with the largest petals on the bottom and then stacking smaller ones on top. I added a lace circle in between some of the satin. At this point we're not permanently attaching anything, we're just playing around and seeing what we like best. That's why it's a good idea to make lots of satin petals.(Tip: I mentioned in the video that you can use a slip for your satin. It's a great way to recycle an old slip! Turn it into a bunch of flowers!)
Initially I was going to use this cream satin that I showed in the video, and my flower was going to look like this (shown on the doily).
It's really pretty and fancy-schmancy, but I changed my mind and decided to go with an all-white flower that was much smaller so more of the doily would show, so I created some smaller petals in white satin. My flower ended up being 4 layers of satin petals in varying sizes with one lace circle for variation. It looks pretty plain here (shown without the doily background), but with the added pearl embellishment, ended up being just what I wanted!
Once you decide what you want, thread a needle and knot the back. Insert your needle from the back through all the layers to the front and and stitch up and down just a couple times, right through the center of all the layers, ending with your needle on the top. Here's a quick picture of the back, you can see the small stitches used.
Then lay the whole thing in the center of the doily and stitch again right down through the doily and the hat to secure well and knot.
The last step is adding the embellishment to the center of the flower. I prefer to stitch mine on, but you can hot glue it also. I just like the security that hand-sewing everything gives; to me that means it has longevity and isn't all going to blow off in a strong wind, lol!
Sorry I don't have a picture of this part; I got carried away and was so excited to finish my hat.
Here it is, all finished!
What do you think? Isn't it totally adorbs? Great for days when I don't feel like doing my hair! Or, just want to wear my awesome new hat!
I've gotta tell you that I'm really happy with my decision to go with all white! I'll have to do another hat in the future with other colors, but I'm loving this one just the way it is!
I plan to wear this hat all summer long! Ooh, and it'll be really cute in the fall when I pull out my cozy sweaters too!
What would you wear this hat with? I need your fashion suggestions!
Talk to me...Is this a project that you feel confident attempting?
I would love to know if you decide to make your own hat; please drop me a line and let me know!
bringing beauty to the ordinary,


Comments
Post a Comment
Your comments are like sunshine and chocolate! Thanks for taking the time to leave a nice one ;) I read all comments and love to respond. If you don't have Gmail, please leave your name!