How to Make a DIY Slip-N-Slide
Summer's in full swing, but what happens when the kids get bored? This inexpensive 'redneck slip-n-slide' (sorry to be cliche, but I do reside in TN lol) is a simple DIY that will provide hours of fun and it's a great way to beat the summer heat!
Affiliate links may be included for your convenience; my full disclosure policy can be found here. If you click through and make a purchase I'll receive a small commission at no extra cost to you!
We had a heat-wave last weekend. Temperatures were in the high 90's, but with the humidity, it felt like 105°F! Most people would handle the heat by cranking their air and staying inside the house, afraid of getting fried by the sun. But not us! We headed to Target and the home improvement store for a few supplies, and the kids had a blast all day long on our huge DIY slip-n-slide that cost less than $30!
Why make a DIY slip-n-slide?
Sure you can buy a slip n slide at the store, but here's why you'll want to make your own:
- Heavy duty
- Less expensive than store bought
- Make it as big as you want
- Summer fun for even the big kids!
Everyone will want to take a turn on this larger than life slip-n-slide that comes together in just minutes! And bonus, the plastic sheeting can be recycled for use in garden beds or other projects around the home...or just roll it up and save it for next summer!
How to make a giant DIY slip n slide for less
SUPPLIES NEEDED FOR DIY SLIP-N-SLIDE:
- roll of heavy-duty plastic sheeting (I purchased 10' x 25')
- garden staples
- rubber mallet
- liquid dish soap
- sprinkler hose (optional)
Mr DIY's tip: buy the metal garden staples rather than the plastic ones! It makes it easier to secure the tarp to the ground and they won't break when you hammer them!
HOW TO MAKE A DIY SLIP-N-SLIDE:
Step 1:
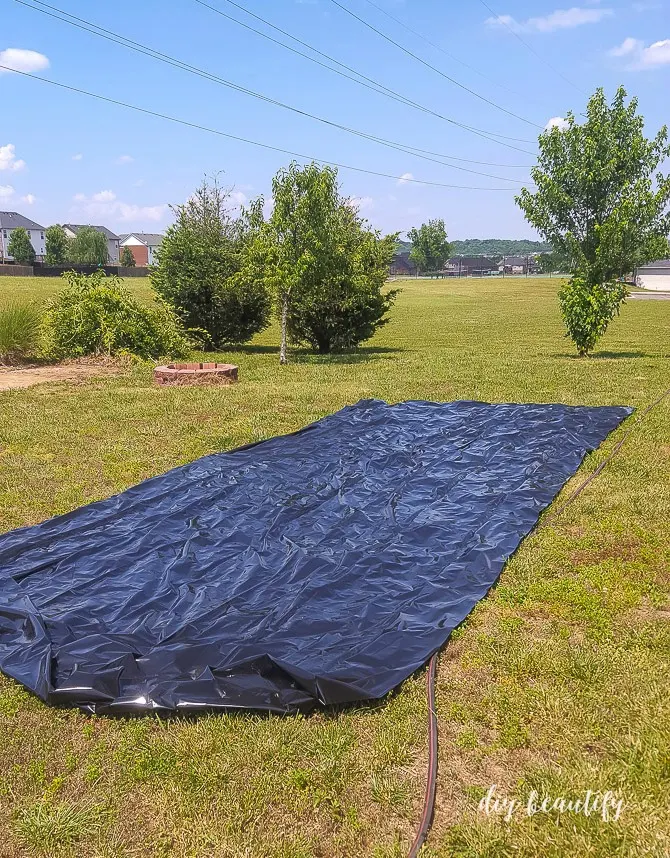
Roll out plastic sheeting on grass. If you want to make an extra long slide, cut in half along the length for a 50 foot slip-n-slide! (recommended for kids who tend to be a little more adventurous!) The size is really only dependent on the size of your yard! That's what makes this DIY slip-n-slide so much better (and way more fun) than a store-bought one that is too short for any real fun to happen!Step 2:
Stake the corners of the DIY slip-n-slide to the ground with the garden staples. This will keep it secure and safe while kids are sliding. Secure the long edges a couple times as well.Step 3:
Squirt slide with liquid dish soap. Warning: you won't need an entire bottle! The more you add, the slipperier it will be. Start with a little bit, and add more as needed.Step 4:
Hose down well. We used a sprinkler hose alongside the DIY slip-n-slide for a continuous stream of water along its length. If you don't have a sprinkler hose, just keep the hose nearby and add water as needed.Step 5:
Don't forget to apply sunscreen. Protect the kids from the harmful sun's rays before they get wet! I'm happy to report that no one got sunburned, even while playing in water in 100° heat for over an hour!This DIY slip-n-slide is now ready for action! Make sure you take lots of pictures because it's really fun to watch! And I promise there will be bloopers!
Here's a little video showing the fun that was had...
Let me know if you try this fun summer idea!
bringing beauty to the ordinary,


Comments
Post a Comment
Your comments are like sunshine and chocolate! Thanks for taking the time to leave a nice one ;) I read all comments and love to respond. If you don't have Gmail, please leave your name!