Thrifted Frame Update with Liming Wax and a Decoupaged Floral Print
Liming wax is a great product to soften dark or orange stain to get more of a gray washed look! I'm sharing the process using a a thrift store frame, as well as how to decoupage a printed image onto the glass of the frame.
Affiliate links may be included for your convenience. As an Amazon Associate, I earn from qualifying purchases at no extra cost to you. My full disclosure policy can be found here.
Hi friends, before we get into this tutorial, I just want to give you a word of hope and encouragement! In light of the craziness going on in our world right now with the Coronavirus, just remember that God is Still in control! He knew this would happen! He has a plan! I know it's hard to trust when you're fearful, but if you can cling to these verses, I promise it will help! Stay busy and stay positive!
Today I'm excited to share two tutorials with you! I updated a thrifted frame with liming wax to soften the stain color, and I decoupaged a pretty floral print onto the glass for a fresh new look! Keep reading for all the details and a supplies list!
"Don't let your hearts be troubled. Trust in God, trust also in me." John 14:1
"I have told you all this so that you may have peace in me. Here on earth you will have many trials and sorrows. But take heart, because I have overcome the world." John 16:33
Today I'm excited to share two tutorials with you! I updated a thrifted frame with liming wax to soften the stain color, and I decoupaged a pretty floral print onto the glass for a fresh new look! Keep reading for all the details and a supplies list!
Thrifted Frame Update with Liming Wax
I have had this thrifted frame for awhile and finally got around to giving it a pretty makeover! I wanted more of a Restoration Hardware, or gray wash look to the wood, and this was a cinch to achieve using liming wax!
Here's how the frame looked before its refresh. Excuse the goofy photo 😂 I was so excited to jump into this project that I forgot to take a before picture and had to screenshot this from my video tutorial!!
Watch this short video tutorial to see exactly how I changed the look of the wood using liming wax!
Isn't that cool?? You can also use this product on wood furniture to soften the finish or tone down a finish that is too bright, too dark, or too orange.
How to Decoupage on Glass
Once the frame had the liming wax on it, I realized I didn't care for the mat and print inside. Because I couldn't easily remove those (the back of the frame was stapled or glued on), I decided to decoupage a pretty floral print onto the glass itself!
This is an easy way to get a completely new look for very little money! And if I ever decide I'm tired of it, I can just repeat this process with a different print!
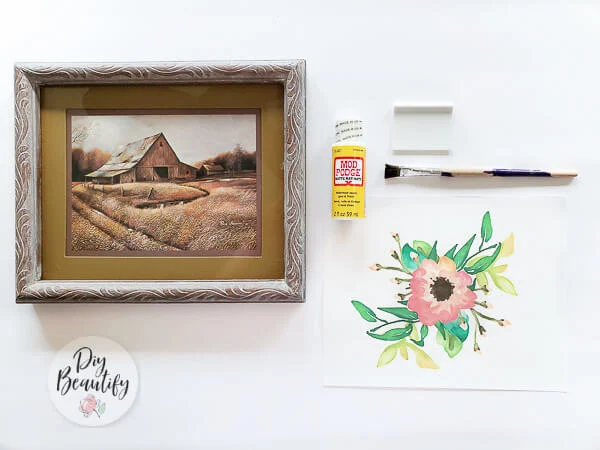
I found the floral print for free on a website I follow (see supplies list below for link) and printed it to my home printer on regular printer paper.
All you need is the frame, your print, decoupage medium and a craft brush.
1. Measure frame opening and cut print to size
2. Apply mod podge to back of print
Use a flat craft brush and brush on a thin coat, making sure to paint mod podge on edges and corners.
3. Carefully place print onto glass
Do this slowly because the mod podge will stick.
See those bubbles? This next step will help eliminate those.
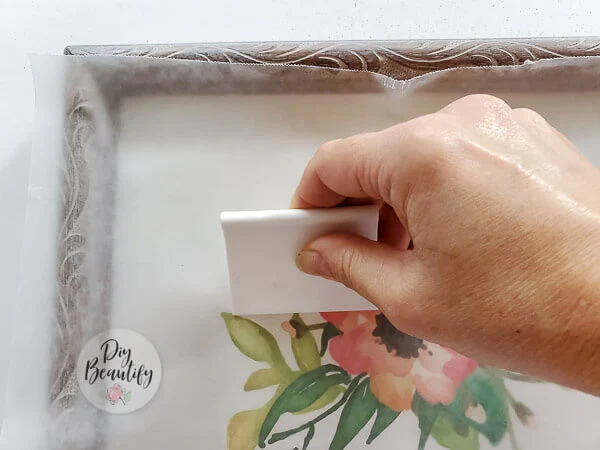
4. Use a flat edge to press out bubbles
Lay a piece of wax paper over the print to protect it and slowly run a scraper tool (or even a credit card) over the print to remove air bubbles.
5. Let dry
Set the print aside to dry. You will notice that more air bubbles will show for awhile, but they will go away once the mod podge dries.
6. Apply mod podge to top of print
To seal the print and protect it, brush on a thin coat of mod podge on the top of the print. Let dry and do another coat. This also makes it easier to dust! I like to use matte mod podge (see link below in supplies list), which gives a very soft sheen, rather than a shiny finish.
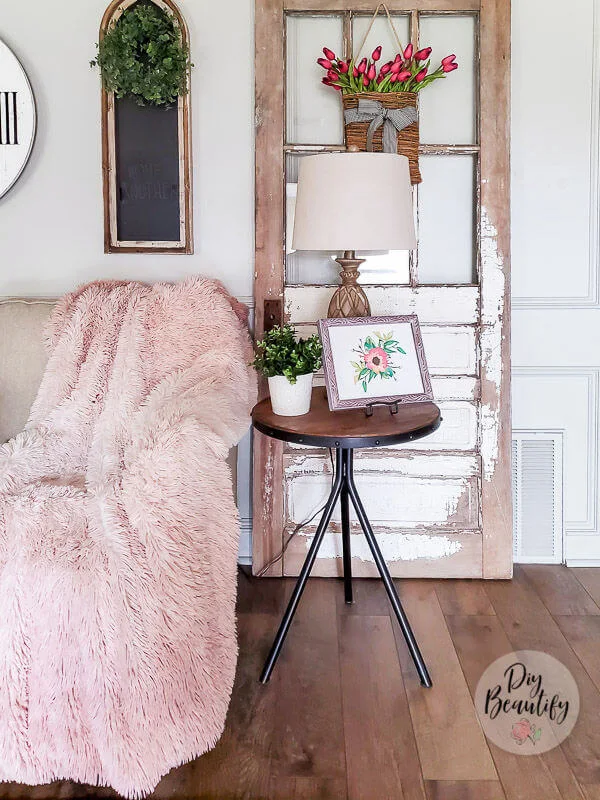
And that's it. Once the decoupaged print has completely dried, it's time to display!
For just a couple bucks, I have a brand new piece of artwork!
By the way, I can't decide if I prefer the chippy white or pale aqua side of this vintage door. Which do you like best?
Supplies List
- thrift store frame
- Briwax liming wax
- round wax brush
- soft lint-free cloth
- print (I used the pink poppy print in a free set from Little House of Four blog)
- paper trimmer
- matte mod podge (or other decoupage paste)
- flat craft brush
- wax paper


Hi Cindy. Great idea. Thanks. I always like white chippy
ReplyDeleteThanks Cheryl, it feels classic! 😉
Deleteblue chippy side
ReplyDeleteI like both sides and the opportunity to change it!
Delete