Cover Your Chandelier Cords with Burlap
Easy Makeover

Lighting plays a big part of our daily lives. I love my kitchen chandelier and my crystal one, but those unsightly cords? Uggh. Over time you get used to the ugly and don't even see it anymore.
So when I saw this amazing way to cover those cords in...are you ready for it...burlap...I was ready to jump in the air for joy! Yes, one roll of wide burlap ribbon can change your life! Or at least your chandy :)
I found the idea while cruising From My Front Porch to Yours who was inspired by Serendipity Refined. I encourage you to head to both their sites to see their amazing chandelier transformations.
As always, I chose to use the idea and make it my own, keeping it mainly the same but wrapping the burlap much more snug around my cords as I went down from the ceiling to the top of my chandeliers.
One thing I never knew before, and I have been working with burlap for ages, is how easy it is to ruffle it! No scissors or cutting required. You simply pull one thread from the end (in the middle) and when you start pulling it, the burlap ruffles beautifully and so easily. I created the whole thing while standing on my kitchen table with a few needles in my mouth (you should never, ever do that!).
Once you have a few feet of it ruffled, you wrap it around the plate on your ceiling and using straight pins, attach it by sliding a pin into the burlap and then under the edge of that plate; do that 3 or 4 more times. It's a loose hold, but it's not like we have monkeys swinging from the chandeliers around here!
And then continuing on, begin wrapping it around the 'neck' of the chandelier, wrapping as loosely or tightly as you wish. You can keep ruffling your burlap or choose to keep it flat as I did. Then, once you get to the base, begin creating ruffles again, wrap them around the base and secure them with a few pins.

I love how it warms up the dining area...burlap on the ceiling adds texture and warmth! And, weirdly enough, it perfectly matches the shade of gold on the inside of the black shades on my chandelier!
Now, moving on...I did the same treatment to my crystal chandelier in the piano room...
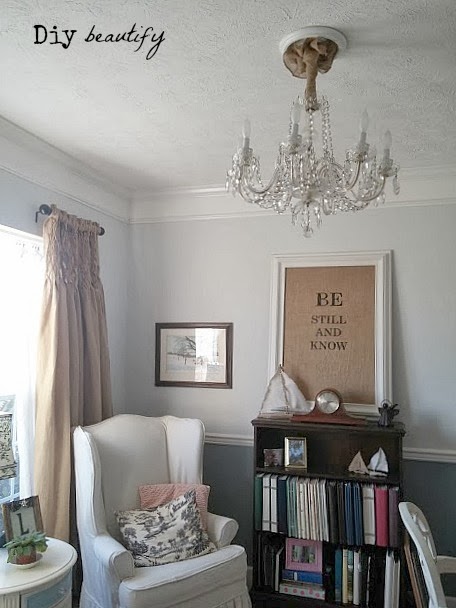
Here's the before...pretty, but that cord sure isn't doing it any favors...do you see that link poking out the side?


The rustic and the glam...together at last :)
This is a project that can be completed in less than 15 minutes (if you don't have to find a ladder and drag it out from dark and dangerous corners).
Burlap ribbon = my new best friend :)
I hope you'll try this simple project in your home and wrap up your unsightly cords with burlap!

Sharing with:
Feathered Nest Friday
Wow us Wednesdays @ Savvy Southern Style


What a fabulous idea!
ReplyDeleteThank you!
DeleteCindy, it really does dress up the chandelier! I've seen this done before, but haven't tried it myself. I do love burlap! In fact, I have the same burlap curtains as you hanging in my family room. Thanks for sharing with SYC.
ReplyDeletehugs,
Jann
I love the warmth & texture burlap brings to a room...and it's so affordable :) Don't you love those curtains!! Thanks for commenting Jann :)
Delete