Painted Boxes for Storage (Master Bedroom Project)
I know I promised to share some of my projects in the Master Bedroom when I shared my Stenciled Wall and Master Bedroom Reveal with you!
But then life got in the way and all my time was spent on planning and projects for my son's Graduation from high school and his big Grad party.
That big crazy week is now behind me and I can get back to all the other projects that are waiting for me, such as sharing this upcycle and how I painted these boxes to give them a modern vibe.
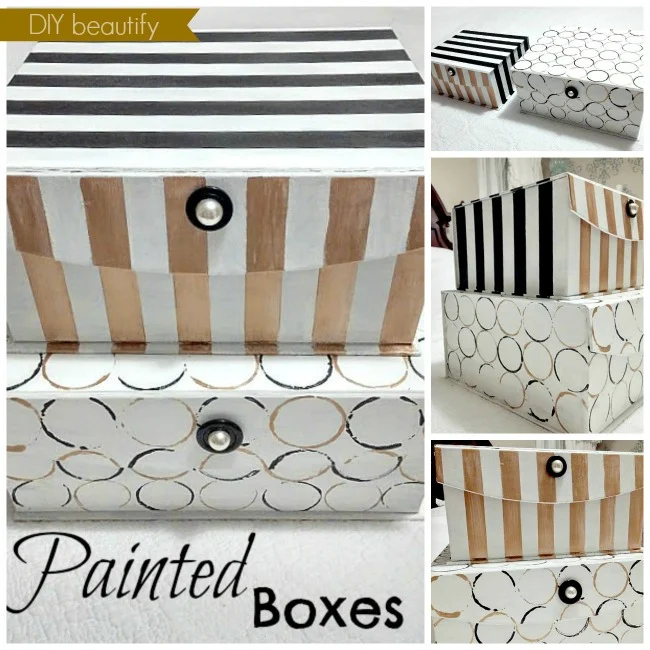
I've had these storage boxes (I found them at Michaels) for a long time, and I love the generous size of them. However, the faded floral just wasn't fitting into my desire to go a little more modern in some of my accessories. I decided to paint the boxes with simple stripes and circles, using chalk paint.
This post contains affiliate links, which are always items I personally recommend. You can read my full disclosure policy here.
They needed two coats of chalk paint to cover up the flowers. Here is how they looked after one coat.
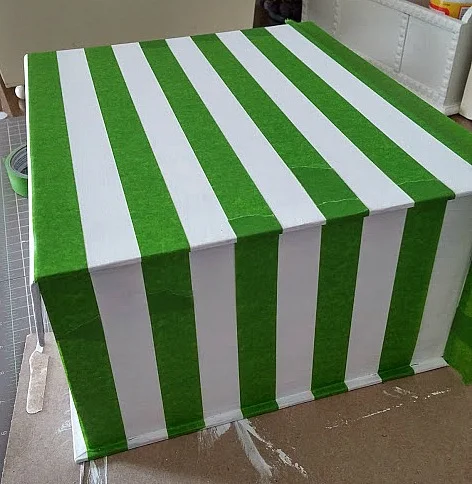
Next, I used Frog Tape and taped off stripes for the smaller box.
Then I used black and gold acrylic paint and painted the white that was exposed. I did black on the top and sides and gold on the front. It took about 3 coats of the darker colors. This is how it looked after the first coat.
I did have to do some touch up once I peeled off my Frog Tape.
For the larger box, I used a large ribbon spool (minus the ribbon) to paint circles. I alternated dipping the ends into gold and black paint and touching them to the box to get my circles.
Once everything was dry, I attached large buttons with pearl accents and Velcro dots to the front flap closure.
I love how modern and updated these boxes look now!
I'm using the smaller one to store some of my bulkier necklaces. The larger box is perfect for holding all the miscellaneous paperwork that seems to accumulate on a daily basis. Things like receipts and other odd things that I want to keep handy but want to keep out of sight.
Do you even remember how these used to look??
They look great on top of Mr. Diy's tall dresser. The lighter color, even with the black, makes them stand out and their fun pattern makes them almost like artwork in our newly redecorated and painted bedroom!
I hope this project encourages you to see beyond the ordinary in your own items! Before you throw them away or send them to the thrift store, consider giving them a makeover for a whole new look!
I hope you're having a great week, friends!
Become a DIY insider!
You'll never miss a post, and you'll get all my FREE tutorials
and more...delivered straight to your inbox!
and more...delivered straight to your inbox!
Let's be Social! Follow along on Pinterest, FB, Twitter, Instagram
This blog's content is for entertainment purposes only and is not professional advice. By reading this blog and attempting to recreate any content shared on it, you assume all responsibility for any injuries or damages incurred. Read my full disclaimer here.


Thanks so much for sharing these pretty makeovers at my party.
ReplyDeleteBlessings,
Linda
These are so so cute! I MUCH prefer them like this than to how they were before!
ReplyDeleteThanks Amy, I like them much better too...it's a nice update and I love that I didn't have to spend any money since I already had the supplies on hand :) Sure appreciate your visit and sweet comment!! Have a wonderful evening.
DeleteAdorable! I like how you made the circles!
ReplyDeleteThanks!!
DeleteLove the makeover you gave your boxes. Very chic!
ReplyDeleteMary Alice
Thank you,.. I love how paint can completely transform something and allow you to make it your own!
Delete
ReplyDeleteI love your project! Thank you so much for linking it up at Work It Wednesdays! Hope to see you back tomorrow!
Your new boxes are perfect for the more modern vibe you are going for! Upcycling is so much better than just spending money to replace them. ;)
ReplyDeletePinning to our Party Board!
Thanks so much for sharing your creativity at Show-Licious Craft & Recipe Party! Can't wait to see what fun projects you link up next Saturday!
~ Ashley
~ Ashley
It was fun to change them up with just paint! Thanks for stopping by :)
DeleteSo fun! I love the designs and the bit of bling! Thanks for sharing them with SYC.
ReplyDeletehugs,
Jann
Thanks Jann; they are fun, aren't they? Amazing what a little paint can do!
DeleteWhat a great before and after! They look so great! Thanks so much for linking up with us at The Makers. :)
ReplyDeleteLove these!!! Thank you for sharing. You are one of the features today at The Round-Up from the Before an After Wednesday party at The Dedicated House. Here is the link to the features. http://www.thededicatedhouse.com/2014/06/the-round-up-from-before-and-after.html Hope to see you again at the bash tomorrow. Toodles, Kathryn @TheDedicatedHouse
ReplyDelete