How to Update a Deck with Paint
I'm sharing the steps for how we gave our "EW" deck a fabulous new makeover, rather than replacing it!
Affiliate links may be included for your convenience; my full disclosure policy can be found here. If you click through and make a purchase I'll receive a small
commission at no extra cost to you!
Our deck was certainly 'Ew' before we gave it a much needed makeover!
Let's just say that staining it wasn't an option...time and weather had done their dirty work and our deck was gross!
It was dirty with cracks, splinters, gouges and wonky wood, including loose boards and one board that had rotted. Ew!
With no roof, our deck is fully exposed to all the crazy TN weather.
In an effort to get a few more years out of it, we opted to paint it.
Actually, I need to back up the bus first and say that this deck update started off as a deck cleaning...but as is the way with most things, it became a much bigger project.
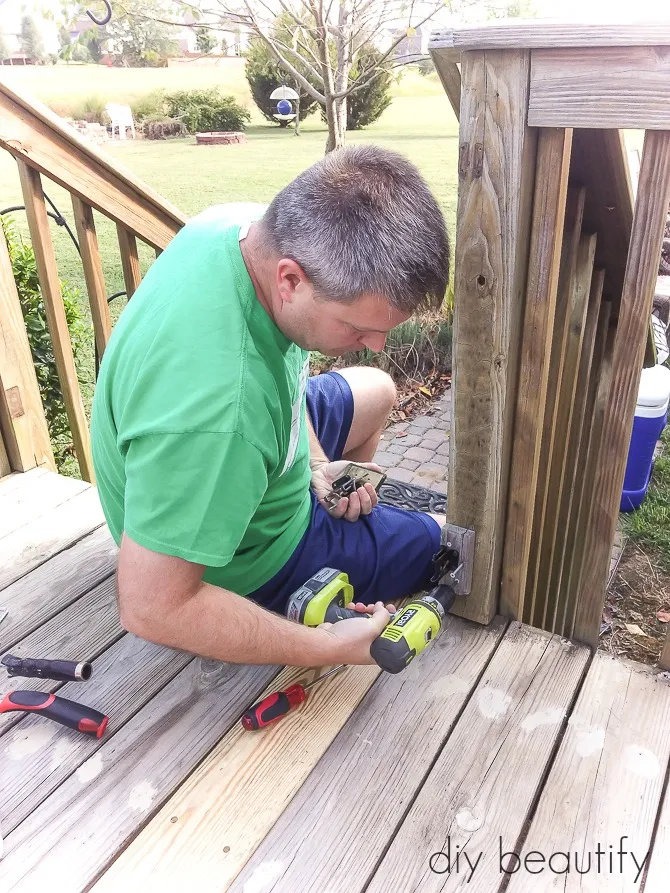
Mr DIY spent the better part of a day scrubbing the deck, replacing a rotten board (Ew!) and then filling all the screw holes prior to painting. Oh yeah, and removing the outdated lattice because that was really Ew!
He went through a lot of Elmer's Wood Filler!
Once all the prep was done, the deck looked like it had the measles! But at least it was clean and ready for paint.
And yes, it was July when we started on this project. Between bouts of rain and other factors, this project took us awhile to complete!
We used a product that Home Depot carries, called DeckOver. Here is the total list of supplies we used.
Supplies Used to Repair a Deck
- Behr Premium All-in-One Wood Cleaner
- stiff deck brush
- Elmer's Wood Filler to fill holes and gouges
- Behr Premium DeckOver in Drift Gray
- semi-smooth roller covers
- mini roller
- assorted handles, paint trays, etc.
- Behr Premium Plus Ultra Exterior Satin Enamel (in ultra pure white)
- drill mixer attachment (to mix paint)
- drill
- Not Pictured - the Behr Weather Proofing Stain pictured below in the list...there's a reason for that, and I'll be sharing that in a little bit.
Clean, let it dry. Fill holes, let it dry.
Sand, sweep, clean.
Remove hinges, etc.
To make the job even more challenging, because our deck is not covered, we were subject to inclement weather conditions and August was a really wet month in TN this year! It was stop and start throughout the project.
We chose to paint the deck rails white and to do those first. When we bought the DeckOver, there wasn't a white available. The associate working at Home Depot recommended the Weather Proofing product, which comes in white. So we bought it. But it's a stain y'all (which of course we didn't realize until after trying to paint the vertical slats!)
Have you ever tried painting a vertical surface with stain? It's like trying to paint with milk! It was splattering and dripping and not really covering that well.
I'm sure it's amazing in the proper application, but this wasn't it.
So we took it back to Home Depot and they kindly replaced it with something that could tackle the job properly, Behr Premium Plus Ultra Exterior Satin Enamel (thank you Randy for all your help!).
Once I started using the exterior satin enamel, the job went much faster!
Here is proof that I did much of the painting...armed and dangerous with my hair outta the way and my shirt inside out because that's how I like to paint! Hehe.
At this point, I don't have it all over my knees and elbows yet...but that is coming, I promise you I was a mess when I was done!
Once the rails were painted and dry, we tackled the deck floor with the DeckOver.
If you've never used it before, be prepared because it is thick like pudding! It needs to be well mixed. We used a drill paint mixer attachment to make the job easier.
I cut in around the edges of the deck while Mr DIY poured a small amount of paint out onto the deck and then rolled it.
We needed to do two coats, but this was by far the easiest part of the whole job!
And I know that I know that I took pictures of this process, but I cannot find them. Ugh. Or should I say, 'Ew'!
The fabulous thing about the DeckOver is how it fills and levels.
Cracks disappear and deep gouges are mostly filled in. It does a great job of refreshing a tired deck and saving wood that has seen better days!
I think this progression says it all...
Remember where we started? The deck was Ew!!
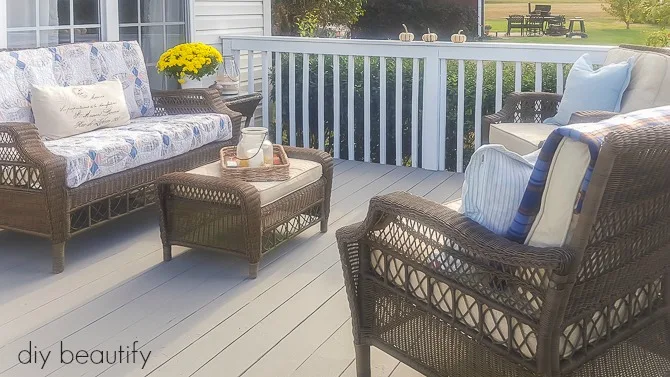
And now it's not! The budget didn't allow for new deck furniture, but by covering the cushions with some quilts and throws, it adds a homey touch and looks so inviting.
And the bright yellow mums add a gorgeous pop of color. Our deck is now fresh and clean and we did it within our budget!
And we find ourselves wanting to be out there more!
It's far from perfect, but by updating our deck with paint, we've given it a few more good years.
The view from inside the kitchen makes me smile!
Have you ever painted or stained a deck? It's a lot of work (and I'm sure our neighbors wondered if ours would ever be done!).
Please let me know if you have any questions about this painted deck project; I'd be happy to answer them!
So how has our painted deck held up?
Update: I've had several readers email to ask me how our deck has held up since we painted it. We noticed at the beginning of the next summer that there were a few spots that were starting to bubble. The good folks at Home Depot offered to replace the paint, but we found out we were moving and so we didn't do it. I do believe that having an uncovered deck is what caused the paint to do this. It was exposed to the elements all the time. My in-laws used the same paint on their covered deck and it has held up for several years. So please keep that in mind before starting this project!


Love your deck!! I have a covered front porch that needs help...how difficult is it to replace boards (the current boards remind me of indoor hardwood floors about 3"-4" wide with tongue and groove)? I know I'll have to wait until spring to do anything - too cold in Washington to work outside now. You and Mr. DIY really did a fabulous job on your deck - it does look so fresh and clean and now I want to spend time out there too!!
ReplyDeleteHey Farm Quilter, thanks for all your sweet comments! It wasn't difficult at all to replace the board. There are slight gaps between each board, they are not tongue and groove..so they simply pull up with a crowbar.
DeleteHi Cindy, I just wanted to pop in and tell you what an amazing job you did on your deck. It is quite the transformation! Thank you so much for sharing at Create • Share • Inspire, we hope to see you back this week!
ReplyDeleteAlicia
P. S. I loved the Jimmy Fallon reference. :)
Thank you Alicia, I was skeptical that the paint would make much of a difference and have the power to 'save' our deck! I'm so happy with the results!
DeleteWe are halfway through the same project, and it is a lot of work. I really wanted a wood stained floor on the deck, but after all the work of removing old paint and cleaning it up, the wood just wasn't good enough, so we have to restore and paint. I love how you painted the railings a different color from the flooring. It makes it look more like a room. And your view from you kitchen window is beautiful.
ReplyDeleteThank you Rebecca, and you're right, it is a lot of work. Ours was too far gone to stain as well, and the DeckOver was the best solution. Good luck with your project!
DeleteI'm curious how the paint has held up over the past year. I'm thinking of painting our deck and wanted to see how it was handling the elements!
ReplyDeleteThanks for your question, Ashton. It's held up great, even through our very wet winter. I do notice when it's wet it's a little bit slippery, but that's probably true of any painted surface. There has been absolutely no chipping, peeling or paint wearing away.
DeleteIt looks great! I'm about to tackle a similar project and I'm torn between the Behr and the Rustoleum. Can you tell me how this is currently holding up? Any flaking or chipping?
ReplyDeleteHello! I loved the outcome of your deck. Currently working on mine and wanted to know if you needed to seal it after with anything (weather proof seal)? Or it wasn't necessary because of the thickness of the deck over paint?
ReplyDeleteThank you Melissa! I would suggest some kind of sealer if your deck is uncovered. We did notice some peeling and bubbling in the summer.
DeleteHey!! Wanted to know how your deck paint job is holding up? I am wanting to paint mine soon and considering Deck Over but have read some reviews that it chips and fades pretty quickly. What has your experience been? Thanks!
ReplyDeleteOh and if you could email your answer to lindy.jo.h@gmail.com please! Thanks again!
DeleteIs it recommend to always paint the floor last ? Did you cover anything with plastic to protect areas painted in different colors ?
ReplyDeleteGreat job! What color stain is this? I love it!
ReplyDeleteCurious what color is your house?
ReplyDeleteAlaina, the house where we redid this deck was a red brick front and white siding back.
DeleteThanks for walking us through this. It came out amazing. I have a very similar project where I want to re-paint the railings white and deck floor grey. And my railings attach to the floor exactly like yours do. They are currently painted in that color combination but the paint is peeling off. Did you have to use any painters tape or any other product in every single railing to make sure that when you were painting the deck floor/sides (deck over), that paint didn't go on the white paint railing specially at the bottom of the railings and stairs?
ReplyDeleteThank you! I used a brush to cut in around the rails before we painted the main part. It was actually much easier than I thought!
DeleteHi, What color deckover paint did you use?
ReplyDeleteIt's in the supplies list.
Delete