DIY Sweater Snowmen
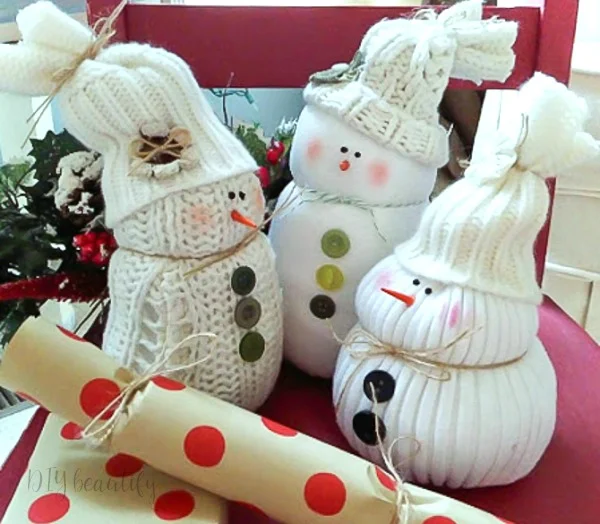
Craft the cutest fluffy snowmen using recycled sweaters and socks! Perfect for gifting and for adding a little cozy to your home during Christmas and winter!
Updated 01/2023
Affiliate links may be included for your convenience;
my full disclosure policy can be found here. If you click through and make a purchase I'll receive a small
commission at no extra cost to you!
Sweaters to snowmen!
Today I'm excited to show you how to make these cheeky little snowmen using items you probably already have on hand!Each one has its own personality, and they are simply charming in a trio!
Let me show you how easy it is to make them... Bonus, no sewing is involved!
How to Make Sweater Snowmen
Supplies for Sweater Snowmen
- sleeves from sweaters (Goodwill sweaters are perfect for this; just make sure the weave is tight)
- sock (not pictured)
- rice
- rubber bands
- twine or ribbon
- black and orange acrylic paint
- wood skewers
- buttons
- hot glue gun (not pictured)
- various embellishments to add personality (like mini crocheted flowers)
- blush (if desired)
Start by cutting the sleeves off your sweater (it goes without saying that
you've washed and dried the sweater first!)
Turn sleeve
inside out
and using a rubber band, wrap it around as many times as possible to keep it
shut
Turn right side ou t and fill with rice. You will use a LOT of
rice for one snowman, anywhere from 3-6 cups depending on the stretch of your
sweater! So don't use that specialty wild rice you've been hoarding!
Using another rubber band, tie the top shut, snug down around the top of the
rice.
Tip: if your sleeve has a heavy or thick cuff, you'll want to cut that
off first to reduce the bulk
And just like that you've got the beginnings of a snowman!
Cut the cuff off a sock that coordinates. This will become the snowman's
hat.
Trim the excess sweater off the snowman's head and hot glue the sock around
the snowman's head, cuff-side down.
Make the shape of the snowman by tying ribbon or twine about 1/3 of the way
down to distinguish the head and the body. Unless you do a really tall
snowman, I would not advise 3 sections because it may not stand up properly.
Two will do!
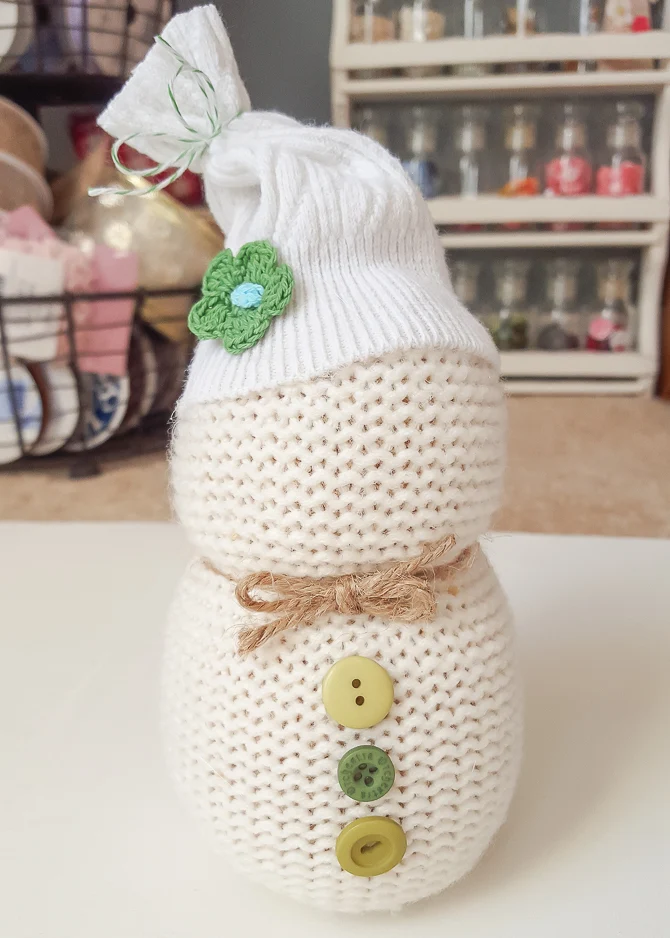
Using ribbon, twine or cording, tie the end of the hat tight and snip off
excess sock. Add a crocheted flower or other embellishment to the hat. Hot
glue buttons to the front of the snowman's tummy.
This is what your snowman should look like now. It's time to add the face and
see what kind of personality emerges!
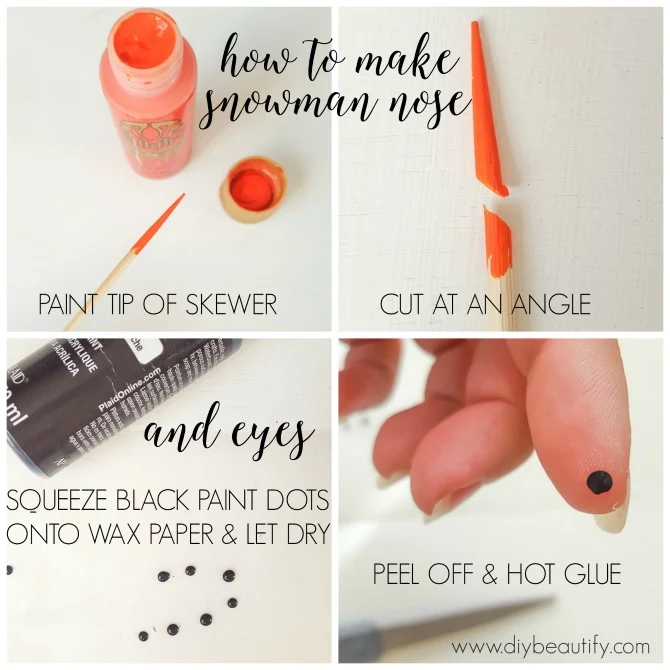
The eyes are made from small dots of black acrylic paint. Dot them onto waxed paper, let them dry, pick two that match and glue them on (tip: add a dab of hot glue to the snowman's face and then apply the eye rather than adding glue to the eye!)
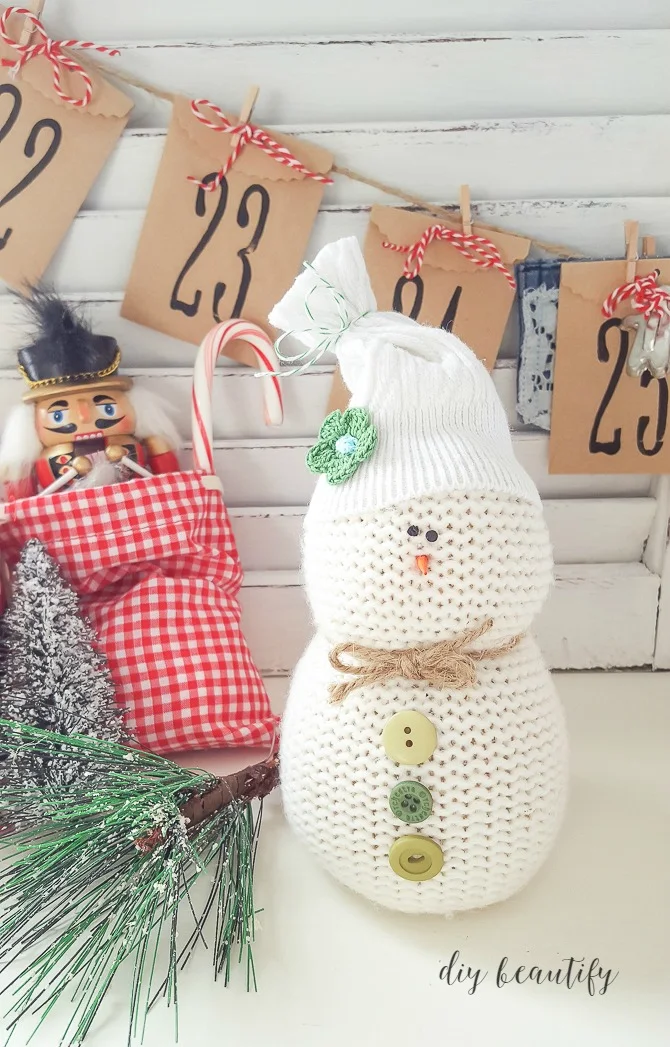
How you glue the nose and eyes onto your snowman goes a long way towards adding personality. The nose can be glued on slightly sideways, or straight on. The eyes can be close together, further apart, or even offset. Have fun adding your own touch to your creations!
This one looks slightly perplexed! If you'd like you can also dab on a bit of blush onto his cheeks because, brrr...it's cold outside! (I didn't add blush to this snowman).
I hope you try this quick craft! Once you get started, you won't be able to
stop making these adorable sweater snowmen! This one is going to my niece for
Christmas.
FAQs for Making a Sweater Snowman
Is there a specific type of sweater I should use?
You want to use a sweater that has a tight weave so that the rice doesn't fall out! You could also use a white cotton t-shirt!Won't the rice attract pests?
I have lived in both Florida and Texas, both hot and humid climates and I haven't had a problem. I wrap the snowmen in a zipper bag and store in a sealed plastic bin in my attic.Do the snowmen need any kind of anchor so they don't fall over?
No, that's the beauty of using rice! You could also use small beans like lentils (that's what I use in my sweater pumpkins). You can squish and mold them into the shape you want and they'll stay put!If you have any questions that you don't see addressed here, please feel free to reach out via email or leave a comment below!
PIN to save
Pinning and sharing my images is a great way to support my site, thank
you❤
bringing beauty to the ordinary,


Super sweet! I bought socks at the dollar store in August to make sure I had them on hand to make a few of these guys. I am off to pin, I like your sweater/sock combo even better!
ReplyDeleteThank you Kim..I've made the sock ones too, and you can even use cotton shirt sleeves. But the sweaters make the softest snowmen!
DeleteOh my goodness Cindy, your snowmen are adorable!!! And the fact that they are repurposed score them even more points! Just love them!:o)
ReplyDeleteThank you for the snowman love Lucy!!
DeleteCindy, your snowmen are so cute!!! It's one of the sweetest repurpose I've seen!! Fantastic job!! :)
ReplyDeleteKeri, thank you so much! I really appreciate your sweet words!
DeleteCindy how could I not pin these adorable snowmen? They are so cute enough to make the snow melt off my nose... Merry Christmas to you and yours!
ReplyDeleteI appreciate the pin Mary, and wish you and Merry Christmas also!
DeleteThanks for the tutorial. Pinned for later. Just to find a sweater to cut up. Happy Holidays.
ReplyDeleteHey Theresa, you are very welcome! Thank you for the pin. I hope you have fun finding a great sweater and crafting your own little snowman!
DeleteYour sweater snowmen are so adorable, especially with their rosie cheeks! Pinning to share.
ReplyDeleteThanks Marie, I'm pretty much smitten with them myself! I agree the rosy cheeks are the best...I went and forgot to add it to the last snowman I made...then I took pictures and edited them...too late to redo. I've since added the blush so he looks even cuter!
DeleteThese guys make me smile...so cute!
ReplyDeleteAw, me too Jeanette! Thank you :)
DeleteCute cute cute! I love these!!
ReplyDeleteThank you Christy!
DeleteWhat a great project. It's so sweet, but than again I have a thing for snowmans. LOL
ReplyDeleteThanks Vanessa, I love snowmen too, especially soft ones with sweet faces 😁 Have a great day!
DeleteCindy, I love snowmen and these are simply so sweet! Popping over from i heart naptime and pinning! Hope you have a merry happy weekend!
ReplyDeleteThank you Cindy!
DeleteSo adorable! Love those buttons marching down the front and I've got a pair of red and white striped socks that will make a perfect hat! Pinned.
ReplyDeleteThanks Charlene! I think red and white stripes will make a perfectly adorable hat on your snowman!
DeleteThese are darling! I have to make some for my baby next year! Thank you for joining the 12 days of Christmas Blogger tour Link Party!Merry Christmas!
ReplyDeleteI just love these adorable little guys. I'm linking this post to my blog so others can make their own too. :)
ReplyDeleteThank you so much Haylee, they are such fun to make!
Delete