How to Make a Farmhouse Sign and a Free Printable
This quick DIY sign adds texture and just the right farmhouse feel for the space above my sofa. Read on to find out how to make it!
Affiliate links are provided below for your convenience. You can find my full disclosure policy here.
This handmade farmhouse gather sign was inspired by our recent trip to IKEA and the accessories I found for my living room. I felt like the space above my sofa needed something with texture, but nothing too big and intrusive.
A quick search in the garage yielded an ideal piece of wood. No cutting was necessary, just some sanding to smooth out the rough surface and edges.
I'm not going to bore you with the complete tutorial for this project because you've seen it before. If you're new here, search signs and you'll find several more projects with in-depth tutorials like this one...or this one...or this one.
The basics for making a sign like this include stain (or paint) and a stencil.
How to Make a Quick Farmhouse Sign
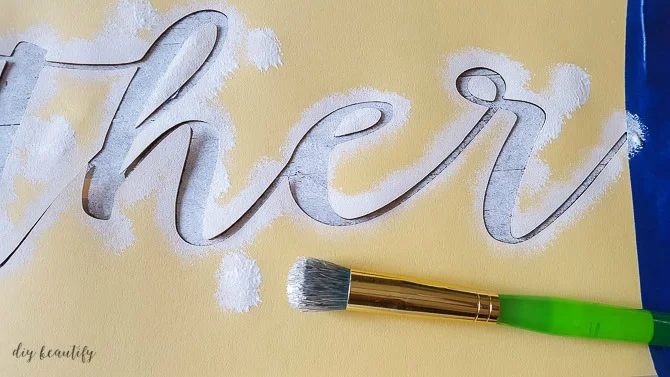
I gave my board a quick coating of stain and let it dry overnight.My stencil was created in PicMonkey and cut out using my Silhouette. If you don't have access to a die-cut machine or you don't want to make your own stencil, you can find many varieties of affordable 'gather' stencils here. Or you can grab my free printable a little further down.
It took longer to tape all the little pieces to my board than to actually apply the paint! I used regular card stock for my stencil, so it wasn't sticky...but much more affordable than vinyl!
The finished product was a little too perfect for my taste...I wanted it to look more aged. So once the white chalk paint dried, I gave the sign a few swipes with my hand sander to remove just a little of the white paint.
I didn't bother to wax or poly it as it won't get touched much, hanging on the wall.
As promised, here is the free printable (for your personal use only please). Click the link and save to your computer. You'll be able to print it or upload it at full size to either your printer or die cut machine.
Now my living room is complete, haha. Ok, I'm sure there'll be more tweaking and arranging, but for now I'm satisfied!
I'd love to know how you'd use this sign! Leave me a comment below.
bringing beauty to the ordinary,
Become a DIY insider!
You'll never miss a post, and you'll get all my FREE tutorials
and more...delivered straight to your inbox!
and more...delivered straight to your inbox!
Let's be Social! Follow along on Pinterest, FB, Twitter, Instagram
Popular Posts You Might Have Missed
This blog's content is for entertainment purposes only and is not professional advice. By reading this blog and attempting to recreate any content shared on it, you assume all responsibility for any injuries or damages incurred. Read my full disclaimer here.


Comments
Post a Comment
Your comments are like sunshine and chocolate! Thanks for taking the time to leave a nice one ;) I read all comments and love to respond. If you don't have Gmail, please leave your name!