How to Lighten Bookcases without Paint
An No-Commitment, Inexpensive Way to Lighten Dark Bookcases
Affiliate links may be included for your convenience; my full disclosure policy can be found here. If you click through and make a purchase I'll receive a small commission at no extra cost to you!
Such is the case with these black IKEA bookcases. We've used them in various rooms in our home and right now they're corralling stuff in my office. I have been hard at work on my office makeover and it is really starting to look amazing! I hope to share the full reveal with all the pretty pictures with you very soon.
I already painted this green room a lovely shade of white and added new farmhouse floors and even a shiplap wall. This went a long way to brighten and freshen the space.
These bookcases provide a ton of storage and are a great fit for my office, but the black felt too heavy. I wanted to lighten them up without a huge commitment like paint. Why? Because I tend to change my mind all too frequently! And the black really is classic and I do like it.
The solution was a roll of peel and stick wallpaper I bought on Amazon. There are so many options available! I just spotted this one and kinda sorta wish I'd chosen it instead...or this beachwood one! But I chose a white shiplap paper, which I do love! And I picked it out even before I knew that we'd be adding a shiplap wall in my office! So I guess it was meant to be!
Here is how the bookcases looked a couple months ago, when I did this project. Very dark. I had them set up on either side of the large window facing our backyard.
This is when my office was still a hot mess...and we still had the carpet and green walls. Like I said earlier, that has all changed and in case you missed it, you can see the newest changes here.
SUPPLIES NEEDED TO WALLPAPER A BOOKCASE
- peel and stick wallpaper of choice (1 roll per bookcase) - most are 20.5" wide x 18 feet long
- scraper tool (kitchen tool or even a credit card)
- sharp utility knife (not pictured)
- scissors
- measuring tape
HOW TO WALLPAPER A BOOKCASE
I found it easiest to remove all the shelves that I could. I did have one stationary one that I had to work around. You can remove the pins that hold your shelves in place if you choose; I left them up.
I wanted my wallpaper "boards" to run horizontally, which meant I had to attach it vertically, so I measured the wallpaper to that stationary shelf and cut.
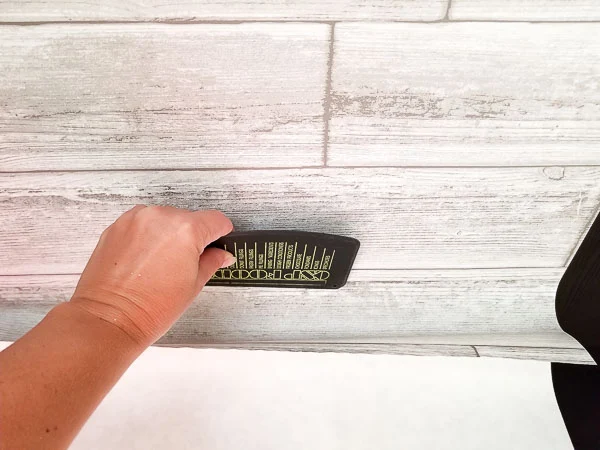
The hardest part is getting the wallpaper straight. What I found worked the best was to peel just one upper corner of the paper back slightly, get it situated and then slowly remove more backing paper as I pressed the wallpaper to the surface, using the scraper to press out any air bubbles as I went.
I cut off any excess along the bottom edge with my sharp knife.
That first piece was definitely the easiest! It was a little more difficult to match the edges with the next cut. Just take your time, measure twice!! And keep in mind that wallpaper has a repeat pattern to it.
I love how these bookcases look with their lighter backing. The paper has a rustic look to it that is perfect for my farmhouse office and it was a relatively simple and quick project.
Plus, it's easy to remove if I ever decide to change it up! The paper just pulls right off. I've seen black and white buffalo check wallpaper at Target.com that I'm dying to use somewhere in my home.
Please fee free to PIN and SHARE this image! And keep following along for more projects and reveals in my farmhouse office...including how I styled these bookshelves!
My daughter and I are currently at the beach for 3 days! We are celebrating the great year that she had, and just relaxing and bonding. Shopping will happen too!!
On Wednesday I'll be back for the monthly Thrifty Style Team post. I'm sharing a round-up of my favorite chalky painted furniture before and afters with all the links to the specific projects! Hope to see you back then!
Become a DIY insider!
You'll never miss a post, and you'll get all my FREE tutorials
and more...delivered straight to your inbox!
and more...delivered straight to your inbox!
Let's be Social! Follow along on Pinterest, FB, G+, Twitter, Instagram
Popular Posts You Might Have Missed
This blog's content is for entertainment purposes only and is not professional advice. By reading this blog and attempting to recreate any content shared on it, you assume all responsibility for any injuries or damages incurred. Read my full disclaimer here.


This is a great idea! I have a bookcase in my living room that needs some personality. This is the answer! Thank you!
ReplyDelete