Easy and Thrifty Outdoor Peppermint Pillow Wraps
Outdoor pillows get a festive wrap reminiscent of peppermint candies!
Affiliate links may be included for your convenience;
my full disclosure policy can be found here. If you click through and make a purchase I'll receive a small
commission at no extra cost to you!
Welcome to Friday and welcome to the Thrifty Style Team! I've got a super
cheap and fast project that you're going to love! I wrapped my outdoor pillows
so they look like peppermint candies, and they're so cute on my front porch!
If you're new here, a special HELLO to you! ❤ The Thrifty Style Team is a
group of bargain-loving bloggers who share ideas and inspiration each month.
At the end of my project you'll find links to all the gals and see what
thrifty-loving-goodness they shared this month!
OUTDOOR PILLOW WRAPS
If there's one thing I know for certain, it's that I am a pillow
hoarder!
There, I said it. Whew...
I have closets bursting with pillows, beds strewn with pillows and sofas
begging for a little breathing room 😉
I can't help it, I love pillows.
But as we all know, storage space is precious and I have (almost) (mostly)
stopped buying pillows and instead get new covers for my existing pillows.
You know, to save on space without sacrificing my love for pillows!
So as I was pondering how to bring a little Christmas spirit to my front
porch, I had a little quandry. Do I purchase new outdoor pillows (that are
crazy expensive), or do I try to modify the pillows I already have.
I'll bet you figured out what option I chose right? The thrifty one! I made
cute pillow wraps for my porch pillows and they ended up looking like wrapped
peppermint candies, which is absolutely perfect for Christmas!
HOW TO MAKE PILLOW WRAPS
Once I figured out what to use to wrap my pillows, this project took all of 10
minutes! I swear I spent 2 hours trolling the aisles of HomeGoods, Target and
Hobby Lobby before coming up with my idea. You see, I was looking for a vinyl
tablecloth.
Remember those? If you grew up in the 70's or 80's, I know you're familiar
with a vinyl tablecloth. But it seems that they're not sold anymore so I had
to come up with something else to wrap my pillows with that would be water
proof.
Texas is super humid, even during most of the cooler months, so I didn't want
my pillows rotting on my porch!
My ingenious idea (if I do say so myself) was really born out of a little
desperation...I found myself in the party aisle of Hobby Lobby when low and
behold I spotted a red and white striped plastic table cover in the Pirates
section!!! Here's how I wrapped my pillows with it.
SUPPLIES
- throw pillows
- scissors
- plastic table cover
- ribbon or elastic
STEP ONE: FOLD AND CUT TABLE COVER
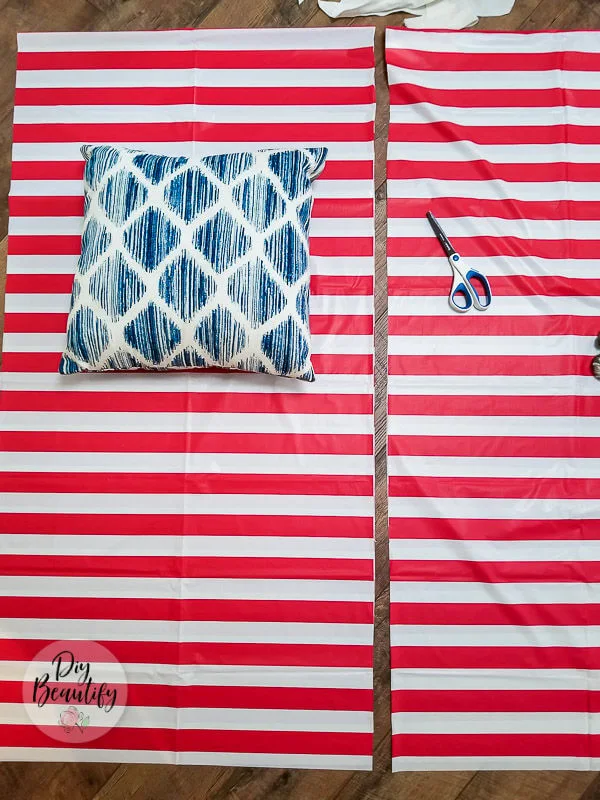
The first step is to open up the table cover. This thing was huge, but that
worked in my favor because I was able to double it up so my bright blue
pillows didn't show through.
Fold the table cover in half.
Measure and cut in half so you have two equal pieces.
* Note: the fold should be at either the top or the bottom, with sides open
STEP TWO: WRAP PILLOW
Lay pillow in the top half of the cover and wrap so the open end is wrapped
around and under the pillow (that's just to hide the open ends).
Pull the top, folded half down over the pillow.
STEP THREE: CINCH ENDS AND SECURE
You can see in the picture above that I only had 2-3 inches to spare on either
side of the pillow. I cinched the ends, smooshing the pillow down as I did so
that the pillow ended up taking on a rounded shape.
I tied the cinched ends with a ribbon.
Sorry there's no picture of this step...both my hands were being used!
It's as simple as that! I didn't intentionally create pillows that look like
peppermint candies...wait a minute, of course I did! That was totally my idea
all along 😉😍
My pillows are wrapped and watertight! Ready for the season! The wraps are
easy to remove when I'm ready to see my blue pillows again!
I think they look very Christmasey and welcoming on our front porch! Best $3 I
ever spent!!
If you
follow me on Instagram,
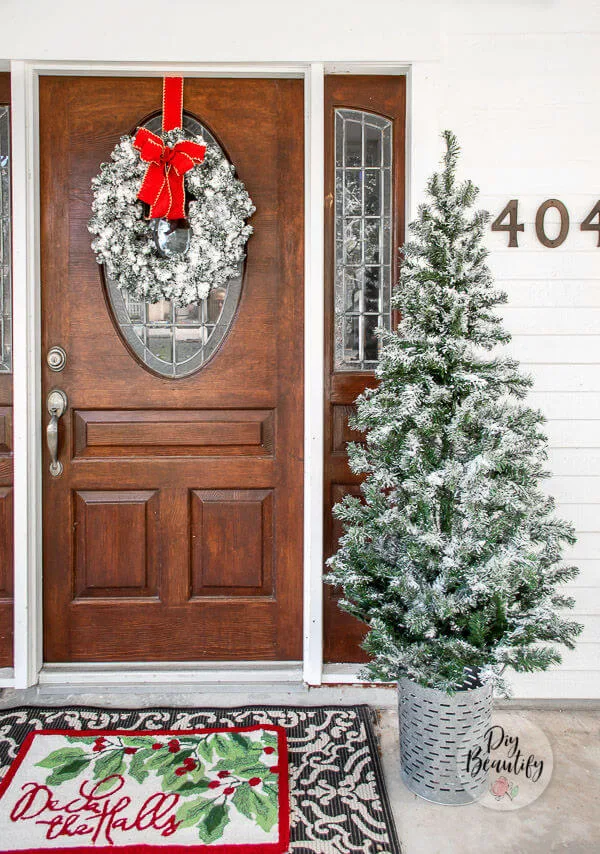
this is the discarded tree I found this week that had a broken stand. I shared
how I fixed it and now it's found a spot on the porch! If you want to see how
I fixed the broken tree stand, here's a very short video of the process.

That's a wrap on these easy outdoor pillows! ❤❤
If you found this idea helpful, please consider pinning the image below!
Now let's see what my thrifty friends have been up to this month.
DIY Mason Jar Centerpiece - Chatfield Court
How to Make a Bow Christmas Tree Topper - The Creek Line House
Easy Thrifty Outdoor Peppermint Pillow Wraps - DIY Beautify
Dollar Store Olive Appetizer Wreath -Redhead Can Decorate
Recycled Metal Seat Door Wreath - Bliss Ranch
How to Make Scented Pine Cones -I Should Be Mopping the Floor
Champagne Bucket Christmas Tree Stand - Postcards from the Ridge
Thrifty and Easy hostess gifts - Duke Manor Farm
Dollar Store Duster Christmas Wreath- The How-To Home
Christmas Cloche Centerpiece Ideas - 2 Bees in a Pod
Vintage Thrifted Christmas Tablescape - What Meegan Makes
DIY Snowman Ornaments - Cottage at the Crossroads
Rustic Leather Magazine Holder - Unskinny Boppy
More Thrifty Style Team Christmas Ideas
DIY Mason Jar Centerpiece - Chatfield Court
How to Make a Bow Christmas Tree Topper - The Creek Line House
Easy Thrifty Outdoor Peppermint Pillow Wraps - DIY Beautify
Dollar Store Olive Appetizer Wreath -Redhead Can Decorate
Recycled Metal Seat Door Wreath - Bliss Ranch
How to Make Scented Pine Cones -I Should Be Mopping the Floor
Champagne Bucket Christmas Tree Stand - Postcards from the Ridge
Thrifty and Easy hostess gifts - Duke Manor Farm
Dollar Store Duster Christmas Wreath- The How-To Home
Christmas Cloche Centerpiece Ideas - 2 Bees in a Pod
Vintage Thrifted Christmas Tablescape - What Meegan Makes
DIY Snowman Ornaments - Cottage at the Crossroads
Rustic Leather Magazine Holder - Unskinny Boppy
bringing beauty to the ordinary,


Love your 'candy' rolled pillows; what a great idea. They really make your front porch 'pop' with color
ReplyDeleteThanks Colleen, they do add some much needed color! Merry Christmas!
DeleteGReat idea!!!! They looks adorable!!
ReplyDeleteThanks Sandra, have a Merry Christmas friend!
DeleteThis is such a great Idea Cindy! I love your creativity! Thank you for sharing.
ReplyDeleteThank you Michelle, Merry Christmas!
DeleteThese are so sweet, Cindy!! What a neat idea! I want to curl up on your porch with a fuzzy blanket and cup of hot coco. What a lovely space!
ReplyDeleteThank you so much Kristi! I hope you have a wonderful Christmas!
DeleteArrrrg matey, I too used some dollar store white and red plastic table covers on my porch. I wrapped fake gifts. So far so good, and next year I'll need me some pirate pillows.
ReplyDeleteOh that's a fun idea! Merry Christmas!
DeleteSuch an incredibly clever idea! Also, I just love your style overall. :)
ReplyDeleteAww, thanks Courtenay! I sure appreciate your sweet words! Merry Christmas!
DeleteYour outdoor pillows are the cutest! I couldn't wait to see how you'd made them waterproof. Wishing you and your family a Merry Christmas if I don't get back around to visit before then!
ReplyDeleteThanks Jane, they're at least water resistant! Have a wonderful Christmas!!
DeleteThis is so genius and so darn cute! Merry Christmas!
ReplyDeleteThanks Laura, Merry Christmas!
DeleteThese are so stinking cute, Cindy! Festive and fun.
ReplyDeleteThank you so much!
DeleteThey are adorable and look great on your pretty porch! Merry Christmas my friend!
ReplyDeleteThanks Kristi, Merry Christmas!
DeleteWhat a fun and creative way to add some Christmas pops of color to your porch! Thanks for always sharing some amazing ideas, Cindy.
ReplyDeleteThank you Meegan, I always appreciate your sweet comments! ❤
ReplyDeleteThese are adorable, Cindy! And they look perfect on your holiday porch. I'm also a pillow hoarder and am trying to only get or make covers these days because they take up so much room! Merry Christmas!
ReplyDeleteThanks Angie!
ReplyDelete