How to Make Cottage Floral Eggs
I'm sharing the steps to decoupaging floral napkins onto wood craft eggs for a pretty, shabby chic cottage look that's perfect for Spring!
Affiliate links may be included for your convenience. As an Amazon Associate, I earn from qualifying purchases at no extra cost to you. My full disclosure policy can be found here.
How are you doing friend? I'm praying for Peace over panic in these crazy times we find ourselves in! If you need prayer, please don't hesitate to reach out!
I have found that staying busy is a great way to keep my mind at peace. One way to do that is to create something beautiful that I can enjoy 🌼🌷 This easy and inexpensive project is also fast!
I'm excited to show you how I created these beautiful, cottage style Easter eggs, so let's get right into it. I'll save the supplies post for the end.
How to make cottage floral eggs
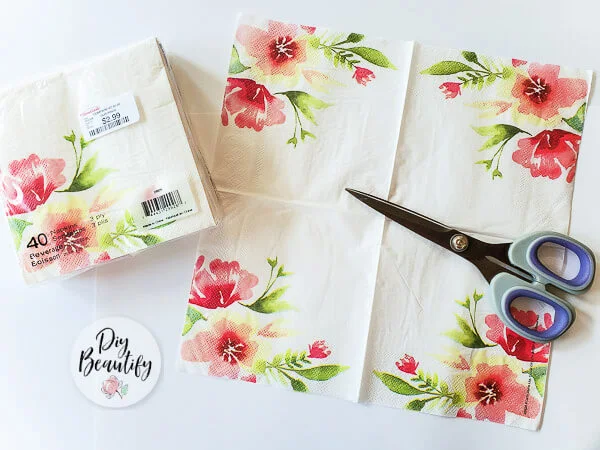
I've been wanting to make these eggs for awhile now, but I had a hard time finding napkins that I really loved. Until one day when I happened across this set in HomeGoods (thanks HG for always having exactly what I want!)
My dining room is decorated in soft pinks and some navy, and I knew these eggs would fit right in. You can see that the napkins themselves are a very pale pink, and then of course are the beautiful blooms. When you're looking for napkins to use, just make sure there are designs that you can cut out.
And for reference, I only used one napkin to make 6 eggs (and these are cocktail size!), so maybe reach out to a friend or your mom rather than buying an entire package!
Cut out design
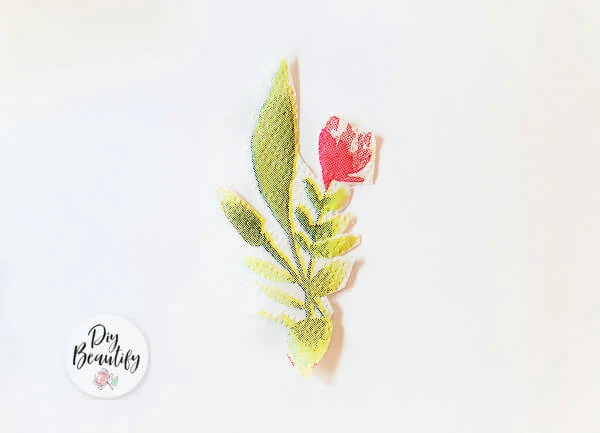
It really couldn't be simpler. I picked random flowers from my napkin and cut them out. I tried to cut as close to the design as possible (this was definitely the longest part of the project).
Peel away layers
Now if you have really good eyesight, you'll notice the package of napkins is 3-ply. The first layer came away as soon as I opened up the napkin, but that second layer was a little harder to find. Look closely, because it's there, and you want to peel that away. Note: it's easiest to see and do once you've cut your design out.
This gives us a very thin, fragile piece to work with, which is terrific for decoupage!
Apply Mod Podge to egg
Because of the fragility of the napkin, rather than brush the decoupage medium onto the back of the napkin, I painted a little Mod Podge directly on the egg where I wanted to place the flower (do a dry run first to make sure you're happy with the placement).
Place flower on egg
Gently lay the design on the Mod Podge and gently press down! I say gently because if you're not careful, the fragile tissue will rip! Now gently press the flower flat, adding more decoupage medium if you need to.
Add thin layer of Mod Podge to flower top
Immediately brush a little Mod Podge to the top of the flower, adding a little to the bottom side as well if needed, until the entire design is laying flat. Because we're adding a design to a round surface, you may get a little puckering of the tissue. That's okay, and it will not be noticeable once the eggs dry.
Set egg aside to dry
Put the egg in a protected spot and allow it to dry while you start on the next one! I tried to vary my eggs by using different parts of the napkin for various looks.
Supplies
- wood craft eggs (I bought a 6-pack carton from Target Dollar Spot for $3...they have a flat bottom, which makes them extra easy to craft with because they're not rolling around on you!) If you can't get to Target, or yours doesn't carry them, Michaels has them here or you can find natural ones here
- regular white craft eggs (if you can't find the heavier wood ones these will work too!)
- floral napkins (there's a beautiful assortment here and here, but they're pricey) You'll only use one or two, so maybe ask a friend first! Or pretty floral tissue paper would work as well!
- decoupage medium (I found a small bottle of Mod Podge at Dollar Tree)
- small flat craft brush (*Note: if all you have is a foam brush, that will work too!)
This was a fun and satisfying project for only $6! I know I'll be using these cottage floral eggs again and again.
Pin for later
I hope you love these as much as I do!
I'm working on lots of easy projects to keep you inspired while we're waiting for the coronavirus to pass so be watching for a giveaway, blogger spotlight, roundups and more in the next few weeks! ❤❤❤


Awww they are sooo pretty!!! :] stay safe and well and thanks for the sunshine!
ReplyDeleteThank you Sandra! Hope you're staying safe and healthy!
DeleteI love your blog!
ReplyDelete