DIY Weathered Wood Pedestal From a Chunky Candlestick
I'm sharing how to create a wood cake or decor stand using a chunky candlestick and wood round, plus how to give it a weathered look for modern farmhouse style!
Affiliate links may be included for your convenience. As an Amazon Associate, I earn from qualifying purchases at no extra cost to you. My full disclosure policy can be found here.
Hi friend and welcome to May's installment of Thrifty Style Team! We're a team of thrifty loving DIYers and each month we share our projects and ideas with you! I can't wait to share my easy and thrifty rustic wood cake stand that I made. You'll find links to everyone's thrifty posts below.
Turn a wood candlestick into a cake stand
This project has been on my "to do" list for months! I'm thankful to be a part of the TST because it helps motivate me to finish all those projects which would otherwise just sit there gathering dust 😏
It all started with a pair of wood candlesticks from Hobby Lobby. They were a housewarming gift when we moved into our current TX home in 2016. I love the chunkiness of them, and the wood finish is that perfect blend of weathered and rustic that works with my home decor!
Here's the problem. The tall one was too tall for our home! And once you put a candle on it, it elevated it even further! So I asked Mr DIY if he thought he could chop it down for me, and he did!
He cut it in half using his chop saw, and then I sanded the cut edges to smooth them out with my palm sander. *Please note that this worked because my candle holder was solid wood; do not attempt to cut metal unless you are experienced!
The candlesticks were now the perfect size...and Bonus...I had an extra one! I also had an extra wood round from when we made the cottage side table for our sunroom, and I knew these two would work perfectly as a rustic wood cake stand.
Supplies
Here are the supplies that I used for this project.
Back to my wood cake stand supplies. The problem I had was that the wood round was in its unfinished state. I wanted it to match the candlestick base so they'd look like one cohesive piece.
- chunky candlestick (I wasn't able to find a link to the one I used but here are some wood candle holders that may work)
- unfinished wood round
- sanding sponge
- acrylic paints
- burnt umber acrylic
- rags
- paper plate
- craft brushes
- white furniture wax
- dark paste wax
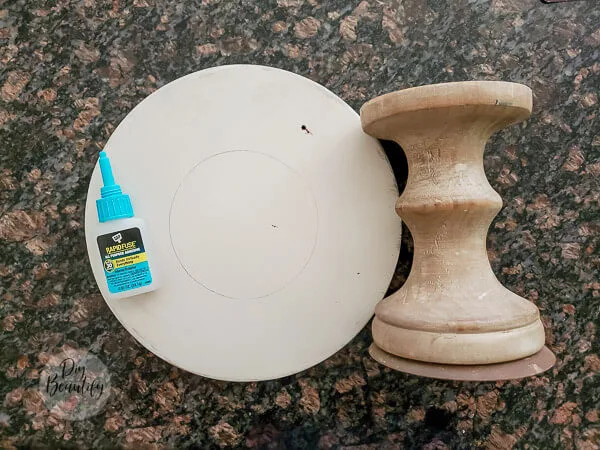
- DAP Rapidfuse adhesive
DIY tip: obviously if you have to purchase all these supplies, this will not be a thrifty project! So my tip for you is to look around your house and see what you already have that you could use! Maybe the top of a broken stool for the round, maybe a metal candle holder that you can paint to look like wood, etc! Make it work for you and your budget!
Back to my wood cake stand supplies. The problem I had was that the wood round was in its unfinished state. I wanted it to match the candlestick base so they'd look like one cohesive piece.
I found that I was able to achieve a matching "stain" color using acrylic paints.
Weathered wood finish with acrylic paints
The trick to creating any weathered wood look is layers...lots of layers of paint! The method will be slightly different for each piece because they're all different, but there are a few basic steps that are the same.
- start with a dark base
- paint medium coat next
- finish with lightest coat
- use variety of dry brush and wet rag to achieve mottled, imperfect finish
- finish with dark and light wax to highlight areas
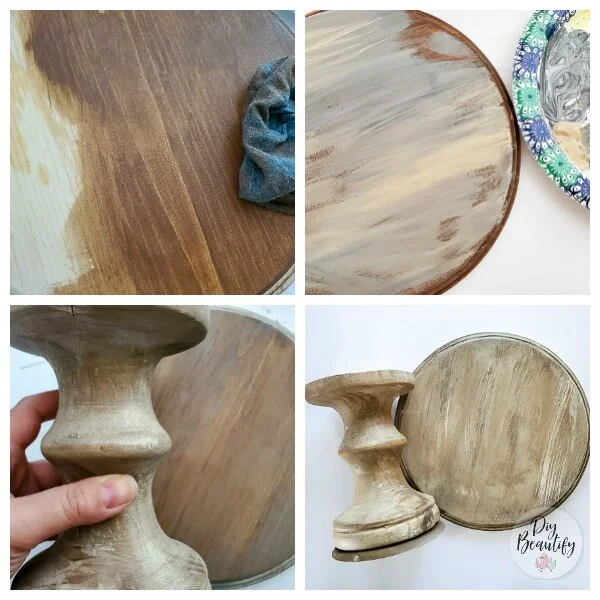
Instead of using actual wood stain, which smells strong, is messy and takes forever to dry, I stained my wood round with paint! Yep, plain old acrylic paint. I like the color Burnt Umber for this method. Brush on the paint in small sections, and then wipe off with a damp cloth. This allows the wood grain to still show through, giving a stained effect (see the first picture above).
Next I mixed up some gray, tan and white paint on my palette (aka paper plate!) and brushed on small sections. I wiped this off with a damp rag, spreading the paint as I did so and removing excess paint.
After that dried, I repeated these steps with lighter paint, white and tan. For the final coat of paint, I used a cheap chip brush and dry brushed some white paint on the top of the wood round. This gives texture and brush strokes which adds to the rustic look.
Once dry, I sanded the round to reveal some of the base color, and then wiped on some dark wax and some white wax. Sorry, that's not very technical, but it's kind of an art! Just keep blending to achieve the look you want. I kept comparing my stained round to the candlestick base, and adjusting my paint and wax accordingly.
In the end, I'm really happy with the finished weathered wood round. It's not an exact match to the rustic candle holder, but it's pretty close.
The last step was to glue the pieces together. I recently fell in love with DAP's Rapidfuse adhesive. It's like super glue on steroids! Just a little bit sticks anything together, almost immediately!
I did a dry fit and traced the top of the candlestick in the middle of the round, marking it with pencil. These guide marks really helped to make sure I glued the pieces together exactly!
Weathered wood cake/bakery stand
I am thrilled with how this project turned out! I had baked a loaf of banana bread earlier in the day and wanted to showcase my baked treats on my 'new' wood cake stand. Guess what? There were only two very thin pieces left! This is the problem with all the people being home right now! 😏
*Remember not to put food directly on a wood cake stand; use a plate!
Guess I'll be baking more banana bread this week...or maybe some chocolate chip cookies? Ooh, or my chocolate fudge pie!
Using a cake stand as decor
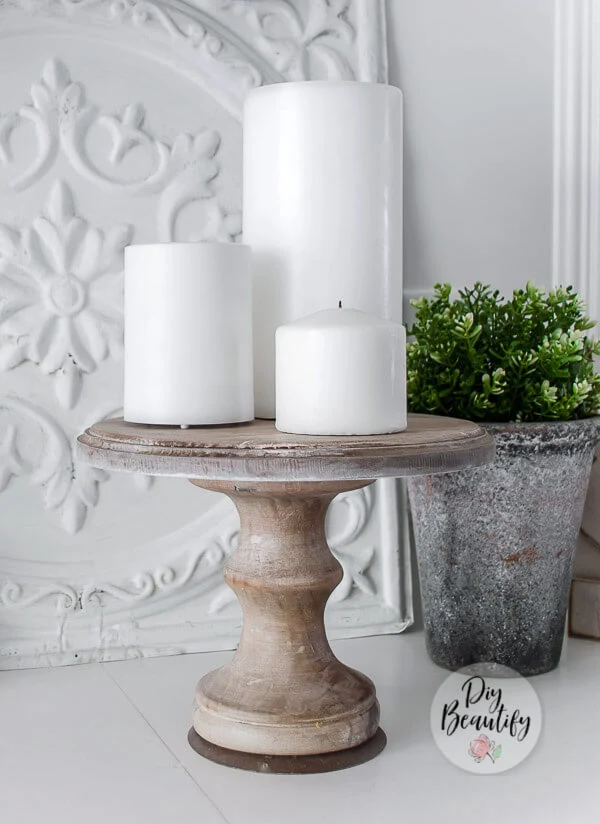
The fun thing about rustic wood cake stands is they don't have to showcase baked goods! You can use them all over your home! They're perfect for candles.
A little piece of rustic wood adds so much texture and interest to any surface! It's farmhouse perfection! 😍
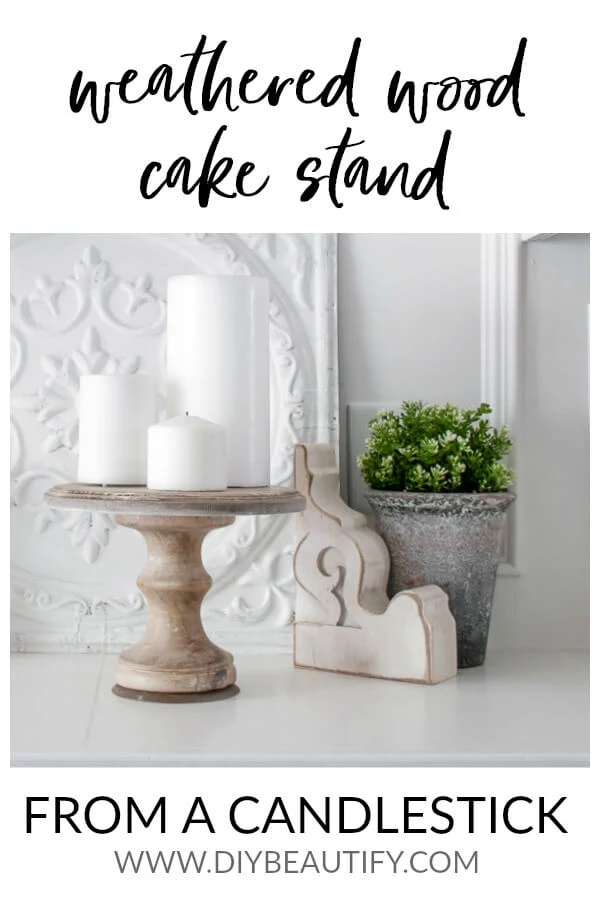
PIN this image for later
I hope this project inspired you! Let me know if you make a weathered wood cake stand using my directions, I'd love to know!
More Projects from the Thrifty Style Team
Redhead Can Decorate - Sun Clothespin Wreath
The Painted Hinge - How to Make Paperback Books Look Vintage
DIY Beautify - DIY Weathered Wood Pedestal
2 Bees In A Pod - Thrift Store Planters - Thrifty Style Team
Postcards From The Ridge - Tiered Tray Decor Ideas with Thrifty and Vintage Finds
The Creek Line House - Ten Plants to Grow for Home Decor
The How To Home - Upcycled Berry Basket
The Tattered Pew - How to Easily Recover an Old Footstool
Unskinny Boppy - How to Frame a Puzzle without Puzzle Glue
Sweet Pea - DIY Patriotic Vase
What Meegan Makes - Thrifted Mirror Gallery Painted with Homemade Chalk Paint
I Should Be Mopping The Floor - Ethan Allen Console Table Makeover


Cindy - your stand looks amazing! We can't believe that you achieved this weathered finish with acrylic paints...well done!
ReplyDeleteThanks so much! It took a lot of blending, but I'm loving how it turned out ;)
DeleteThis is by far my favorite candlestick/cake plate transformations I have every seen. It looks FANTASTIC, Cindy! xoxo
ReplyDeleteThank you Kristi, that is such a huge compliment! :)
DeleteYou matched the stain on the wood round perfectly with the candlestick. I love what you created and it's going to be great to use for decor in any season.
ReplyDeleteThanks so much Paula! It was actually easier than I expected and yes, this piece will get a lot of use!
DeleteLove the transformation, Cindy! This is a lovely piece for any home or style. Thanks for sharing the tutorial.
ReplyDeleteThanks so much!
DeleteI really love this, Cindy, and your tutorial is very helpful. I am looking forward to giving this a try soon.
ReplyDeleteThank you!
DeleteCindy I love this so much! Such a beautiful way to repurpose a candlestick. So happy to be part of this super-fun hop with you!
ReplyDeleteThank you, love being a part of this talented group!
DeleteCindy this turned out so cute! You always have the best ideas. Thanks for sharing!
ReplyDeleteThanks Kelly!
Delete