DIY Wreath with Painted and Aged Terracotta Pots
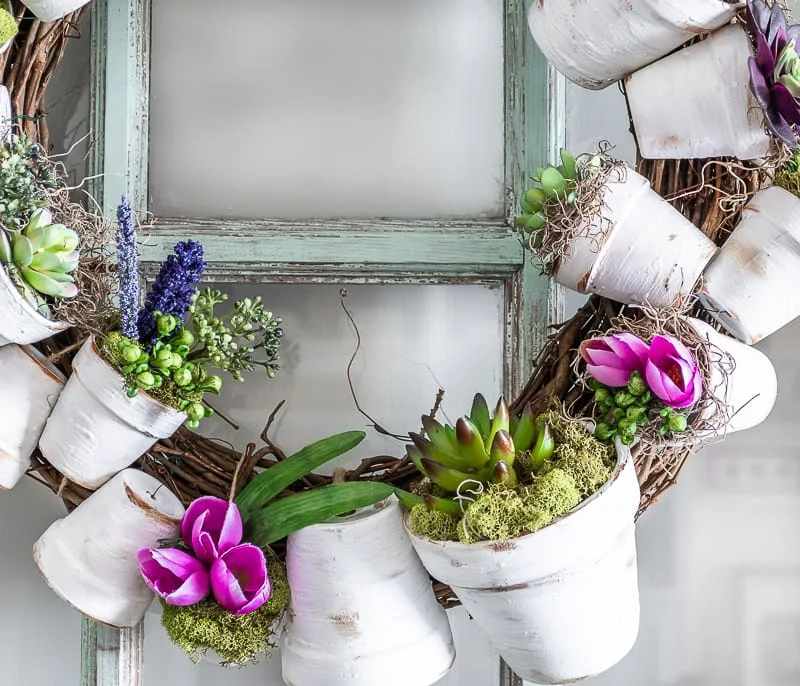
An inexpensive terracotta pot wreath, painted and aged and full of French cottage charm. Filled with succulents, moss and flowers from the dollar store, it makes a big impact.
Project featured on The Pioneer Woman

This post may contain Amazon or other affiliate links. As an Amazon
affiliate I earn from qualifying purchases.
My full disclosure policy can be found here.
This terracotta wreath looks like it could be hanging in the French
countryside! Luckily for us, it's quite inexpensive to make and most of the
supplies are from the dollar store.
I love making wreaths! I generally find them to be much thriftier to make than to buy, although that is not always the case. My most popular wreaths are this $10 farmhouse wreath with striped ribbon, my easy Spring wreath with blush pink flowers and my fresh magnolia wreath.
I love making wreaths! I generally find them to be much thriftier to make than to buy, although that is not always the case. My most popular wreaths are this $10 farmhouse wreath with striped ribbon, my easy Spring wreath with blush pink flowers and my fresh magnolia wreath.
A few years ago I made a
flower pot wreath with moss
using items from the dollar store. I guess you could call today's version the
cottage cousin! It's a flower pot wreath, made with painted and aged clay
terra cotta pots. I've added succulents and moss and some purple flowers to
give it a punch of color.
How to make a DIY Spring wreath with aged terracotta pots
How to aged terracotta flower pots
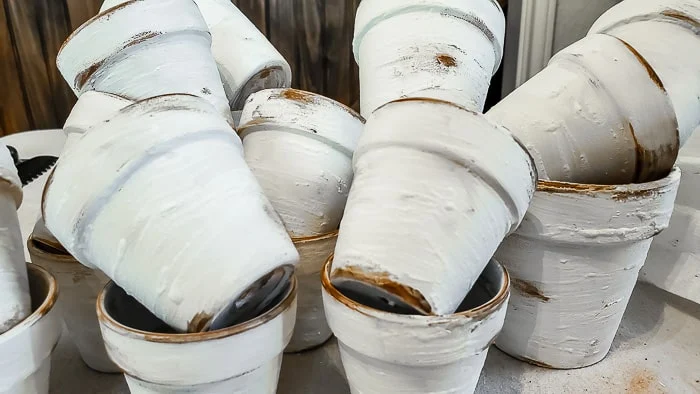
I love that Dollar Tree carries a pack of 3 small clay pots and I recently found some larger ones in a pack of 2. My DIY wreath is made with a variety of inexpensive terracotta pots from the dollar store and I knew I wanted to paint and age the pots for this cottage wreath.I mixed up some texture paint using white acrylic paint and baking powder. If you haven't seen this technique yet, you can read all about it at Collective Gen.
You can use this easy technique on glass, ceramic and yes, even terracotta! I made my paint kind of chunky because I wanted my terracotta pots to look old, with bits of old pottery crumbling away.
You just mix paint with baking powder (I've also seen people do this with baking soda, but I tried it and prefer to use baking powder). The paint will puff up and then it's ready to use. If you want a smooth appearance, you should sift the baking powder first; I didn't because I love all the texture created from the little clumps. I didn't paint a solid coat onto the flower pots, I tried to leave some of the natural terracotta showing through in spots, mostly along the edges and rims.
To add even more age to the pots, once my painted pots dried, I dabbed on some
dark wax and rubbed it in a little bit with a paper towel.
The wax not only highlights the terracotta color, it adds an aged look to the
painted pots.
Assembling the wreath
My wreath has 20 terracotta pots on it (I'll include the full supplies list below), so it's definitely heavy! I used a grapevine wreath for my base because you want something that is sturdy and can handle the weight.Normally I divide a grapevine wreath into 3-4 smaller ones, you can click here to find out why and how I divide my wreaths, but for this heavy wreath, I left the grapevine intact.
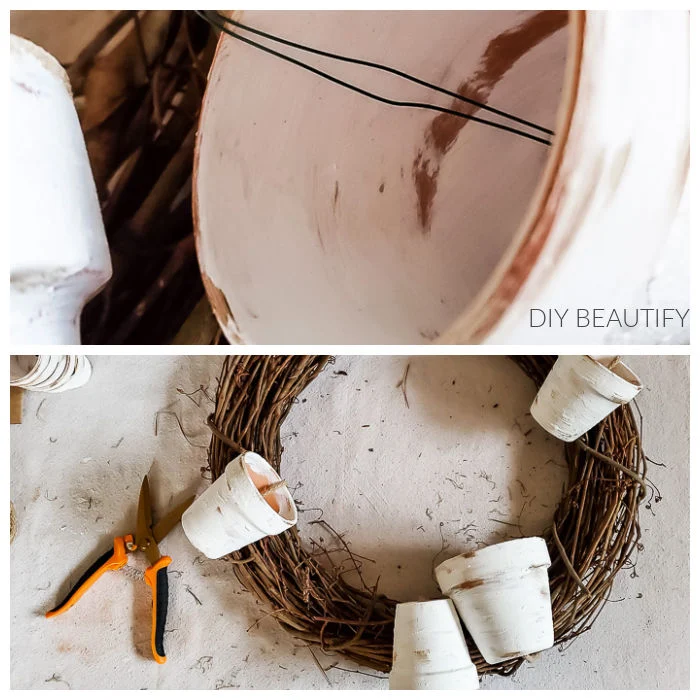
I used a combination of wire, wired jute and regular jute to attach the pots to the wreath. The regular jute cord was easier to get a tighter fit. You can see below that I started with the 5 larger pots and attached them first, making sure they were balanced around the wreath.
The smaller pots went on next, and I wanted a really full look so I attached them as close together as I could, alternating the direction for interest. The hole in the bottom of the pot is where you feed the wire/jute and then just wrap it around the wreath and twist the wire or tie the jute cord tightly to hold the pot in place.
Here's how the garden pot wreath looked once all the painted and aged terracotta pots were attached. It's beautiful and I could have stopped here, but I wanted to make this wreath even more gorgeous and Spring-worthy!
Adding color to a terracotta pot wreath
I like to buy moss and flowers on sale or when the Dollar Tree has some good stuff. I gathered all these bits and pieces together and selectively added some to this wreath.Designer Tip: If you're like me, you don't like to commit 😄 I didn't want to use any hot glue and make this wreath permanent because that's just what I'm like...I like to keep my options open. Keep reading to find out how I added the decorative elements without using any glue!
And here it is, my secret weapon! Styrofoam balls were the perfect solution to adding moss and flowers without using any hot glue! I had foam balls that fit tight and snug into my pots, they were actually leftover from another project so I was happy to put them to use in this bright Spring wreath.
I only added the Styrofoam balls to pots that were facing up...why mess with gravity? There ended up being about 7 pots with nothing in them, but I think it helps to break up all the color and give a little breathing space to this DIY wreath!
I added a variety of succulents and purple flowers (all from Dollar Tree), as well as some lavender flowers purchased from Hobby Lobby. I snipped all the stems short with wire snips, leaving about 1" to poke into the Styrofoam balls.
I tucked reindeer moss around some of the flowers, securing with floral pins when needed.
I tucked Spanish moss into the other pots, I love how organic it looks and it helps to disguise the Styrofoam balls and make the greenery look like it's actually growing in the flower pots!
I'm so please with the finished wreath.
Isn't it beautiful? I really love how it turned out! This flower pot wreath reminds me of the French countryside, it's so charming and rustic.
I think this is one of those projects that looks difficult, but is really quite easy to make.
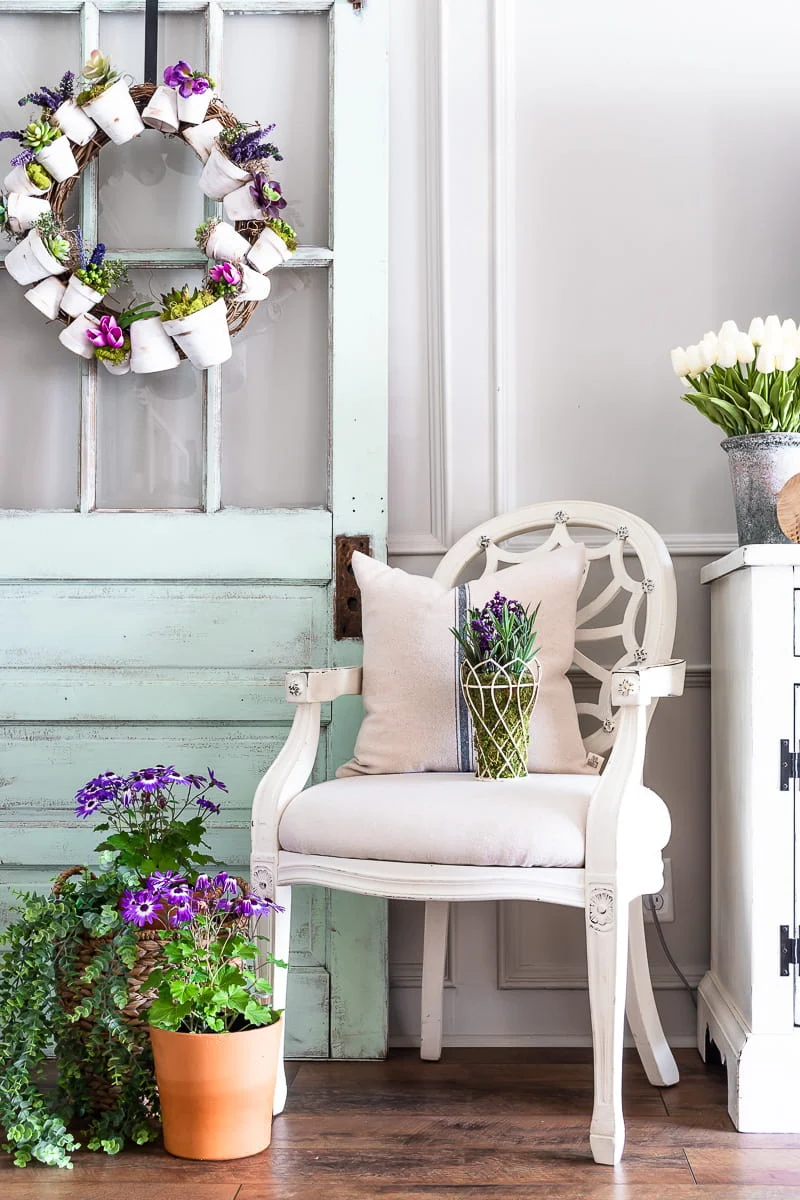
The vibrant colors against the painted terracotta pots looks so beautiful! And I really love this wreath hanging on my chippy old door!
Supplies to make this wreath:
- grapevine wreath form (for reference, mine is 18")
- 5 small terracotta pots (these pots are 3.5")
- 15 smaller terracotta clay pots (these pots are 2.5")
- white acrylic paint
- baking powder
- dark paste wax (I used Annie Sloan dark wax)
- 26 gauge paddle wire, wired jute or plain jute twine
- small Styrofoam balls
- reindeer moss
- Spanish moss
- faux succulents
- faux flowers (I used purple crocus and lavender)
I hope you love this easy DIY wreath as much as I do! It's perfect for Spring.
As always, I love to hear if you try my projects, and be sure to send a
message if you have questions! 💜🍀
Pin to save
Sharing and Pinning my images is a great way to support my site, thank
you!


That is just the cutest thing ever. The pots really do look quite old and worn.
ReplyDeleteDenise TX
Thanks Denise, I love that about them! Aged in minutes 😄
DeleteToot Cute!! I wonder if the baking powder mixture would stick to plastic pots...maybe I'll try it and let you know. I love the wreath and colors mixed with various types of succulents and flowers. Lovely!
ReplyDeleteOh I'll bet it would Cecilia! Thank you!
DeleteThis is just the cutest, Cindy and so perfect for spring! I love how the pots look aged and vintage too. I want to try making of of these wreaths for my front door. Thank you for sharing. Pinned!
ReplyDeleteCindy,
ReplyDeleteI love this version of your creative terra cotta wreath. It's perfect for Spring. Thanks for sharing your creative ideas.
what a gorgeous wreath cindy! I want to make this one!
ReplyDeleteOne of my favorite Cindy projects!!
ReplyDeleteOne of my favorite Cindy projects!!
ReplyDeleteI love your Spring wreath Cindy! There are so many great ideas and inspiration with this Spring DIY share.
ReplyDeleteThank you!
DeleteTalk about needing spring NOW. This terra cotta wreath is positively gorgeous Cindy! That would be a blast to customize!
ReplyDeleteThanks so much Donna, YES, I would love to see what you do with it!
Delete