DIY Home Filing System in a Blanket Chest or Trunk
Turn a blanket chest or trunk into a home filing system complete with color-coded files to maximize your organization.
Updated 01/2023
This post may contain Amazon or other affiliate links. As an Amazon
affiliate I earn from qualifying purchases.
My full disclosure policy can be found here.
Get Organized
I love an organized home and today I'm sharing a super simple way to organize
your home files, as well as a DIY filing cabinet system that is as beautiful
as it is functional!
A cluttered house is a cluttered mind! I'm one happy mama when everything is
put in its place! While I don't like to deal with messy piles and stacks of
paper, a couple days work leads to infinite rewards!
Earlier this week I shared a
cedar chest makeover with a bold and colorful outside. Today it's all about the inside of
that blanket chest! I'm going to show you how Mr DIY and I retrofit a blanket
chest to serve as an organized filing system that looks beautiful in any room
of our home!
File System That Works
Before I share that tutorial, I'm excited to show you how I dealt with the
actual paperwork. I'm a visual person, and any way I can make my life easier
pays off in the long run!
I was shopping at Target for file necessities and found these FriXion Erasable ColorSticks and FriXon Erasable Colors Marker Pens!
Y'all, did you read that...they're erasable! They contain a
unique thermo-sensitive gel ink formula that disappears with erasing
friction. I knew they would be perfect for labeling my files and I couldn't
wait to try them out!
FYI, I found large packs in the office aisle and smaller packs in the back-to-school section of the store.
FYI, I found large packs in the office aisle and smaller packs in the back-to-school section of the store.
I'm a bit of a perfectionist and often need a couple do-overs! That goes for my handwriting as well. Being able to easily erase my mistakes over and over, without damaging my files, was incredibly freeing and totally took the stress out of getting it perfect the first time!
I used the FriXion Erasable Markers to write the sub-categories on file folders in a matching marker color. This system is going to make it extremely easy to find and file paperwork! If it doesn't match, it doesn't belong there!
I love how it all came together!
Trunk turned home filing system
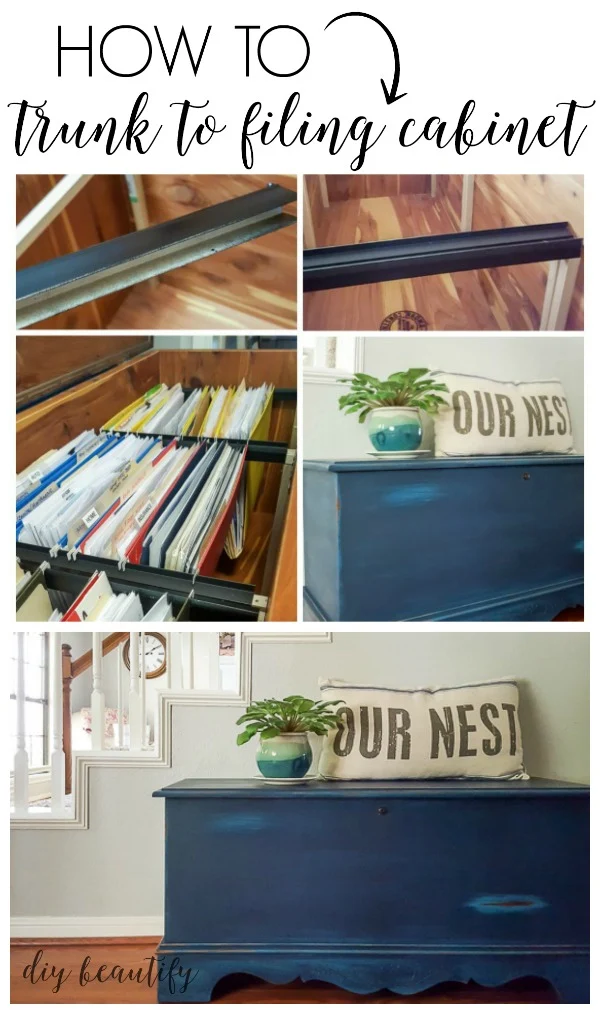
Our beautifully organized files were ready for their new home...the painted cedar blanket chest. Mr DIY was the brains behind figuring out how to transform this chest/trunk into a usable file cabinet!The issue: the trunk was too narrow to hold a normal filing system.
Our solution: multiple hanging systems going across the width of the trunk. This actually is a much easier way to file; no more cricks in my neck!
Here's how we accomplished this trunk to filing cabinet makeover.
SUPPLIES USED
- 1/2" x 36" poplar square dowel rods, cut to size
- PVC hanging file rail (we used 3, cut in half)
- saw
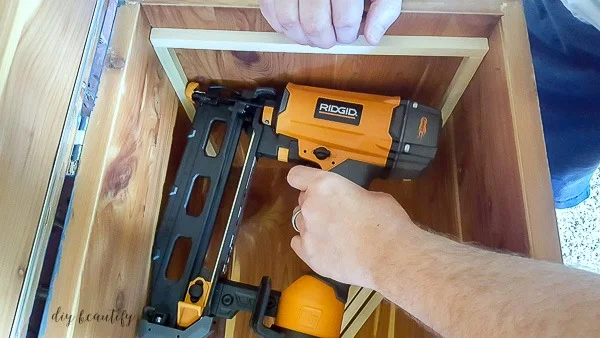
- nail gun
- 1" finish nails (16 gauge)
Additional dowels were nailed into the front and back of the trunk, giving us
3 equal filing spaces so we have lots of room to grow!
The PVC rails slide on top of the horizontal dowels, creating a spot to hang
the files from.
We made sure to leave enough space so the files aren't dragging on the bottom
of the cedar chest, but hanging freely.
You can free the mess in your home and take control of your home files!
Click here to see 7 more amazing solutions for your home!
PIN to Save
Sharing and pinning my images is a great way to support my site, thank you ❤
bringing beauty to the ordinary,
Disclosure: I was compensated by Collective Bias for this post,
but all opinions are my own.
but all opinions are my own.


This is a good use of furniture, making drawer to keep your important books.
ReplyDeleteIt's really amazing and also a good use of furniture.
ReplyDeleteLooks great! Can you share what the internal dimensions of the trunk are, as I may make my own trunk as well?
ReplyDeleteThe trunk measures 12.5" x 40.5" inside.
DeleteNow that’s something I’ve not seen before and I just love this idea! I have several trunks around here with nothing in them and could really use the extra filing space. Thanks so much for sharing and I really do love this!
ReplyDeleteGlad to inspire you!
Delete