How to Make a Shabby Farmhouse Sign for $4
Learn how to make this easy and inexpensive farmhouse Fall sign for only $4
Affiliate links may be included for your convenience; my full disclosure policy can be found here. If you click through and make a purchase I'll receive a small commission at no extra cost to you!
I'm sure your Fall decorating is well under way by now! I've got a sweet and simple DIY sign to share with you today.
Have you made anything after seeing it here at DIY beautify? Maybe you made my antiqued dollar store pumpkins, or my sweater sleeve pumpkins or tried your hand at decorating a fall table? I LOVE to know when you try my ideas, and especially when you share a picture with me!
Today's project is so cheap and easy! It cost me just $4 to make this cute distressed fall sign and if you read the tutorial below, you too can make one! If you follow me on Instagram (I share lots of behind the scenes videos and pictures!) you may have seen my stories where I showed all the distressed wood I picked up one day. Someone in my neighborhood repaired their fence and threw out all the 'ugly' boards...ugly to them but when it comes already aged, weathered and distressed, it is a WIN in my books!
I knew I wanted to make some super cheap and inexpensive signs for Fall, and this free find kept this sign to only $4! Here's how I made it.
I knew I wanted to make some super cheap and inexpensive signs for Fall, and this free find kept this sign to only $4! Here's how I made it.
SUPPLIES NEEDED:
- old board
- note: if you cannot find old boards, check out Hobby Lobby's 'woodpile' products!
- white chalk paint (I used this one)
- wooden letters (I found mine at Walmart)
- hot glue
- respiratory mask
OPTIONAL:
- Silhouette*
- black craft vinyl
- scraper tool
- transfer paper (this one is my favorite and I get great results every time)
*Note: if you don't own a Silhouette yet, what are ya waiting for? If you're a serious crafter and home decorator, you can save yourself tons of money by making your own signs and home decor...even things like tees and dishcloths! Here's a little secret...black Friday is a great time to save on a bundle! You usually get the machine plus a bunch of tools plus a ton of craft vinyl plus a subscription to the Silhouette Design Store (where you can purchase designs). It's definitely worth it; I got my new Cameo last November and I seriously use it several times a week! Now...if you just cannot afford it and you can't put it on your wish list...you can use stickers! They're not as customizable and you are stuck with whatever fonts you can find in the store, but that is definitely an option!
I had everything on hand already except for the wood letters.
HOW TO MAKE A DISTRESSED FALL SIGN:
I had Mr DIY cut my long fence board down into manageable sizes. I got three sign boards from one fence board.
I always, always sand my wood before I do anything else. No one wants splinters! I sand every edge with my palm sander, and it takes me just a couple minutes. When using old wood, please wear a respiratory mask to protect yourself cause you never know just what's in that dust you're breathing in!
Then I painted it, being careful to leave quite a bit of original wood showing through!
I was thinking I'd need to paint the white letters I found at Walmart. But they were darker than my painted board so I left them as is! The $4 for this project came from these letters, at just $1 each!
Next, I created my word 'hello' in my Silhouette Studio. The beauty of this machine is that you can customize everything! I was able to measure the spot on my board where I was going to place it, and cut it out to that exact size!
Some of you who are new to a Silhouette or Cricut machine have questions about how to get your words where you want them. That is where the transfer paper (or tape) comes in! I remembered to take pictures so I could show you how to use it!
Once you've successfully cut your word/phrase/image from your die cut machine, cut a piece of transfer tape to size and lay it over top of your word that you cut and weeded (removing the negative, unnecessary vinyl). Use the scraper tool (or a sturdy credit card) to firmly press the transfer paper over the vinyl letters. When you peel up the transfer paper, the vinyl will be stuck to the back! Then you can place your word exactly where you want it on your sign. Again, use the scraper tool to press it flat. When you peel up the transfer paper, your design is left behind on your surface!
My wood letters were attached with hot glue.
To make a hanger for my DIY fall sign, I cut a piece of jute twine, knotted both ends and stapled it to the back of my sign using my heavy duty staple gun.
Trust me, this tutorial took longer to write than the project took! Not only is this sign cheap to make, it's really easy and I think it's super cute in all its shabby, distressed simplicity! Wouldn't it be fun to make one for your front door that said 'Welcome' or 'Hello'?
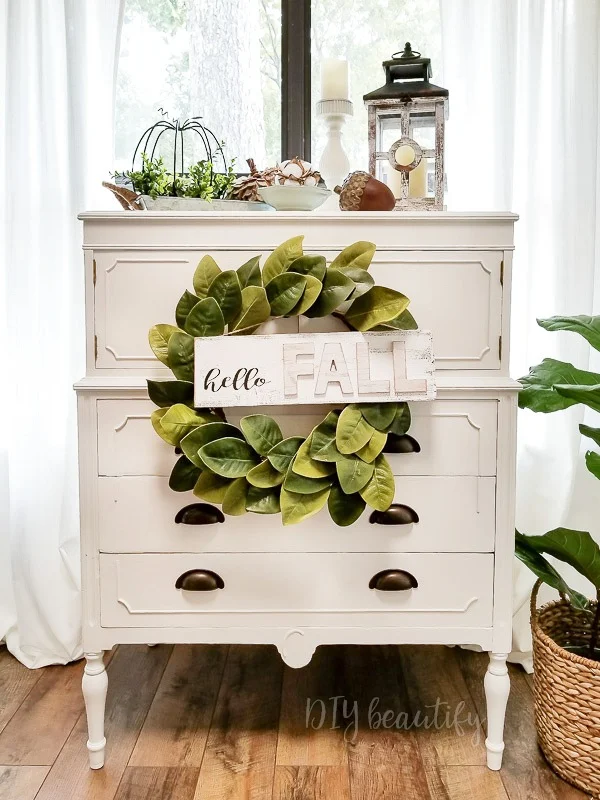
In the end, I moved my magnolia wreath from Antique Farmhouse behind the sign and I like this best! The green helps to highlight the distressed sign and really show it off in all its shabby farmhouse glory!
I would be absolutely delighted if you chose to PIN this image and share it with your DIY-loving friends!
bringing beauty to the ordinary,
I always, always sand my wood before I do anything else. No one wants splinters! I sand every edge with my palm sander, and it takes me just a couple minutes. When using old wood, please wear a respiratory mask to protect yourself cause you never know just what's in that dust you're breathing in!
Then I painted it, being careful to leave quite a bit of original wood showing through!
I was thinking I'd need to paint the white letters I found at Walmart. But they were darker than my painted board so I left them as is! The $4 for this project came from these letters, at just $1 each!
Next, I created my word 'hello' in my Silhouette Studio. The beauty of this machine is that you can customize everything! I was able to measure the spot on my board where I was going to place it, and cut it out to that exact size!
Some of you who are new to a Silhouette or Cricut machine have questions about how to get your words where you want them. That is where the transfer paper (or tape) comes in! I remembered to take pictures so I could show you how to use it!
Once you've successfully cut your word/phrase/image from your die cut machine, cut a piece of transfer tape to size and lay it over top of your word that you cut and weeded (removing the negative, unnecessary vinyl). Use the scraper tool (or a sturdy credit card) to firmly press the transfer paper over the vinyl letters. When you peel up the transfer paper, the vinyl will be stuck to the back! Then you can place your word exactly where you want it on your sign. Again, use the scraper tool to press it flat. When you peel up the transfer paper, your design is left behind on your surface!
My wood letters were attached with hot glue.
To make a hanger for my DIY fall sign, I cut a piece of jute twine, knotted both ends and stapled it to the back of my sign using my heavy duty staple gun.
Trust me, this tutorial took longer to write than the project took! Not only is this sign cheap to make, it's really easy and I think it's super cute in all its shabby, distressed simplicity! Wouldn't it be fun to make one for your front door that said 'Welcome' or 'Hello'?
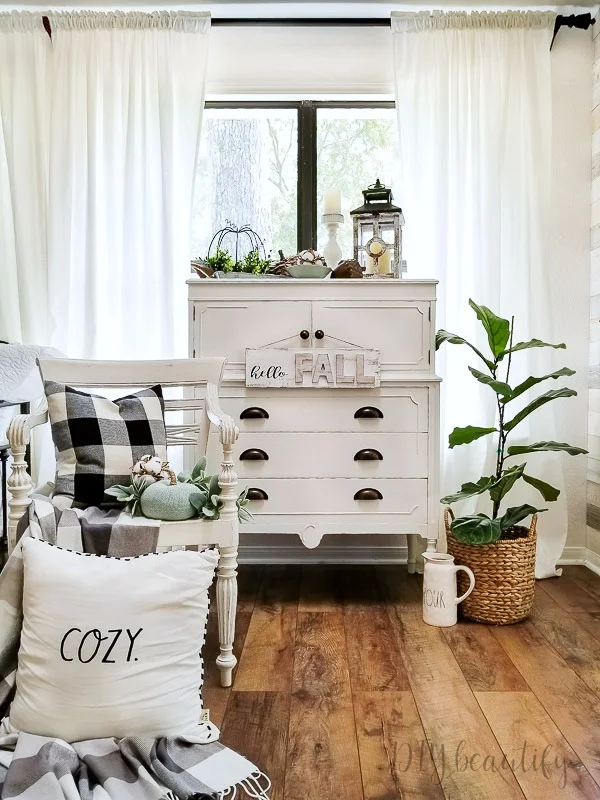
I hung it from the handles on my cottage dresser...went to move the pillow for another shot and found Millie had snuggled right into the blanket!! That's okay, she matches my decor ❤❤
Become a DIY insider!
You'll never miss a post, and you'll get all my FREE tutorials
and more...delivered straight to your inbox!
and more...delivered straight to your inbox!
Let's be Social! Follow along on Pinterest, FB, G+, Twitter, Instagram
Popular Posts You Might Have Missed
This blog's content is for entertainment purposes only and is not professional advice. By reading this blog and attempting to recreate any content shared on it, you assume all responsibility for any injuries or damages incurred. Read my full disclaimer here.


Comments
Post a Comment
Your comments are like sunshine and chocolate! Thanks for taking the time to leave a nice one ;) I read all comments and love to respond. If you don't have Gmail, please leave your name!