Summer Dining Room Refresh
Does your dining room need a refresh for summer? I'm sharing how I added fun pops of color and cute accessories for less than $20!
Affiliate links may be included for your convenience;
my full disclosure policy can be found here. If you click through and make a purchase I'll receive a small
commission at no extra cost to you!
One of my very favorite things in the whole world is details! Yes, I am very
detail oriented...now my observation skills need work 😉 but when it comes to
details, I'm all over them! This works to my advantage when I share tutorials
and room makeovers with you guys because you WANT the details!
I recently spent less than $20 to decorate my dining room for summer. Bright
pops of color, a few fun DIY accessories, and shopping my home for additional
items is all it took.
I used to have a yellow and blue cottage kitchen. Way back when our boys were
tiny and we lived in a little 50's ranch in Oregon, with a huge garden and a
real basement (oh how I miss having a basement!). It was our first
large-scale DIY and it about killed us...but once it was done, it was the best
thing we'd ever accomplished...aside from our kiddos of course! Here's a look
at my scrapbook page from that time.
Since then, I don't believe I've ever paired yellow with blue. I don't know
why. I decided to bring back that delightful summer color combo to my
farmhouse/cottage dining room in a way that feels so fresh and fun!
If you're a long-time follower here, you're already familiar with my love of
blue! I love all shades and you will find something blue in every room in our
home. It's my color. So this room refresh was super easy because the blue
elements were already in place...I just moved them around a little, brought
some out of cupboards and off bookshelves. Our dining room is a gathering
place of blue vintage and thrifted treasures!
Easy Summer Tablescape
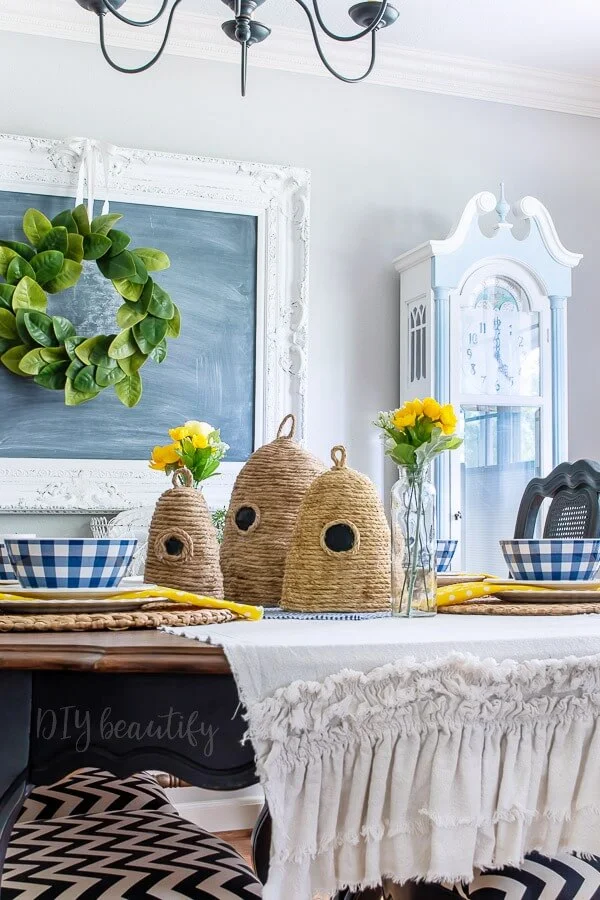
Layering is a fun way to add depth and even texture to a table! I started with
my DIY ruffled drop cloth runner that I made years and years ago before I was
a blogger. It goes with everything and I love it so much!
Each place setting started with a
woven charger. I added
some of my favorite thrifted ironstone dishes, a yellow polka dot napkin and a
cute
blue and white gingham bowl.
I'm not serving soup...these bowls are the perfect size for a big summer
fruit salad or ice cream!
The table centerpiece is a square of gingham fabric placed on the diagonal,
topped with my
super easy and affordable DIY bee skeps
and a couple glass bottles filled with yellow flowers.
Now, let's talk details.
How to make Napkins for $1 each
This little trick has saved me a LOT of money over the years! Have you heard
of
'fat quarters'? They're
18" x 21" squares of fabric for quilters and they're only $1 each! I just
bought 4 of them, removed the tag, washed them and had INSTANT NAPKINS!!! They
are the perfect size for a nice, hefty napkin and the colors and patterns are
endless!
Fabric Trick
Another fabric trick that I use, especially for tablescapes, is repurposing a
yard of fabric. I wash it, then rip it to the size I want! Ripping eliminates
the need for hems, and gives you a frayed edge that is so cute in farmhouse
and cottage style! Start the rip with a small snip of your scissors. I used
this trick to make blue gingham napkins (one of which I'm using as one of the
layers on my centerpiece). This trick is great for making simple table runners
as well, and it's so affordable! Most cotton fabric is well under
$10/yard!
Walmart
I have found endless home decor items at Walmart! These gingham bowls are
melamine and were just $1.50 each! Check out the
matching plates! So
perfect for summer, especially outdoor dining! I have also purchased ribbon to
make my
"famous farmhouse wreath" (one of my top viewed posts of all time), baskets for my
farmhouse office, florals and more! Some of my items are no longer available at Walmart but
they get new stuff in all the time, and it's definitely worth checking them
out for affordable decor and craft supplies!
Room Details
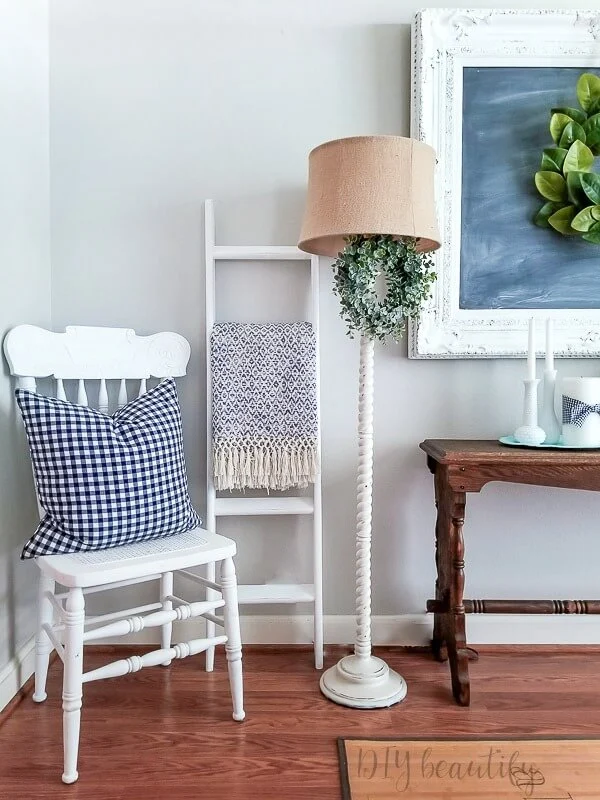
Enough talking...let's get back to this pretty summer dining room! I brought
the blue gingham pillows in from my living room, and added the little ladder
with a blue throw for a little more color on this side of the room. Btw, that
ladder came from a bunk bed and I picked it up at the curb one day and painted
it white 😉
My
painted grandfather clock
is happy in this room so here he'll stay for the time being. I added a stack
of blue vintage books and a thrifted vase filled with dollar store daisies
inside the clock.
I replaced the white plates on my wall with more of my blue transferware ones
that I've thrifted. I've hung them using a combination of these
plate hangers, these
invisible discs, and
these
DIY plate hangers
that are also invisible.
I love these vintage plates, they are just so charming!
In the other corner I hung a rustic shutter (really a vintage baking rack) on
the wall with flowers. I'll be sharing the details of how I did this next
week!
Something else in this room is brand new, but I'll bet you didn't even notice
it! We replaced our grungy blinds that had broken cords with these
cordless double cellular shades! The
coolest part is how easy they are to operate...no cords, just a little button!
We can raise the bottom up and the top down, to customize our privacy and
light filtering! Go back and look at the pics and you'll see the shades in
action!
Decorating my dining room for summer and setting this simple, affordable table
was a lot of fun! I hope these ideas, tips and tricks have been helpful!
Pin for later!


Just gorgeous!!! Thanks for the great tips ;]!
ReplyDeleteThanks so much Sandra!
Deleteeverything looks so fresh! i particularly like that drying rack/shutter - that's definitely my style!
ReplyDeletequestion - i have a real brick wall that was painted white when we moved in, any thoughts on doing a reverse German Schmear with tinted joint compound?
Thanks Gwen! Why don't you try taking a sander to it to reveal some of the original brick? I would try that first!
Delete