How to Easily Reupholster Dining Seat Cushions
This tutorial will show you how to get a brand new look for very little money by recovering your own chair cushions in fabric!
Updated May, 2022
Affiliate links may be included for your convenience;
my full disclosure policy can be found here. If you click through and make a purchase I'll receive a small
commission at no extra cost to you!
I've been working on small projects around my home, like this
one...reupholstering my dining room chairs in classic black and white
houndstooth fabric!
If you learn this easy technique, you can save yourself so much money! You can
get a new look anytime you like! In fact, I just recovered them again,
CLICK HERE
to see the newest look! Re-upholstering dining chairs is really easy and I
can't wait to show you how!
Here's what you'll need to recover your seat cushions:
Supplies
- screwdriver or drill
- roughly 1/2 yard of fabric per seat (I used black and white houndstooth)
- sharp scissors
- heavy duty staple gun
- 3/8" heavy duty staples
- ScotchGard fabric protector
That's it! It's a small list and a very do-able project, even if you don't
consider yourself a DIYer! Before we get to the "how-to", let me tell you a
little story about how we came to own this table and chairs set.
Roughly 8 years ago we moved from FL to TN and had to leave our beautiful antique farmhouse table behind because of its fragility.
I spent weeks scouring CL and thrift stores, looking for a set to replace it.
But I didn't want to settle for just ANY set. I had a wish list for our new
dining set.
- I wanted curves
- I wanted a huge table that could seat a crowd
- I wanted a little caning
- I wanted it all for no more than $350!
So when I spotted this set on CL (at a thrift store in Nashville), I
was ecstatic...until I saw the price...$750. It was everything I wanted with 3
large leaves for the table, 5 chairs and it was a beautiful, natural pecan.
But, it was WAY over our budget.
I kept looking, but made a note to check on this one periodically. A few weeks
later I was scrolling, and in disbelief saw that this very dining set that I'd
had my eye on had been marked down to $350...for a quick sale!!!!!!! I
immediately called Mr DIY at work and literally begged him to drop EVERYthing,
borrow a truck, and hoof it to Nashville to pick up my dream set! We only
lived 30 minutes from downtown Nashville, so it was totally do-able!
My sweet, darling husband did as I asked and headed up to buy my dream dining
set. I can't remember why I didn't go with him
(maybe one of the kids was home sick). Anyway, I received a call from
Mr DIY claiming there was no such table and chairs there. The only one he
could find had a really bad blackish paint job on the chairs. He sent me a pic
and I confirmed it was indeed the set.
I was so disappointed that someone had RUINED it! But guess what??
Mr DIY talked them down to $200 for the whole set! That's my guy 💗
He brought it home and I resolved to make it beautiful once again. I painted
the chairs, table apron and legs with
black chalk paint and wiped on
dark wax
for an even richer black. I refinished the top of the table.
The chairs were without their original seats and the ones they had were awful.
Someone had cut seats with straight lines and they didn't fit properly. So we
tossed them. I made a pattern and Mr DIY cut brand new plywood seats with
curves. I wrapped them in foam and batting, and added a really fun (and
trendy)
black and white chevron fabric.
This dining set is part of our story now! It made the move with us to TX three
years ago. It's so fun to open it up with all the leaves when we have a crowd
over! It's kind of funny because the table extends into our entryway and the
person at that end is literally sitting in the hall 😉 but we're all sitting
at the same table!
Now that you know a little history about this set, let's talk about how to
recover the dining seats with new fabric. I have to say that I really wish
reupholstering a sofa was as easy as doing chairs! This whole project took me
just a couple hours!
How to Reupholster Dining Chairs
I decided it was time to recover our chairs when I found black and white
houndstooth upholstery fabric at a huge discount at Hobby Lobby! It was marked
down to just a little over $4/yard! I bought 3 yards to recover my dining
chairs, and I was even able to make a
little pumpkin pillow
with some of the leftover fabric.
The great thing about upholstery fabric is its weight and the yardage. It has
a nice, heavy weight to it and it's usually 54-60" wide, which is about 10"
wider than most fabrics.
Bottom line, you don't need to buy as much fabric! I planned to
recover 6 dining seat cushions and was hoping I'd have enough, and I'm pleased
to say that I did, with a couple pieces leftover for another project!
Step One - remove seats
Flip your chairs over. You'll see a screw hole in each corner. Remove seats
from chairs with a screwdriver or drill. Set screws aside somewhere safe
because you'll be reusing them!
Step Two - cut fabric to fit
Lay your fabric out, wrong side up, on a large flat surface. Set one seat
upside down along a corner. You'll want to cut your fabric with an overlap of
1-2" (that means that 1-2" will wrap over to the back of the seat). Start with
the larger number! If you have a pattern on your fabric, make sure to line it
up properly so it's straight. Cut the fabric essentially in a large square
around the seat.
Please note that if your chair seats have multiple layers of fabric, you'll
probably want to pull one or two off to reduce bulk! Since our seats were new,
they only had the chevron and I chose to leave it because it was helping to
hold the foam and batting in place and I didn't want to have to mess with
that!
Step Three - staple fabric to seats
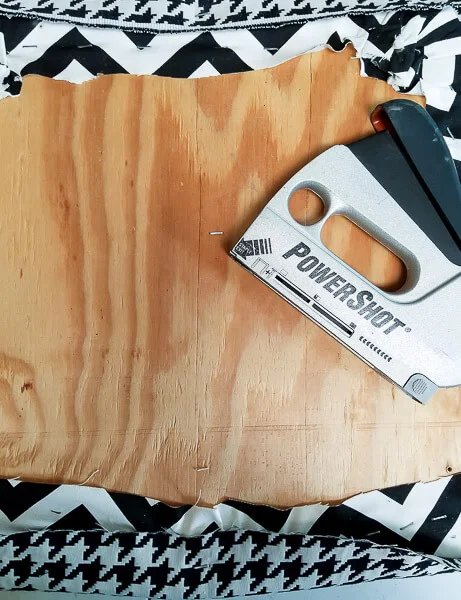
The way I like to attach the fabric is to start by stapling the middle of each
side opposite each other. So I pulled the fabric around and stapled the top,
then the bottom, then the right and left. Here I have a staple in the top and
the bottom (a little hard to see because of the chevron!)
Designer Tip: When stapling fabric to seats, you want the fabric snug, but if you pull too tightly you wind up with lumps along the edge as it squishes the foam underneath! So pull snug, but not TOO hard!
Once I have my four staples in place on each side, I add a couple more to each
side of that., staying away from the corners for the moment.
Step Five - staple corners
Here's how to get perfect corners. Staple the sides up to about 2-3" from the
corner, as you see below. Smooth fabric and pull the corner fabric to the
middle of the seat, then overlap each side, one at a time, with a fold. This
creates an attractive pleat that lays nice and flat.
In the picture below, I've pulled the fabric to the middle, and folded over
one side.
Do the same with the other side of the fabric and staple in place so it looks
like this.
Step Six - finish stapling
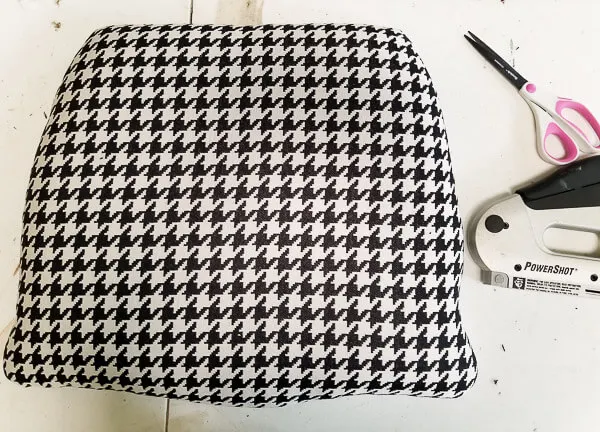
Continue stapling any areas that need it so you have staples 1-2" apart all the way around the entire chair seat.Step Seven - trim fabric
Trim the excess fabric to reduce the bulk. To make reattaching the seats easier, make sure you can SEE your screw holes. If they're covered in fabric, that's ok, but it will be more difficult to reattach.
Flip chair over and make sure the fabric looks good and your pattern is even.
Step Eight - protect fabric
This step is super important unless you want to be reupholstering your chairs
again in a month! Take a couple hours and spray a couple light coats of
ScotchGard on each seat cushion. This will help to block stains and make clean
up easier! I took my seat cushions outside to my patio and protected the
surface with a large piece of plywood. I was only able to do two at a time, so
it took awhile, but I'm glad I took this extra step to protect the fabric!
Step Nine - reattach seats
Reattach upholstered seat cushions to dining room chairs! Admire your hard
work and all the money you saved! I love how this easy project can breathe new
life into your dining set and give it a whole new look!
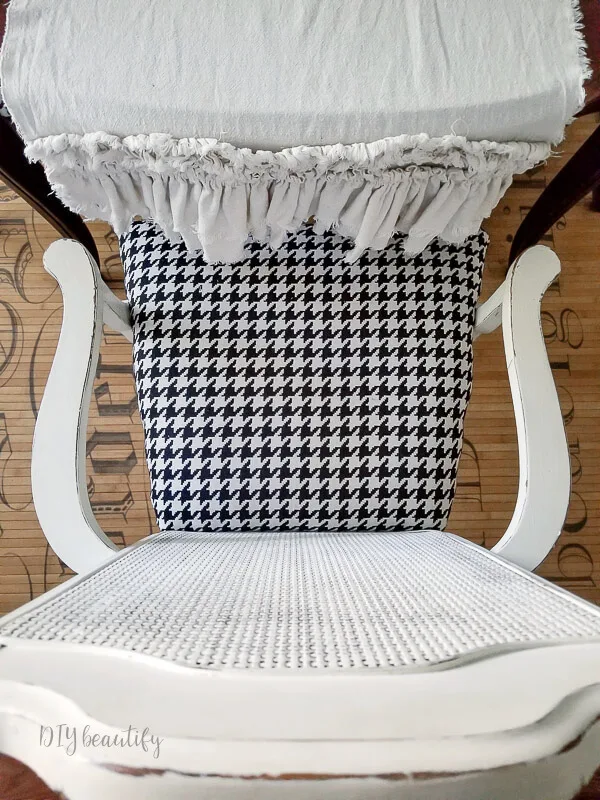
Remember I said that our dining set only came with 5 chairs? Well, I found a
similar chair at Goodwill around the same time that I bought this set. I
painted it white and made it a
flirty little skirt with pleats ala
Miss Mustard Seed.
I decided to redo its seat cushion with the houndstooth so the chairs match,
but I left the chair itself white! I like that it's just a little bit
different from the rest! Can you guess who's seat this is? Momma gets the
pretty white chair!!
It's a subtle change, but I am really loving the classic houndstooth in our
modern farmhouse dining room! It's a little bit like chevron is the trendy
high schooler and houndstooth is the classy older sister! Always in style,
always making a statement!
I hope that this tutorial fills you with confidence to reupholster your own
dining seat cushions!
Remember I said that I've recovered them again? I found fabric on Amazon for
only $16 and love the lighter look.
You can find out what I used for my fabric by clicking here.
Love this project? Here are some more fabric tutorials:
PIN IT to remember it! 👇
bringing beauty to the ordinary,


Comments
Post a Comment
Your comments are like sunshine and chocolate! Thanks for taking the time to leave a nice one ;) I read all comments and love to respond. If you don't have Gmail, please leave your name!