How to Paint a Simple Country Church
I'm sharing an easy way for a beginner to paint a sweet country church in a field of flowers!
Affiliate links may be included for your convenience; my full disclosure policy can be found here. If you click through and make a purchase I'll receive a small commission at no extra cost to you!
The church has always held special meaning to our family, and I've long wanted to paint a little white country church. I grew up going to church and Sunday School every week, and I was even a PK (pastor's/preacher's kid) for a few years! Mr DIY is also a PK, and guess what he grew up to be? If you guessed a pastor, you'd be correct! 😄⛪ You can read more about our journey and find out where we've lived here.
I've always been drawn to simple country churches. A couple years ago I spotted a sweet church painting in a local shop and wanted to buy it, but it was not cheap. So I held off, knowing that one day I would put paintbrush to canvas and figure out how to paint my own church!
I'm not an artist, and I have no real painting experience. I have dabbled in acrylics, but realism is definitely a stretch for me! I can paint a decent pumpkin (like on these DIY pumpkin pillows, and the 'hello pumpkin' sign in this post), but I don't think I've ever painted a building. Oh wait, I attempted to paint the Nashville skyline at a painting class, but wasn't happy with my attempts and later painted over it!
I spent some wee hours of the morning thinking about how I could pull this off (do your creative thoughts wake you up at night?).
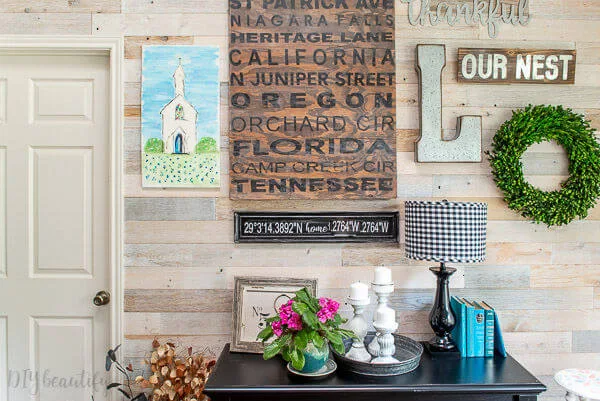
There's a long narrow spot on our gallery wall in the sunroom where I wanted to hang a church painting and I had the perfect piece of scrap wood that I found in our backyard wood pile.
I had some inspiration pictures, and early on Saturday morning, decided to just dive in and see if this would be a craft fail or not! I guess the fact that I'm posting this means I'm happy with the results! 😀
This project cost me $0 because I had everything on hand. However, here's what you'll need if you want to paint your own church.
Supplies
- canvas or piece of wood (my plywood measures 13" x 24.5")
- assorted acrylic paints
- variety of craft brushes
- glass of water
- paper towels
- paper plates
- inspiration pictures (unless you can paint something from your head! In that case I envy you!)
Getting Started
Here's the wood I used for my church painting. My pup Millie likes to inspect everything...
This wood is rough, so I used my palm sander and sanded it really well with 80 grit sandpaper to smooth as much as possible and then followed that with a finer 120 grit.
Next I brushed on 2 coats of white chalk paint, letting the first coat dry before painting the second. I used Dixie Belle "Cotton"; it's a nice, creamy white. Here's a close up so you can see that I'm not painting on a perfect piece of wood!
Now here's where it gets tricky. I wanted to be able to blend the acrylic paints on the surface of the wood, but wasn't sure if that was possible on a matte chalk paint base.
So I put my thinking cap on, and decided to apply a coat of clear wax to give the surface of the wood board a little bit of slick. I used Dixie Belle's "Best Dang Wax". It's a white wax, and I wanted to be very sure that my white chalk paint didn't yellow. This wax did the trick! If you're not sure if your wax will yellow, test it first on a small scrap!
Inspiration Paintings
I wanted to keep my church as simple as possible. The church on the right is the one I very nearly bought and I found the other one online here. I liked different elements from each picture, so kept these in front of me while painting my own version of a simple country church.
Painting with Acrylics
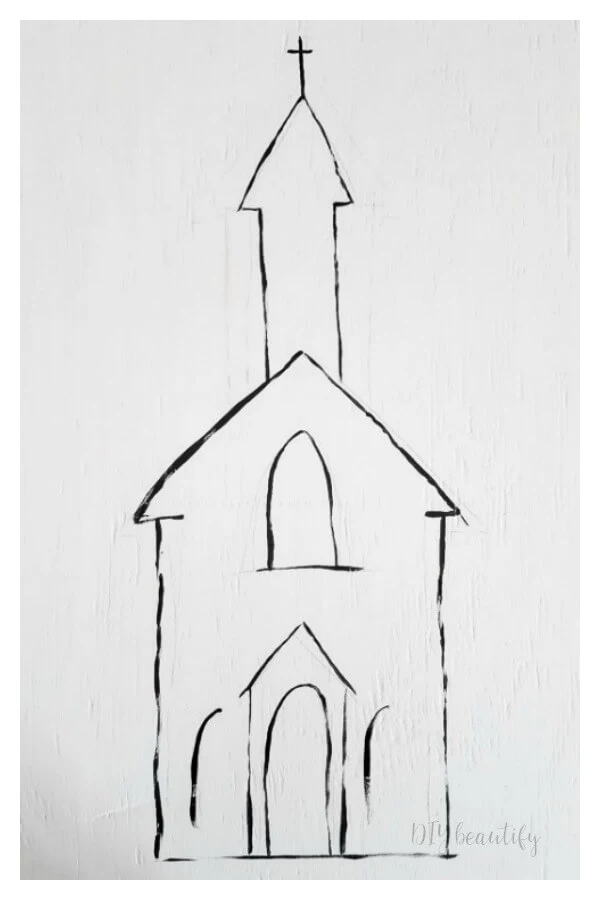
Time to paint! I like painting with acrylics because they're bright and vibrant and a little color goes a long way! They're also very easy to blend, and they work nicely with water. My first order of business was to paint the outline of the church. I lightly drew the shape on with a pencil first before going over it with a paintbrush. This is freehand, it's FAR from perfect, but you don't see many perfect little country churches, right? That's part of their charm.
After goofing and trying to erase my pencil line, I quickly learned that a RED PENCIL ERASER will leave red marks on your work!!! I wasn't too worried as I was planning on painting a background anyway.
Normally, I'm pretty sure you paint and blend your background first. However, in this case I wanted a white church, so I started by painting the outline of the church using black acrylic paint and a very small brush. How do you like my artist's palette? 😏
I think outlining the church was the hardest part of the process! You can see pencil marks, and it's a little wonky, but I really wasn't going for perfection anyway! You can see that I chose to blend the styles of the churches from my inspiration pieces, going for a simple steeple and one stained glass piece on the church itself.
Paint the Background
Next, I painted the background. I used a small paintbrush rather than a craft brush because it's a large area. I blended white with a couple different blues, keeping my brush wet so I could blend. I was just going for the feeling of a blue sky with a little bit of variation in color. I was able to paint right up to the outline of the church, and covered up all those pencil lines!
Next I loaded a small brush with a blend of cream and white and repainted the body of the church. Some of my black paint lines were too thick, and this let me cover that up.
The next step was the grass. I really wasn't even sure what I was planning to paint here, other than green. I swiped on some paint and realized it was way too dark. I took my damp paper towel and dabbed it off, and really like the resulting texture, so I left it!
That field needed some color and I knew I wanted to paint flowers. After mulling it over for a bit, I decided to fill the field with Texas bluebonnets! This was the perfect way to personalize this country church painting even further, as we currently live in Texas, which is famous for its amazing bluebonnets in the spring!
Painting bluebonnets with your fingers!
I didn't have the right size brush, so decided to use my fingers for the flowers! I painted a little stem with a flat brush, and then dabbed my fingers in blue paint and touched that lightly on. The lighter blue acts as a highlight.
They're far from perfect, but it gives the right impression! I continued filling the field, but after awhile stopped painting the stems and just filled in little bunches of flowers, just being careful to vary them a little bit so they didn't all look exactly the same.
Painting a stained glass window on a country church
I liked how my fingers worked so well that I did the same process for painting the stained glass window. Just dipped my fingertips in little dabs of color and dabbed it on the window area.
We actually have a built-in stained glass window on the opposite wall in our sunroom (you can see our stained glass window here), so I like how this painted window echoes the existing one!
I painted a church! A sweet little country church with a stained glass window and a field of Texas bluebonnets!!! I'm thrilled with the results! It's definitely rustic, and far from perfect, but I think it's kinda charming!
This country church painting makes a colorful addition to our gallery wall, which I love! This wall isn't just filled with pretty decor, it's handmade items that are unique to our family! You can click here to see how I made the DIY subway sign, and here to see how I made the GPS coordinates sign


This was a fun challenge and made me step outside my comfort zone a little! What is something that you'd love to paint? I hope you're inspired to see that it doesn't have to be perfect to deserve a spot on your wall (or in your home!)


Really like your country church painting and looks good hanging there on your wall.
ReplyDeleteReminds me of a small church that I used to go to when I was a young child.(several years ago) Also reminds of me of a little country church from Little House on the Prairie.
(now, just don't forget to sign & date it)
Have an enjoyable day along with a fantastic week.
Thank you sweet Colleen! Wouldn't you know I messed up when I tried to sign it 🤦♀️ I hope your day is wonderful!
DeleteDo you have a pattern for sale of your church?
ReplyDelete