Updating a Tired Bookcase and Albums with Chalk Paint and Fabric
I'm sharing how I gave a tired bookcase a pretty and bright refresh! I'm also sharing how I covered some damaged photo album covers with fabric for a more cohesive look.
Affiliate links may be included for your convenience. As an Amazon Associate, I earn from qualifying purchases at no extra cost to you. My full disclosure policy can be found here.
Happy Friday! While Mr DIY and our son have been ripping up old shiny Pergo and installing beautiful new farmhouse floors at the front of our house (to match these in the back), I've been busy myself! This dark and dated bookcase got a bright new makeover, and while I was at it I covered several of the photo albums with fabric. Keep reading and I'll show you how I did it.
So this little corner exists directly outside our bedroom door. It's adjacent to the hallway that splits our home in two at the front. It's an awkward little corner, but needs a little something. I'm one to fill every possible space, and this old bookcase fit the bill perfectly. Several years ago I was an avid scrapbook-er and filled lots of albums with creative pages of my kids and our family.
Over time, many of the album covers had deteriorated. They were tacky and peeling and just looked terrible. The bookcase itself didn't look great either. We bought it at an estate sale for $90 long ago (like 15 or 20 years). It's an original Bombay Company bookshelf (remember that company?) so it's sturdy and real wood. However, the dark shiny finish is not my style. It also had several water stains and was so dark that the albums kinda got lost.
Giving a dark bookcase a fresh and bright new look
Here's a terrible before picture. I forgot to take one, so had to take a screenshot from a short video I shared on Instagram. I'm sorry you can't see much of the bookshelf itself, just a large dark shape.
I'm not sharing a tutorial for painting the bookcase today, because I've done that before. You can see all my painted furniture projects here. You'll find all kinds of helpful tips and tutorials for painting furniture with chalk paint!
I wasn't sure if it would need a blocking primer, being such a dark piece. But I was trying to use up what I already had, so I painted it with one coat of white chalk paint, and then two coats of my favorite paint for bookcases and bookshelves (because it has the sealant built right in!). So once you're done painting, that's it...you're done! I was fortunate to have no bleed through with this piece.
So while it sat curing, I started to work on the damaged albums. Millie's looking a little shaggy here...it's her "coronahair" lol! And yes, I missed the bottom of the shelves. You see it here, but I promise it's not visible when you're standing up! I'll probably go back and paint that some day though...when it's not so hot and humid!
Covering damaged photo albums with fabric
Some of my albums were looking awful and I wanted a quick way to give their covers a face lift. Initially I thought about painting them, but didn't want to deal with the mess of paint while our house is a disorganized mess due to the new flooring being installed. Plus I really didn't want to tackle this project outside as it's gotten very hot and humid.
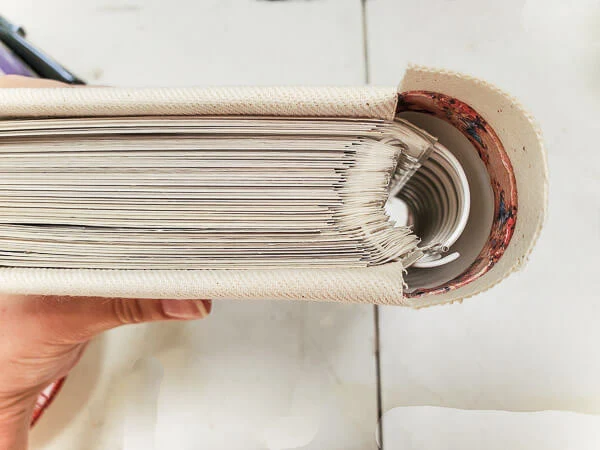
Here's a little look at the damage some of these albums had incurred. This album had stuck to another one and the result was a big mess! The integrity of the album itself was still intact, I just needed a way to recover a few of them.
How to recover photo albums with fabric
I had this lovely linen-like fabric that worked beautifully. You could definitely use drop cloth as well! I'll share a supplies list at the end, but here's the basic way to recover old album covers. It requires very little glue, and the glue is just used at the edges to hold the fabric in place.
Cut fabric Lay your album out on a piece of fabric and cut around it, allowing 2-3" allowance on either end. Iron out any wrinkles now too or you'll be stuck with them forever!
Adhere fabric to each side
Before you glue the fabric, you will need to cut small slits where the binding or spine of the album is. If you look closely, you can see my snipped fabric at the bottom right of this image below. Just snip up to the album. Next, paint a little glue onto the album itself, along the edge (just do one edge at a time).
Before you glue the fabric, you will need to cut small slits where the binding or spine of the album is. If you look closely, you can see my snipped fabric at the bottom right of this image below. Just snip up to the album. Next, paint a little glue onto the album itself, along the edge (just do one edge at a time).
Here's a better view of the fabric snips you'll need to make at the spine of your album. I found it easiest to open the album to roughly the middle before snipping. Remember, it doesn't have to be perfect!
Fold fabric edges over to secure
While folding fabric over the edge, be careful not to shift the fabric. Press tightly for a few seconds to secure, then move on to the opposite edge. By the way, this is a project for those who don't mind imperfection! I wasn't too worried about my fabric edges being perfect because you'll never see them anyway!
While folding fabric over the edge, be careful not to shift the fabric. Press tightly for a few seconds to secure, then move on to the opposite edge. By the way, this is a project for those who don't mind imperfection! I wasn't too worried about my fabric edges being perfect because you'll never see them anyway!
Once you've glued the two opposite edges on one side, move on to the next side and do the same. You'll be left with fabric strips at either end of the album as well as the fabric at the spine.
Glue the fabric at each end of the album
You'll probably need to remove some of the bulk first with your scissors. Then I folded the edges a little like a gift and glued them to the album. I relied on a little hot glue to help me with this step.
I like the nice, finished edge this gives.

Snip off fraying fabric ends
If your fabric is fraying badly or you just don't care for the look, you can make the edges look a little more finished by using strips of electric tape. Another option is to glue a decorative piece of paper to overlap the fabric edges.
If your fabric is fraying badly or you just don't care for the look, you can make the edges look a little more finished by using strips of electric tape. Another option is to glue a decorative piece of paper to overlap the fabric edges.
This is how your album will look at this point.
Glue the fabric at the spine
This last step was daunting to me, until I just jumped in! I found it helpful to trim the fabric a little, just enough so when you fold it over twice, it ends up being in place. Rather than using the decoupage glue, I used hot glue to adhere this area, and even used the tips of my scissors to help press the edges flat. Folding the fabric isn't necessary, but it does help to hide those unfinished edges! You can see below that I left the fabric in a single fold on this album.
This last step was daunting to me, until I just jumped in! I found it helpful to trim the fabric a little, just enough so when you fold it over twice, it ends up being in place. Rather than using the decoupage glue, I used hot glue to adhere this area, and even used the tips of my scissors to help press the edges flat. Folding the fabric isn't necessary, but it does help to hide those unfinished edges! You can see below that I left the fabric in a single fold on this album.
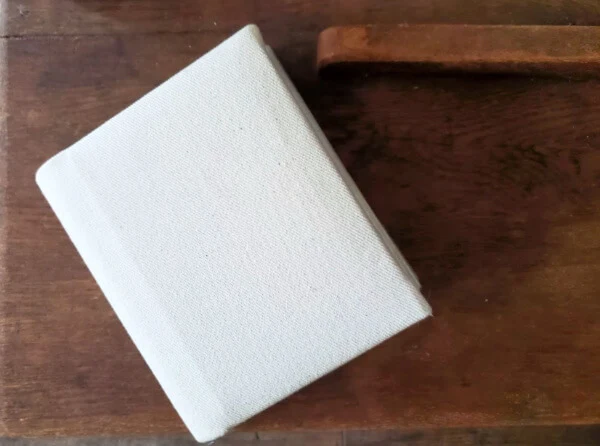
Here's the finished album!
I really like the neutral fabric!
I did several albums. Some of my scrapbook albums had a separate spine. I took those ones apart and finished each cover separately, then put it back together.
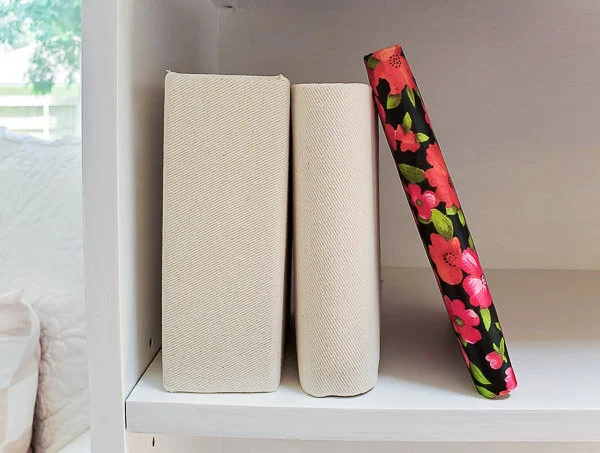
Here's a few more on my freshly painted bookshelf.
See that floral album? I nearly recovered it, but it's still in great shape and it reminds me of my childhood so I left it alone! In the end, I think I recovered 6 albums with fabric, and I love how they look with the other albums...you ready to see?
Painted bookcase with fabric covered albums
I was so happy that the flooring in this area was done and we could move the bookcase back into place so I could take pictures!
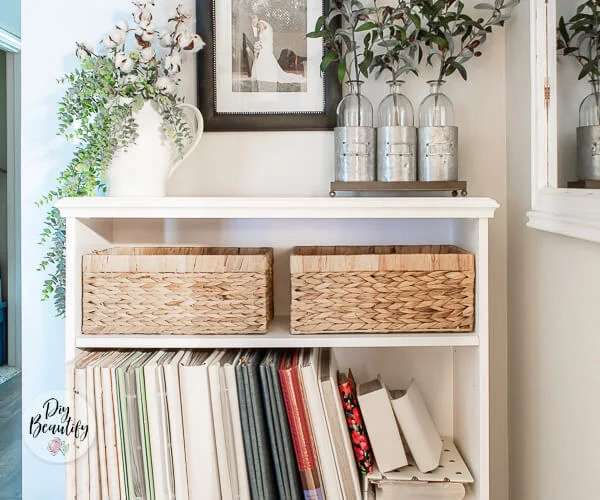
I bought a couple of baskets for the top shelf from Marshalls and feel like it's the finishing touch! The bookcase has more of a farmhouse friendly look now, which suits my home!
Easy paint update for an outdated picture frame and mat
While I was working on this area, I took the time to give my wedding picture a refresh too! Some black chalk paint on the frame, and creamy white chalk paint on the mat (yes, I painted the mat!) made a huge difference and brought our wedding picture into this decade, lol! Nothing to be done about the poofy hair I'm afraid :)
As promised, here is a list of the supplies I used to cover the photo albums.
Supplies
- damaged albums
- foam brush (not pictured)
- decoupage medium
- hot glue
- fabric (I used a yard of this natural osnaburg fabric; it's durable yet lightweight and it's currently on sale for only $2.99/yd!!!)
- sharp scissors
- disposable bowl or plate to hold glue
- electrical tape (optional)
Supplies to refresh wedding picture
- black chalk paint
- white chalk paint (I used Dixie Belle 'Cotton')
What do you think? Chances are you've got a bookcase and albums that could benefit from an update like this! Please let me know if you have any questions...this was a lot of info to throw at you!


Comments
Post a Comment
Your comments are like sunshine and chocolate! Thanks for taking the time to leave a nice one ;) I read all comments and love to respond. If you don't have Gmail, please leave your name!