Easy Felt Mitten Ornaments with Cuffs
Make the cutest Christmas cuffed mitten ornaments using craft felt! Adding embellishments is optional but will really personalize the ornaments to suit your holiday decorations! Full tutorial included.
This post may contain Amazon or other affiliate links. As an Amazon
affiliate I earn from qualifying purchases.
My full disclosure policy can be found here.
It's the perfect time to DIY some Christmas ornaments like these soft and cozy
felt mitten ornaments! I'm sharing a free printable mitten template in three
sizes, as well as the step by step tutorial and supplies list so you can get
everything you need and make these sweet ornaments ASAP!
It's
Pinterest Challenge and we've teamed up this month to share lots of
fun, cute and easy Christmas ornaments with you! Our fun-loving leader,
Cindy of County Road 407
has tasked us with making any kind of DIY ornament, so you know there's going
to be a lot of variety with all the talent in this group! You'll find all the
clickable links below. If you hopped over here from
Postcard From the Ridge, welcome! Angie's glittered ornaments are so pretty!
I'm Cindy and I love to craft and DIY all the pretty things to make my home
unique. I love thrifting and
budget friendly crafts, so if you like saving money but not sacrificing a beautiful home, you are
in the right place!
Let's make some cute felt mitten ornaments!
How to make felt mitten ornaments with cuffs
At the time of creating these mitten ornaments, I had not set up any of my Christmas trees (or unpacked any holiday decor), so I had to scramble to come up with something Christmas-ey to style them!
I think I made it work okay, and I have since added these sweet mitten
ornaments to the larger tree in my craft room/office space. I'll be sharing a
full tour soon!
A couple things to note before we get started
- I have used a sewing machine to stitch my mittens, however, you do NOT need to sew them! You can use fabric glue, and I highly recommend these fabric glue sticks that work in your hot glue gun for this project.
- You can really use any soft material that has a little bit of weight to it. I used both craft felt (the kind you buy in sheets at the craft store) as well as some natural cotton batting that I had on hand from another project.
- You are most welcome to use my free printable mitten template you'll find below. Print it full size onto a piece of regular copy paper and cut it out to use as a pattern on your felt. The template does not show the smallest mitten (my bad, it was a last minute decision to make the littlest ones!) but simply trace inside the template about 1/2" around to create the smallest size.
Supplies needed
- mitten template (see notes above)
- craft felt
- straight pins
- fabric glue or sewing machine
- sharp scissors for fabric
- stiff wire or jute cording
- polyester fiberfill stuffing (you could also use cotton balls or the stuffing from an old pillow or stuffed animal)
- embellishments (buttons, ribbon, jingle bells, etc)
Step One - Cut out mittens
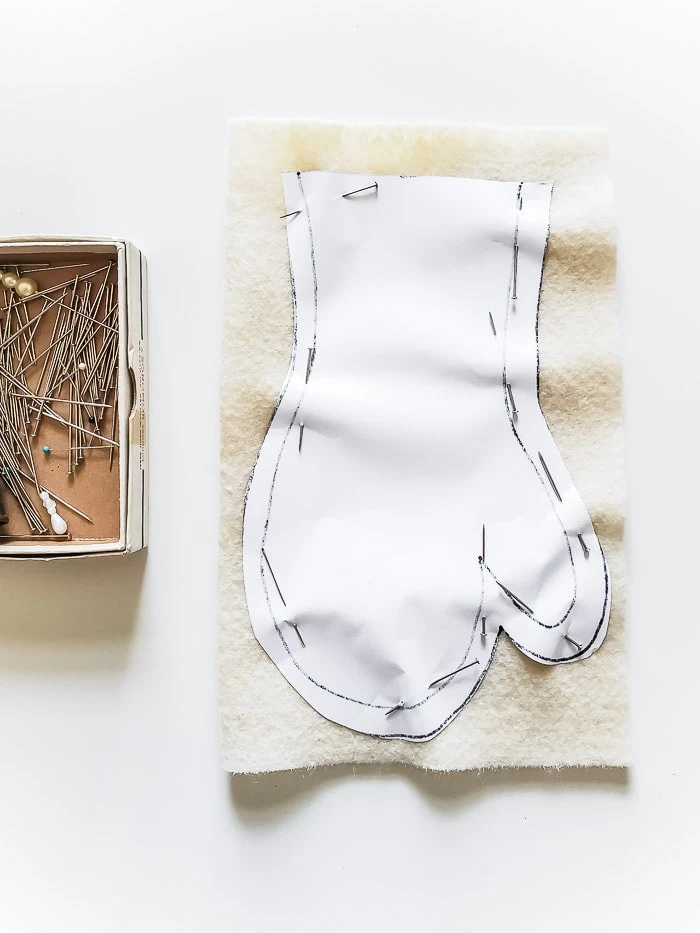
Cut out the mitten template*, pin it to the felt and cut out mittens around
the edge of the pattern. You can use
pinking shears
if you want those pretty pinked edges. Remember that you will need to cut out
two mitten pieces to make one mitten!
* if you cut the template along the outside edge first, then after you use
it to cut out a set of mittens, you can cut the inside edge to make smaller
mittens
Tip: fold the felt in half so you can cut out two mittens at one time!
Step Two - Sew or glue mittens together
If you're using a sewing machine: Pin the two felt mittens together and sew along the edges. We will not be turning the mittens so make sure your thread closely matches the felt you're using! I set my stitch length at 3.5.
Don't sew the top edge closed!
If you're using fabric glue: Pin the center of the mitten pieces in a
couple areas to hold it together. Apply fabric glue along inside edges as
close to the edge as possible, a little at a time. Hold for a few seconds to
make sure it's secure before moving on.
Don't glue the top edges of the mitten!
Step Three - Trim the mitten edges
If you sewed your mittens, use fabric scissor to carefully trim the edges to neaten them up and leave a very small bit of felt remaining Be careful not to snip your seams! You can see the difference this made in the mittens below. The one on the right is trimmed and the one on the left is not. Sorry for the crap pictures, I was working on these at night and the lighting was very poor!
If you sewed your mittens, use fabric scissor to carefully trim the edges to neaten them up and leave a very small bit of felt remaining Be careful not to snip your seams! You can see the difference this made in the mittens below. The one on the right is trimmed and the one on the left is not. Sorry for the crap pictures, I was working on these at night and the lighting was very poor!
You should now have mittens with very long tops! We made them that way on
purpose, so that we can have cute cuffs on our mittens!
Now all you need to do is fold the cuffs over on each mitten. You don't need
to glue them in place, they should stay put just fine. Aren't they looking
cute?
Step Five - add wire or jute hanger
In order to ensure our mitten ornaments can hang on the tree, we need to add a
hanger. Decide how long you want your hanger to be and cut a length of jute
cord or stiff wire.
Tie a knot in either end of the jute and hot glue to the seams inside the top
edge of the mitten, about an inch down into the mitten so the knot isn't seen.
If you use wire, carefully poke the wire through the mitten edges, bring it
back up to meet the wire and twist it around itself.
I tried both types of hangers and while I prefer the look of the wire, the
jute is just much simpler to do!
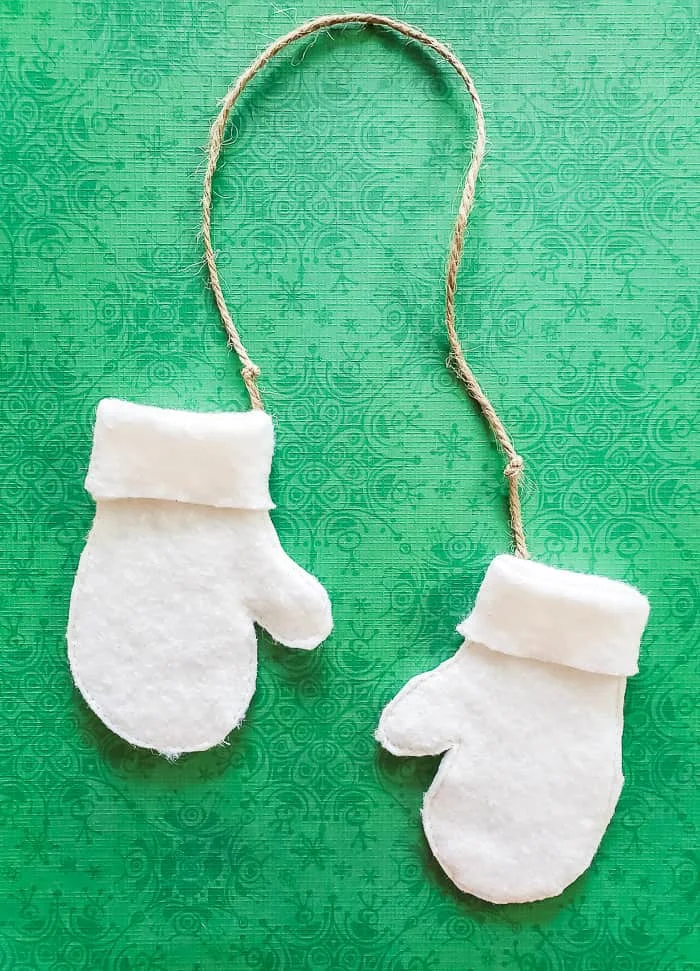
If you want to attach a pair of mittens (anyone remember wearing these as a
kid?) you will cut a longer piece of jute (about 16"), knot both ends but only
hot glue one end into each mitten as shown below. It helps to arrange the
mittens on a flat surface as you'd like them to look when hanging, to
determine the length of the cord, etc.
Step Six - lightly stuff mittens
To give the mittens a little structure, lightly stuff each one with the
fiberfill. You don't need much, just enough to make them a little squishy.
Don't overfill; I stopped at about the cuff level. The stuffing is what makes
them look like real mittens!
How to embellish felt mitten ornaments
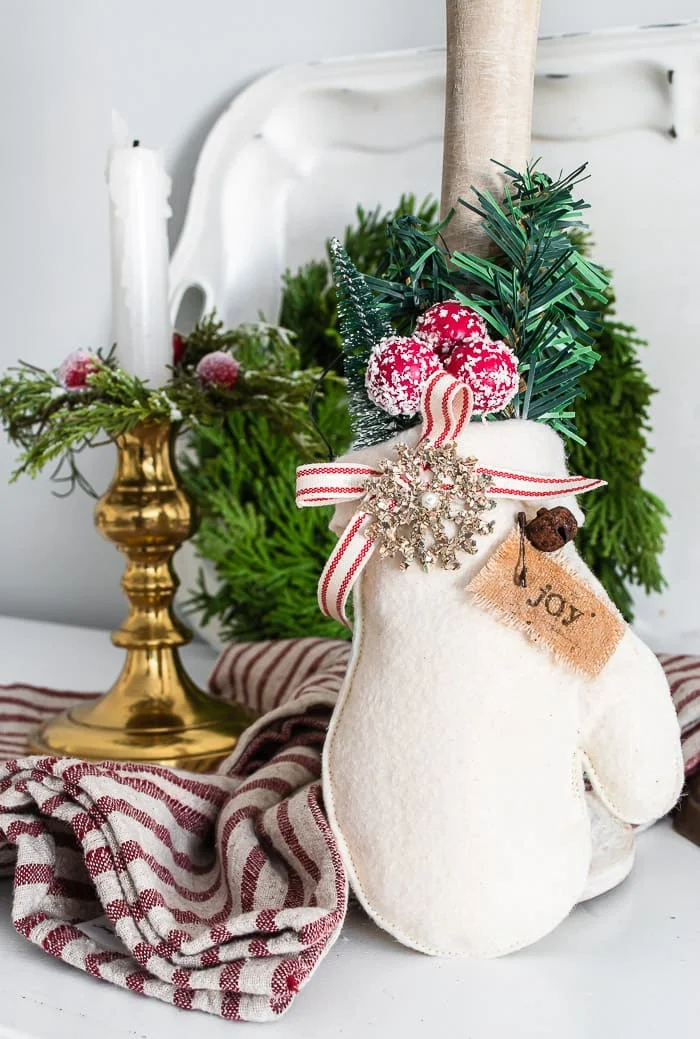
You can keep your mitten ornaments very simple and be done, or you can add
embellishments to your felt mittens as I did below. I grabbed a bunch of cute
items from my stash, that I thought would look good on the mitten fronts.
If you know me, you know I love the details! I try to do 'simple' but it's
pretty much impossible for me, as you'll soon see with my Christmas decor
LOL!
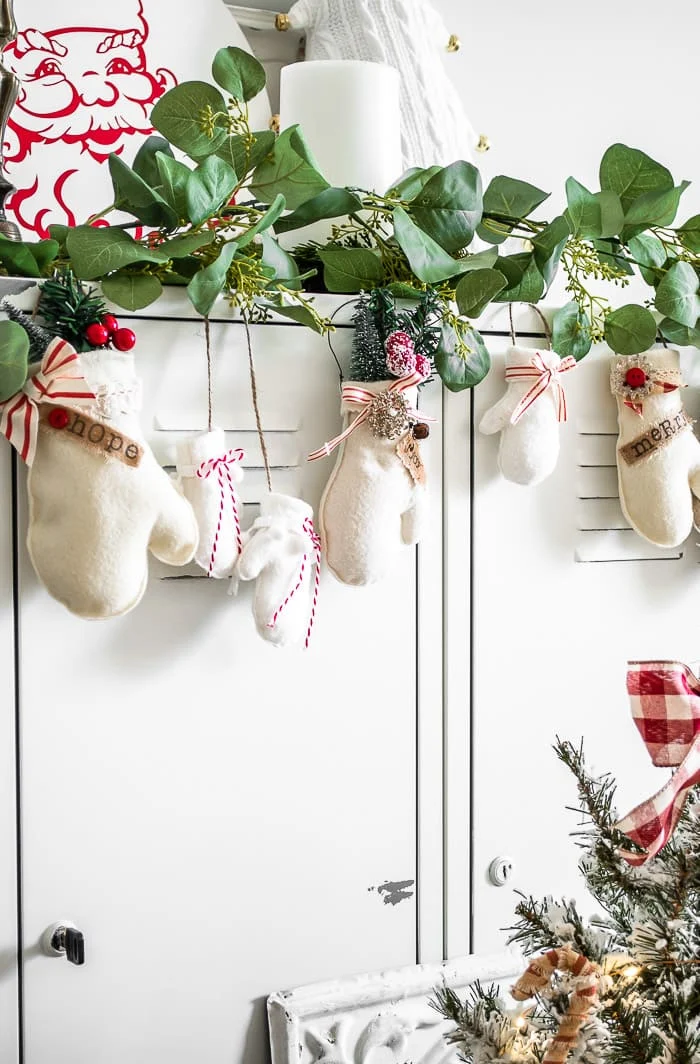
And don't forget to decorate the insides of the mittens!! We left the tops of the mittens open so you can tuck in some greenery, berry stems, even a mini tree!
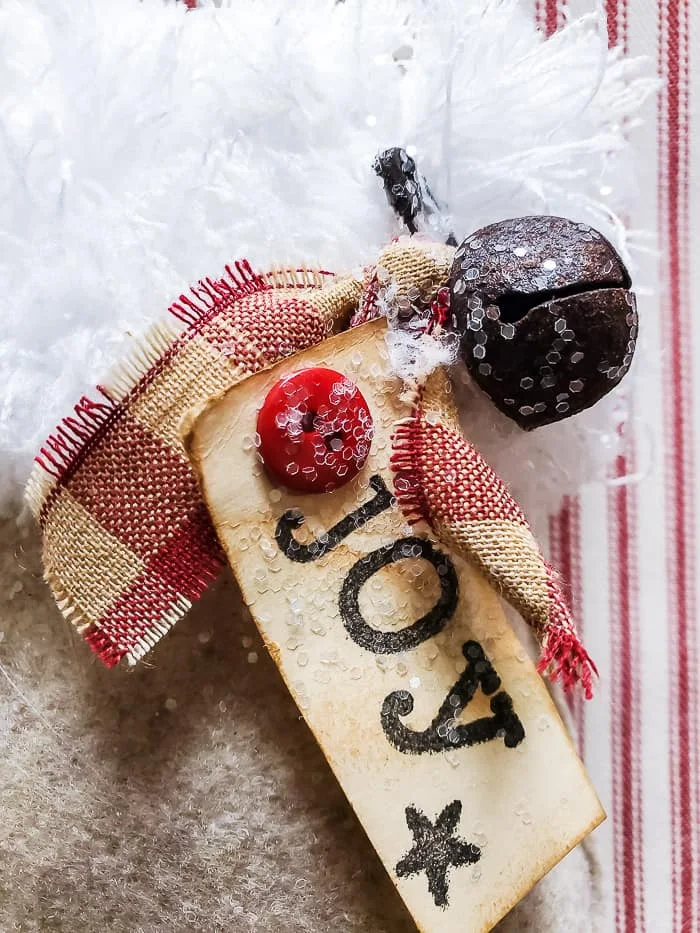
I even cut up a Dollar Tree duster to make a fur collar for one mitten! I
stamped words on small pieces of paper or fabric, and even dusted a few with
some glitter flakes for a little sparkle!
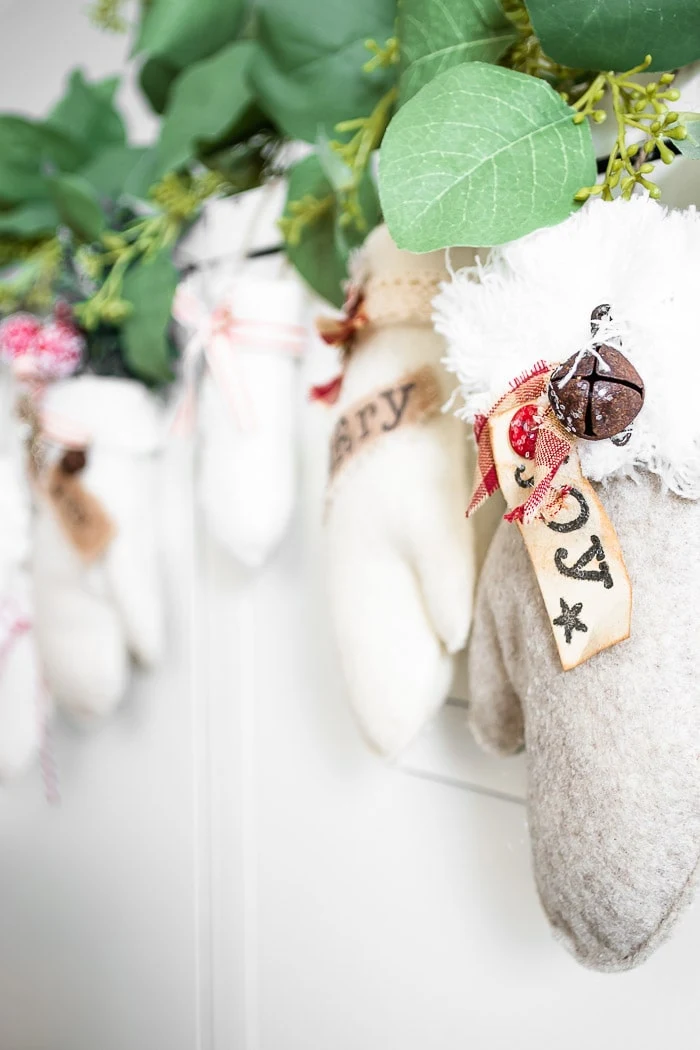
Have fun with it and use your imagination to make ornaments that work with your Christmas tree decorations! But these mitten ornaments will work in so many other ways! Create a garland of mittens, add them to a wreath or hang them from peg hooks! You could even simply bundle them in a wood bowl with a little greenery as filler for a charming coffee table decoration!
CLICK HERE FOR THE FREE PRINTABLE TEMPLATE
Pin to Save
Rachel is next and I hope you'll hop over there and see her
eco friendly ornaments. The rest of the team's DIY Christmas ornaments are below and I hope
you're inspired as you visit all the projects!
bringing beauty to the ordinary,






-min.jpg)




OMG So cute Cindy! Pinned!
ReplyDeleteThanks so much Laura!
DeleteYour mittens are absolutely adoreable. I love them, what a fun idea and they way you've embellished them is so pretty. Thanks for the tutorial, I am going to make some with my grands, they will love these.
ReplyDeleteThank you so much Marty, so happy you are inspired! They'll be a fun project to do with your grands! Send me a pic 😀
DeleteThese are so cute! I love them. And so easy, too. Happy holidays!
ReplyDeleteThank you, yes they can be as simple as you want! Have a wonderful Thanksgiving!
DeleteThese are absolutely adorable. I want to make an entire string of them!
ReplyDeleteThank you so much Laura!!
DeleteCindy
ReplyDeleteThese are just adorable! I’ve pinned to several boards because I don’t want to forget them for next year. Such a cute post.
Thank you so much! Next time you comment, please add your name 😉
DeleteCute, Cute, Cute Cindy! The mittens are just adorable I love how you embellished them and filled some with Christmas baubles! I want to some too!
ReplyDeleteAww thank you Michelle, I truly appreciate that!
DeleteI wish I could come hang with you for at least a day. You are so creative and I absolutely ADORE these mittens. I made some last year with the glue and they've held together! But mine aren't as cute as yours. The one with the broach is so beautiful. Can hardly wait to try this. Thanks for joining us and sharing your magnificent ideas. pinned
ReplyDeleteAww, thank you friend! That would be SO fun! And that's not a brooch, it's just a piece of paper I cut into a snowflake shape with my Silhouette and applied glass glitter to!
DeleteAbsolutely adorable, Cindy! Love all the fun details you added, too. I just saw a Longaberger basket like the one your tree is in at the thrift store, and now I'm wishing I would have gotten it!
ReplyDeleteThanks Lora, that's actually where I found this basket too!
DeleteThese are adorable, Cindy. They remind me of a cold wintery and snowy day at Christmas time! Pinned!
ReplyDeleteThanks Julie! Yes they have a cozy, wintry feel for sure, especially the ones with the glitter!
DeleteThese are so adorable! I want to make some! Pinned for later.
ReplyDeleteThank you Niky!
DeleteCindy, your mitten Christmas ornaments are precious. What a cute idea. Love how easy it seems. Happy Thanksgiving.
ReplyDeleteThanks so much Carol!
DeleteOh my goodness these are just the cutest little mittens ever!!!!!!! I love them on your tree too. Such talent!
ReplyDeleteSo fun hopping with you again. Merry Christmas!
Thank you Amber! Have a wonderful holiday season!
DeleteCindy, You really are a master crafter. These are absolutely darling. I love the garland look of them hanging from the top of the cabinet.
ReplyDeleteAww thank you so much!
DeleteYour cuffed mitten ornaments turned out so cute, what a fantastic idea! I wanted to drop a quick message to let you know that I’ve featured your tutorial on Crafts on Display, hope you enjoy it! - https://craftsondisplay.com/sewing/easy-christmas-cuffed-mitten-ornaments-tutorial-79910/
ReplyDelete