How to Recycle Old Ornaments with Napkins
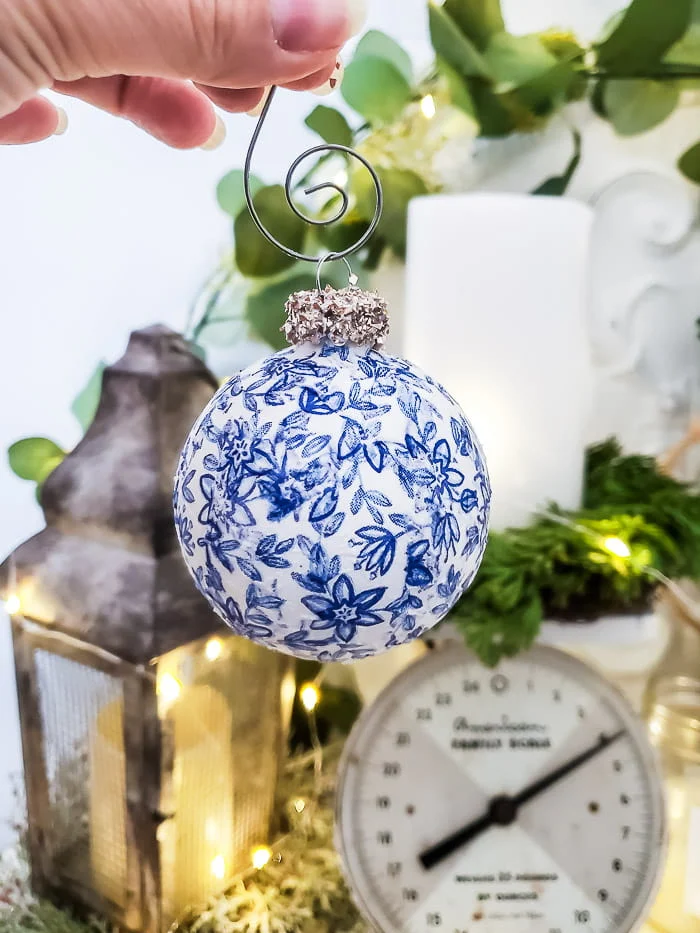
Recycle old ornaments that you don't love anymore! Give them a fresh new look by decoupaging them with napkins and adding gold glitter to the tops!
This post may contain Amazon or other affiliate links. As an Amazon
affiliate I earn from qualifying purchases.
My full disclosure policy can be found here.
Every year as I start decorating for Christmas, I assess what I have and what
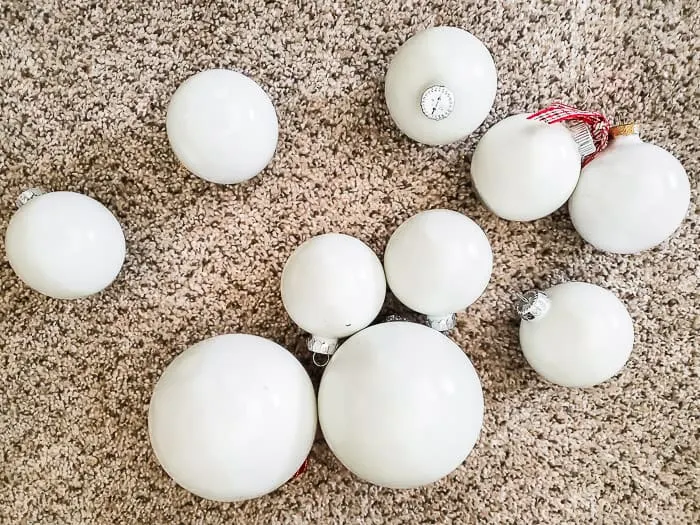
I can get rid of. This year, a bunch of white ornament balls that had seen
better days were on the
to go pile, when I remembered something.
I remembered the blue and white napkins that I had used to make some
cheap dollar store pumpkins look high end. I had plenty of napkins left and decided to recycle those old ornament
balls and turn them into blue and white toile-like ornaments for the Christmas
tree in our bedroom.
This project was a great way to spend $0 and get brand new ornaments with just
a little time! If you're a crafter, you'll no doubt have most of these
supplies on hand already, as I did.
Tip - my favorite place to get napkins is HomeGoods
Let me show you how easy these DIY ornaments are to make and how easy it is to
recycle your old ornaments into something fabulous that you'll love again!
How to Recycle Old Ornaments with Napkins
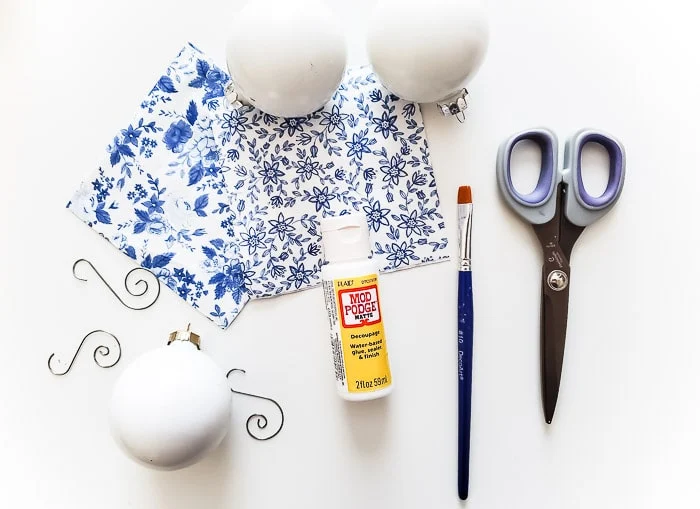
You'll need the following supplies:
- old ornament balls
- napkins (choose napkins with a simple pattern, florals are perfect!)
- matte Mod Podge
- craft brush
- ornament hanger and somewhere to hang them while they dry, like a coat hanger
- gold glass glitter (optional)
Important note
It's important to note that you want the color of your ornament to match the
base color of the napkins you're using. The napkins are so thin and
transparent that the color of the ornament will show through. So if you need
to, give your ornaments a quick coat of spray paint (it doesn't have to be
perfect).
My ornaments were already white, but had seen better days and were covered in
scratches and marks. You're going to be amazed at how decoupaging them with
blue and white napkins really transforms them!
Step One - Prepare napkins
- Cut your napkin into strips about 1-1/4" wide
- Paper napkins are usually 3-ply, that means 3 layers. Peel away the two layers because we won't need them (that second layer can be tricky, work at separating it from the napkin at one edge to peel it away).
Step Two - Decoupage napkins onto ornament balls
- Leave the top on your ornament ball because we'll need that to hold.
- Brush some Mod Podge onto the ornament right under the top and lay down a strip of napkin.
- Go over the napkin with a little bit of Mod Podge to help press down the creases.
Continue working your way around the ornament, adding Mod Podge and napkin
pieces onto the ornament. Once the ornament is covered in napkin, go over it
with a thin layer of Mod Podge to ensure everything is adhered. This also adds
a layer of protection and seals the napkin.
Important Notes:
- don't worry about overlapping the napkin, it won't matter
- you will get creases, just gently pat them down with the brush
- tear the napkin strips as needed for small areas
- this project can be sticky and it's easy to rip the napkin with sticky fingers, so have a wet wipe or napkin to periodically clean your fingers and try to touch the ornament as little as possible (hold it by the top)
Step Three - Hang to dry
Hang ornaments to dry somewhere they won't get bumped. I found hanging the
ornaments with hooks from a clothes hanger worked well!
Step Four - Glitter the tops
This step is optional, but I found it really went a long way to adding a
special look to these recycled decoupaged ornaments! I used
this gold glass glitter
I found at Michaels. It's nice and chunky.
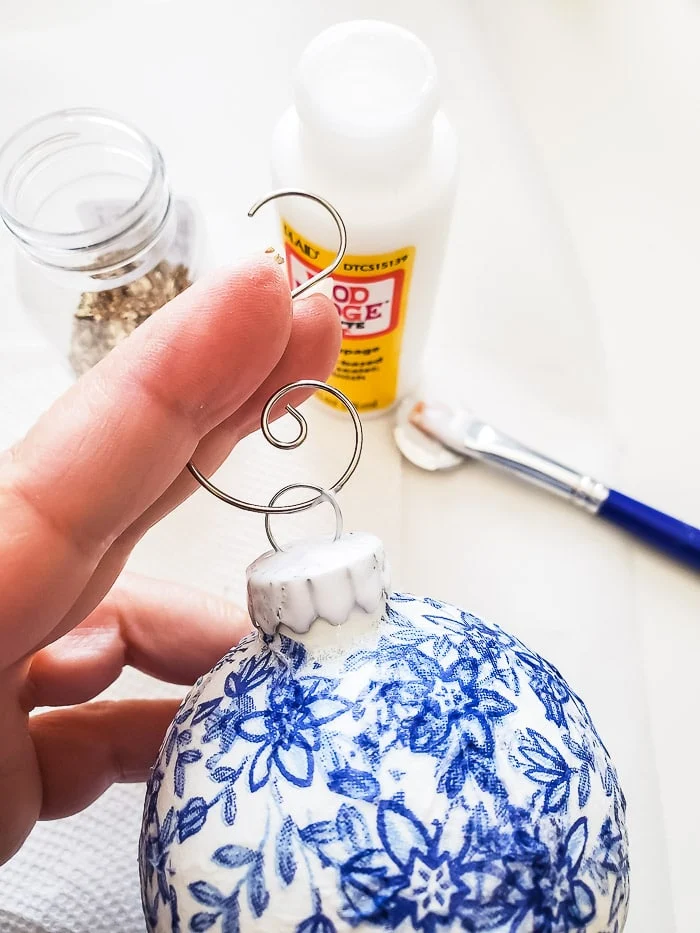
- Hold the ornament by it's top and brush on a thick layer of Mod Podge to the entire top.
- Make sure you have something on your work surface to catch the extra glitter.
- Pour the glitter onto the glue, making sure to coat the entire top.
- Shake off excess glitter and hang ornaments up to dry again.
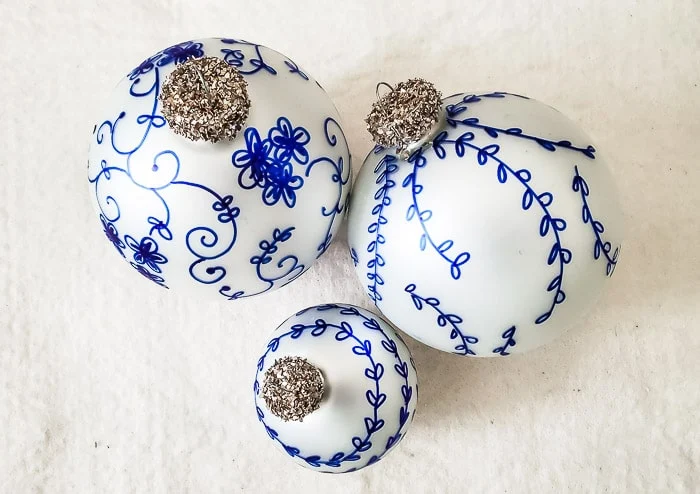
I decided to glitter the tops of the
blue Sharpie ornaments
I made a couple years ago for my
French farmhouse blue and white tree. You can see the transformation below and how the gold glitter really adds
some nice sparkle to these DIY ornament balls!
I strung all the ornaments together onto a hanger and set them aside to dry,
which took less than an hour. Aren't they pretty?
Our bedroom has the most gorgeous
blue toile curtains, and I set our
flocked King of Christmas tree
up in front of the window. I added these pretty recycled ornaments to the
tree, along with some ribbon and kept it really simple.
Be watching for the full reveal of our Christmas bedroom and soft romantic
blue and white tree in the next few days! But here's a peek!
I love that I was able to save these ornaments and recycle them with just a
little glue and pretty napkins! I hope you try this for any of your old
ornament balls that you're tired of!
Pin to Save
I've got a whole host of Christmas crafts, DIYs and decorating ideas coming at
you in the next few weeks! If you like my style, please be sure to follow
along so you don't miss anything ❤







Comments
Post a Comment
Your comments are like sunshine and chocolate! Thanks for taking the time to leave a nice one ;) I read all comments and love to respond. If you don't have Gmail, please leave your name!