10 Minute DIY Pearl Dog Collar
Craft a sweet pearl collar for your dog or cat in just a few minutes and for just a few dollars! I'll show you how easy it is.
This post may contain Amazon or other affiliate links. As an Amazon affiliate I earn from qualifying purchases. My full disclosure policy can be found here.
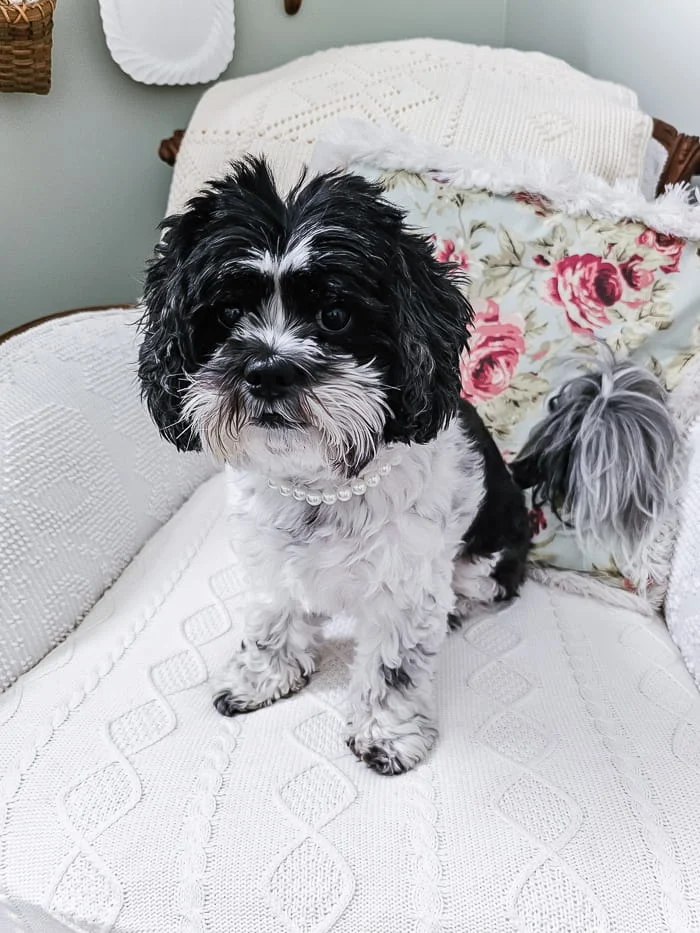
How cute does Millie look styling her brand new pearl necklace? I know some of you won't get it...Mr DIY thinks pearls on a dog are ridiculous, lol!
And I know some of you are asking WHY?
and I say...why not?
I think a dog looks so cute wearing a bandana, and a couple years ago I made some simple bandanas for Millie that fit right over her collar. You can see how to make easy no-sew pet bandanas here.
But here's the thing...some dogs don't like to wear a bandana or anything else that feels constricting. Millie is a little diva, and the pearl collar is a cute accessory that she doesn't even notice she's wearing. It's comfortable, unique and so inexpensive to make.
I made Millie her first pearl collar a few years ago. It recently broke, so I picked up the supplies to make her a new one, and decided to take pictures of this simple, 10-minute tutorial to show you how you can make a pearl collar for your own furry pet.
How to make a simple DIY pearl dog collar
The pet accessory industry is a big thing, just take a look on Amazon or any pet store. People love to dress their pets! You can buy premade pearl dog collars, but I am going to show you how to save money and make your own dog or cat pearl collar for just a few bucks.
Why you'll love this DIY
- save money
- customize the collar to fit your pet just right
- with the supplies I share below, you can make multiple collars
- make a pearl collar for any size dog
Here's what you'll need for this quick DIY. I purchased the items below at Hobby Lobby when the jewelry items were 50% off, which I highly recommend. Below you'll find Amazon links for your convenience and because they're actually a better bargain. You get much more of both the pearls and the elastic cord for less, and you'll be able to make pearl collars for all your furry friends and their friends!
Supplies
- 10mm pearl beads
- .8mm clear elastic cord*
- scissors
- needle with large eye (I used a cross stitch needle, which has a blunt end)
- measuring tape (these retractable measuring tapes are so convenient and easy to tuck into a purse)
*I chose a thicker cord than I used for Millie's last collar, which just broke after 3 years. You want to select a cord that will fit through the hole of the pearls. Really any jewelry cord will work, I like a stretchable cord so it's easy to remove the collar when I give Millie a bath.
Important to note
- be sure that the needle will fit through the hole in your pearl beads
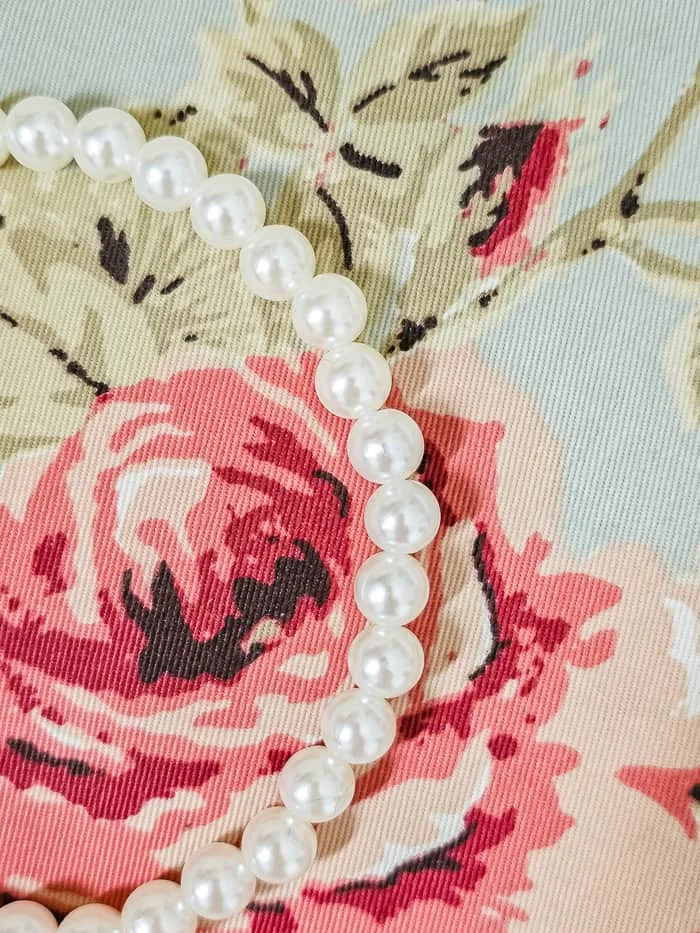
Millie's first pearl collar was made with much smaller pearls (see below), and the needle I'm using won't go through the hole. A needle really isn't necessary, you'll be able to thread the cord through the holes in the beads by hand, but a needle makes this project much faster. I like the larger pearls because the collar is more visible.
Step 1 - Measure dog's neck
Use a measuring tape to find the custom measurement of your dog's neck. Add 3-4 inches and cut the elastic cord to this measurement. I do recommend making the finished collar about 1/2-1" larger than your pet's neck, for comfort purposes.Step 2 - Thread cord onto needle
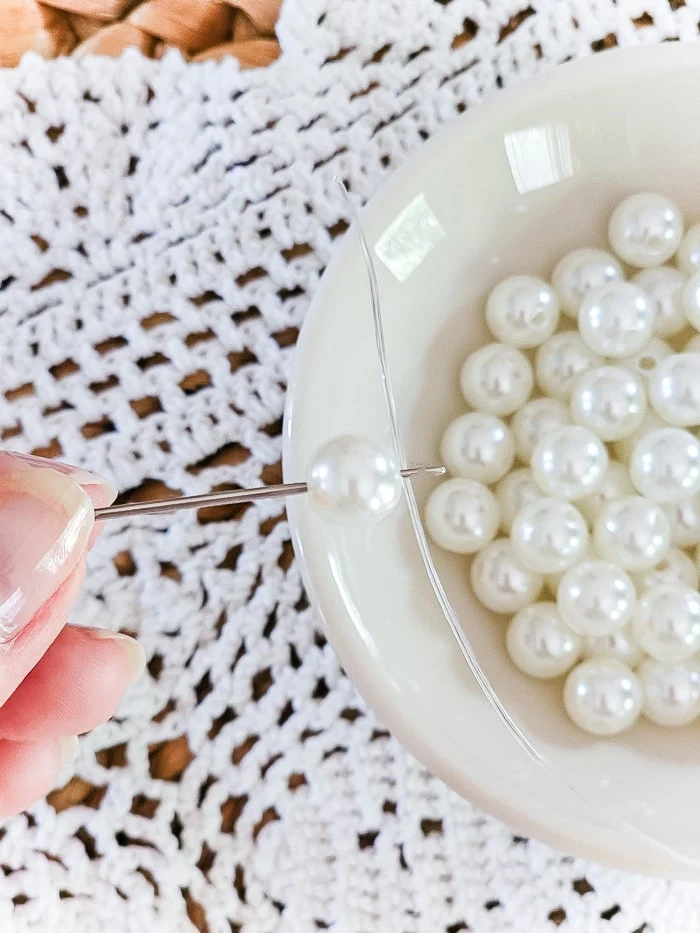
The cord I'm using is fairly thick, and it took a bit of work to get it through the eye of the needle. It's a tight fit, and I didn't tie a knot, but you could. This will help to prevent the pearls from sliding off the end.
Step 3 - Add pearls
Simply start stringing the cord with pearls. You'll want to be careful not to string them right to the end because without a knot, they'll slide right off.
The needle makes this process much faster because you can string 3-4 pearls at a time.
Step 4 - tie off cord
Once the necklace is strung fully, with those extra 3-4" of cording visible, tie the cord. I tied multiple knots, one on top of the other, pulling each knot tightly.
I have heard that you can seal a knot with a little clear nail polish. I did not do this, but it's an option if you're wanting to make the collar extra secure.
All that's left to do is cut the excess cord and add the collar to your pet! Because this pearl dog collar is made with stretchable cording, it's really easy to stretch it to fit over their heads.
Millie posed very prettily for me, showing off her new pearl collar, and of course, treats were involved.
Look at that furry little face ❤❤
We hope you're excited to make your dog or cat their very own pearl collar, please drop us a note if you do!


And this is exactly why I love girl dogs. My grand dog wears bowties. They'd make a debonair couple. ;) Millie needs a red carpet. pinned
ReplyDeleteThank you!
Delete