Revive Old Flower Pots with Chalky Paint
Sharing tips to revive old flower pots or planters with chalk paint, and how to safely paint a pot without removing an established plant
Updated 3/2023
Happy Friday friends! Go grab another cup of coffee and get your bootie back
here for today's post...I'm all about saving you money and time! And because
time is money, you'll be that much richer after reading today's great
tip!
Today I'm sharing Part 2 of a great trash to treasure story. If you missed
Part 1, you can catch up
here. I have been very lucky to find some interesting (and awesome!) things in my
neighbor's trash that I have scooped up and put to good use...like
this and
this!
Today I want to show you how fabulous a gross, dirty plant pot can look after
you give it a little chalk paint love! AND...I'm sharing tips for painting a plant pot without having to remove
the plant! How's that for a double-score, right? This DIY story is about unrelated
items coming together to form a cohesive whole. If something is functional,
even if it's ugly, I like to find a way to bring out its hidden beauty rather
than spend the money to replace it!
Chalky paint is the common denominator in this DIY equation!
Affiliate links may be included for your convenience; my full disclosure policy can be found here. If you click through and make a purchase I'll receive a small
commission at no extra cost to you!
This planted fiddle leaf fig was sitting on our back porch when we bought our
Texas home...in this same get-up. It was twice as tall, with 5 strong stems.
It looked great.
And then I left it outside during a frost, and it died, and I felt terrible!
We left it for months, hoping to see some new growth...and were just about to
toss it to the curb when I finally spotted some sprouting new growth. So it's
been carefully tended, and brought inside the house, so that frost would not
be an issue again and I can baby it (1 cup of water every Monday morning seems
to be the trick)!
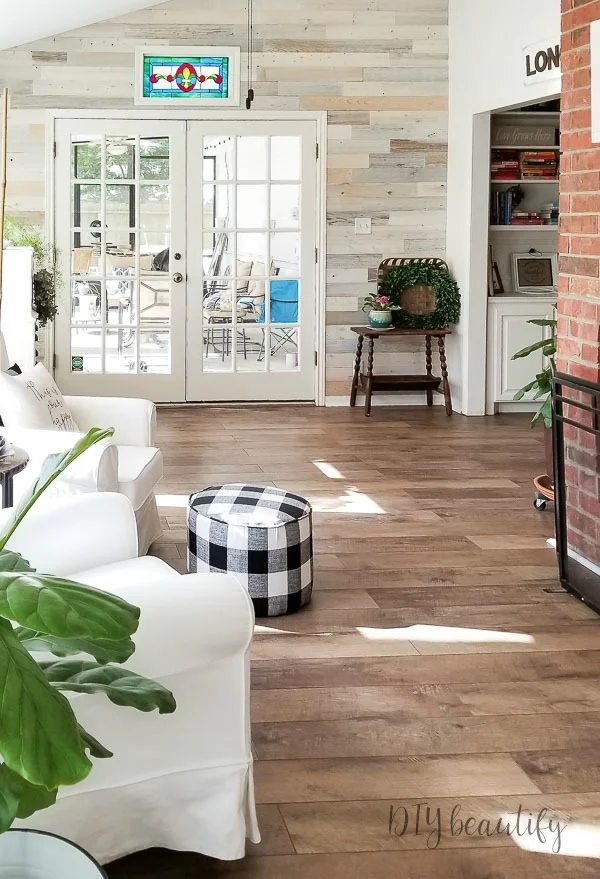
When I share pictures of our
sun room makeover, with its
wood walls and
recently installed farmhouse floors, I always have to hide this large pot...because let's face it, it's not that
attractive!
See if you can spot it in this picture below...
When I created the
DIY plant stand from a curbside find, I knew it would be really cute paired with this potted fiddle leaf. But
obviously the pot needed to either be tossed, or it needed a total makeover!
Have you taken a look at large pots recently? They are not cheap! I would much
rather revive an old planter than dish out money for a new one!
And let's face it...I'm lazy and have no desire to repot anything! 😉
I really, really didn't want to have to take the fiddle leaf fig out of the
pot to paint it, so I figured out a genius (if I do say so myself 😉) way to
paint the pot while the plant was still inside.
How to revive old flower pots with chalk paint
Start with a good cleaning
Before you paint anything, whether it's a piece of furniture or a plant pot,
start with a real good cleaning. I love
Totally Awesome...it's
cheap and it works great! Spray it on, wipe the dirt off, it's that simple!
You will be amazed at how this product
effortlessly cleans your baseboards in just seconds!
But here's the thing - it's still a cleaning product, filled with harsh
chemicals. You don't want to get any of that on your tender plant's leaves.
So, rather than spraying directly onto the pot (unless it's empty), spray the
cleaning solution onto a rag first and then wipe the pot to clean it.
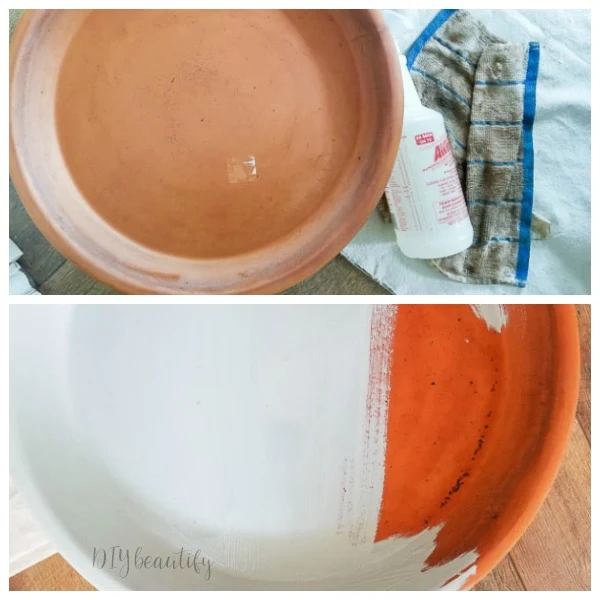
While I was cleaning the planter, I took a look at the terracotta tray that
the pot had been sitting in. It was beyond filthy! I thought I would see if
the Totally Awesome could cut through the grime. I was so skeptical that I
didn't take a before pic. But you can see from the rag just how dirty it
was...and the Totally Awesome cleaned it right up! Which is a good thing
because I decided to paint it too!
Paint the pot
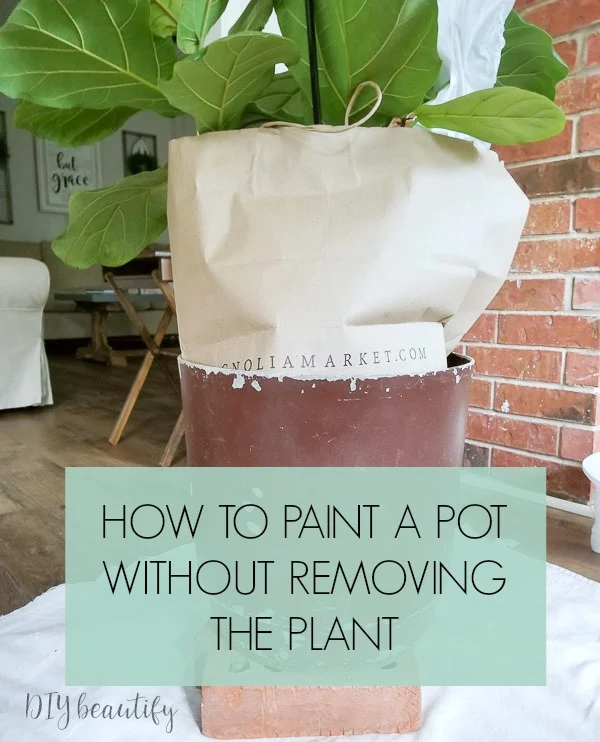
Here is my tip for painting a pot, even the rim, with the plant still
inside...Cut open a large paper bag so it's one long piece, wrap it around the base of
the plant and staple it closed! The plant can still breathe because it's open
at the top but this frees up the entire planter so you can safely paint it
without getting any paint on your precious plants!
I also like to elevate items I'm painting so it's easier to paint around the
base. I find a couple bricks usually work well.
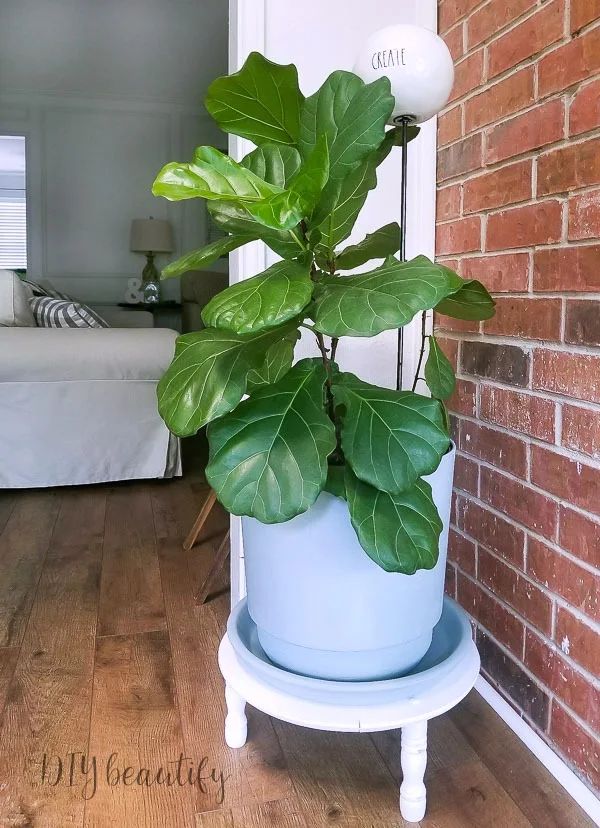
I used Savannah Mist, an
airy pale aqua from
Dixie Belle Chalk Paint Company and my favorite
Purdy paintbrush for
this flower pot makeover.
One coat was all it took to completely cover all the nasty spots!
And all those unsightly gouges on the pot look completely different when
they're painted! From a distance, they virtually vanish!
These unrelated items...a few parts from an antique piece of furniture, an
ugly, dirty and gouged pot and a terracotta tray...came together to create
something beautiful that looks like they were made to go together!
I guess there's a lesson to be learned here! Before you toss something to the
curb, take another look!
Of course this doesn't apply to my neighbors...keep putting out your trash
people 😉
This old planter, once an eyesore, doesn't have to hide in the corner anymore!
The soft colors are perfectly paired with the rest of the cottage decor in my
sun room!
Pin to Save
Pinning and sharing my images is a great way to support my site, thank you! ❤


Comments
Post a Comment
Your comments are like sunshine and chocolate! Thanks for taking the time to leave a nice one ;) I read all comments and love to respond. If you don't have Gmail, please leave your name!