Easy No Sew Fall Pillow Ideas
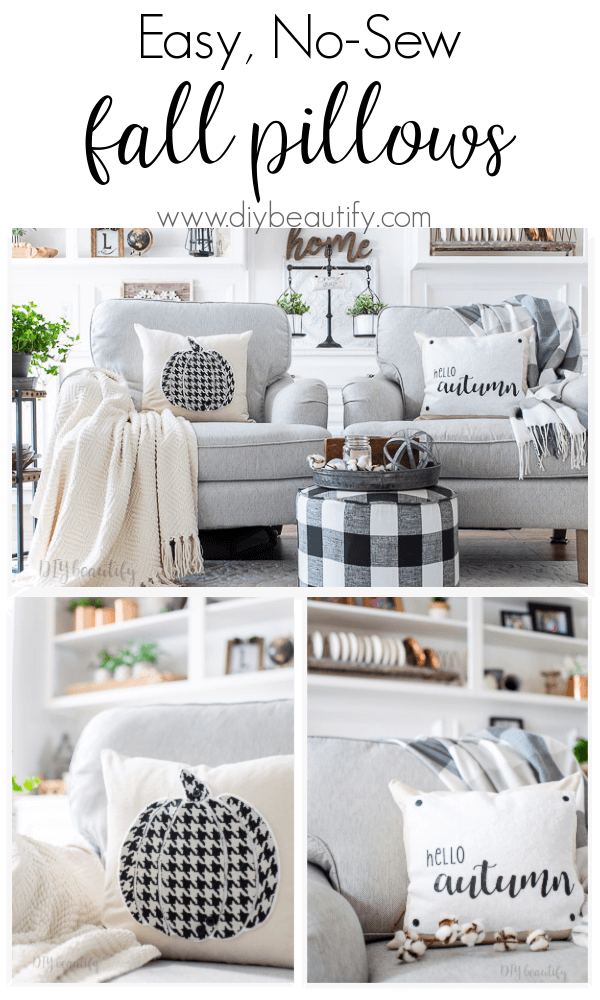
I'm sharing two different no-sew Fall pillow ideas that make a dramatic statement in black and white, perfect for all you neutral lovers!
Affiliate links may be included for your convenience; my full disclosure policy can be found here. If you click through and make a purchase I'll receive a small commission at no extra cost to you!
Hi friend and welcome! I'm excited to share these easy, no-sew fall pillows with you today! I'm joining an inspiring group of bloggers to share ideas and inspiration all week for our Fall Ideas Tour. Make sure you read through to the end where you'll find all the links!
This year, I decided to keep my fall decor simple. I'm in the process of purging a whole lot of stuff, and I didn't even make it up to the attic to bring down the fall bins of decor. I was craving a calmer, clutter-free home.
This year, I decided to keep my fall decor simple. I'm in the process of purging a whole lot of stuff, and I didn't even make it up to the attic to bring down the fall bins of decor. I was craving a calmer, clutter-free home.
But that doesn't mean my home doesn't have any fall decor! It's just simple and neutral, like the DIY drop cloth pumpkins that I shared last week.
Fall DIY Pillows
Part of clearing the clutter means that I'm being very conscious about what I bring INto my home. You probably know I'm a bit of a pillow addict, and one of my tricks to keeping the sheer number of pillows I own under control is pillow covers. Rather than purchasing new inserts, I simply recycle the covers I own for the seasons.
Which leads me to these easy, no-sew fall pillow covers that I want to share today.
I made two different types of pillows, the reason being that not everyone owns a die cut machine. You can make the pumpkin pillow by simply saving and printing a pumpkin design you find online. Let's make that one first.
The very cool thing about both of my pillow ideas is that they're temporary!
They are lightly attached to the pillow cover with buttons, but the entire design is removable! I'll show you what I mean as we get into the tutorial.
How to Make a No-Sew Fabric Pumpkin Pillow
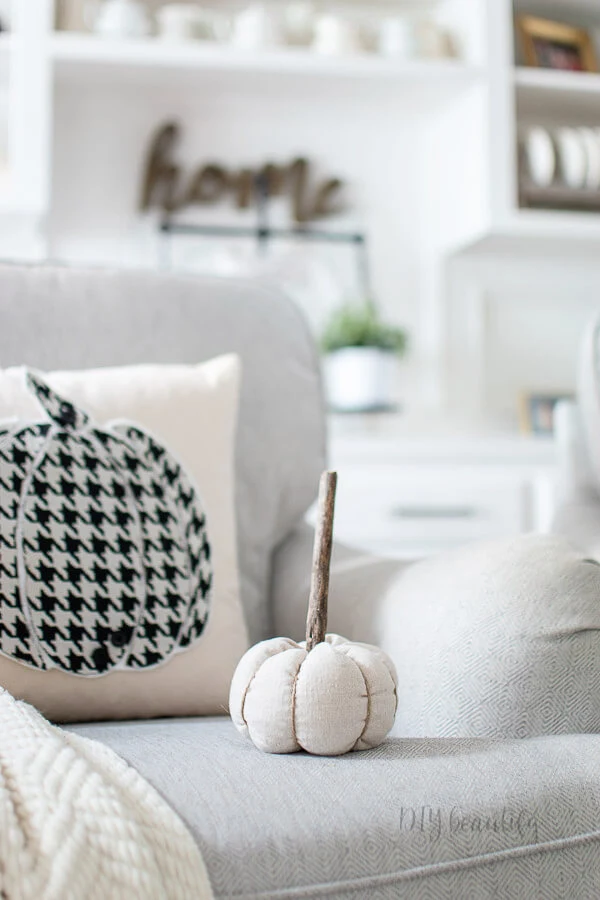
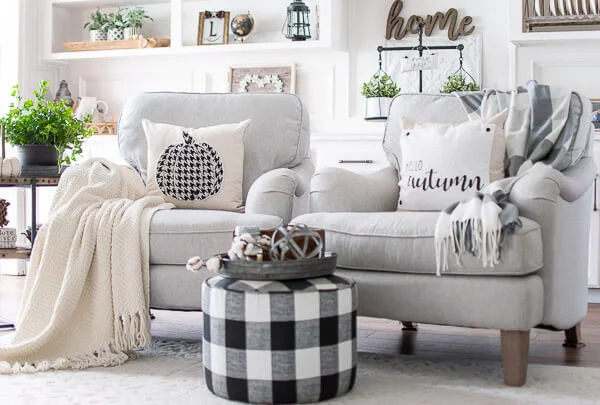
How cute is this black and white houndstooth pumpkin pillow? I found the fabric recently on massive clearance, and bought several yards because I think I'll recover my dining room chairs. However, a little piece for this pillow was a must! Here's what you'll need to make this pillow.
Supplies
- neutral pillow cover
- about 1/4 yard of heavy weight fabric (like upholstery fabric)
- about 1/4 yard of white cotton batting (I used the brand warm and natural)
- pinking shears (or really sharp fabric scissors)
- straight pins
- lighter (optional) or fray check
- 12" square piece of card stock
- fabric glue
- 3 black buttons
- needle and thread
Create your pattern
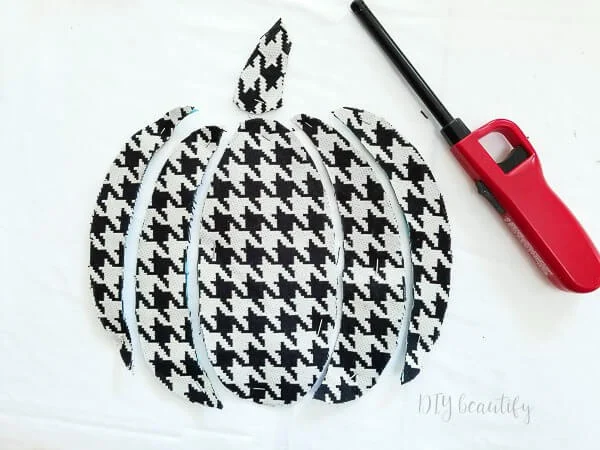
I used my Silhouette machine to cut out a pumpkin pattern onto card stock. Like I said above, if you don't own a die cut machine, you can copy and print pumpkin clip art from Google images. There are several to choose from at this site, just please make sure you're using the free version!Pin pattern to fabric and cut
Once you have your pattern cut out, pin the pieces to your fabric of choice and cut. Not a fan of neutral or black and white for fall? Use any fabric you want! Make your pillows suit your style!
Fray check or lighter
If you have fray check, go ahead and apply that lightly to all cut edges. If you don't have fray check, you can achieve similar results with a lighter. PLEASE PROCEED CAUTIOUSLY if you choose this step! Keep the flame moving along the fabric edges at all times. You can read more about using a lighter to melt and seal edges on this short video I made. The heavy-weight fabric won't curl up like the satin did, but the loose edges will be sealed. I also used this technique to remove the fuzzies when I made my DIY bee skeps. But remember, be careful and smart! Don't burn your house down!!!!!!!
Glue pumpkin pieces to backing fabric
Lay out the pumpkin pieces onto a piece of white felt or natural cotton batting. I love this fabric for its softness! Glue the pieces one by one using a good quality fabric adhesive.
Cut out design
Give the fabric glue time to dry and then use sharp fabric scissors to cut out around the whole pumpkin, leaving about 1/4" of white edge.
Stitch to pillow cover
I told you this was a no-sew pillow, and it is...but you do need to know how to sew a button!! Unzip the pillow cover, lay the design where you want it, using a couple pins to keep it in place. Then attach the pumpkin design to the pillow cover with a couple strategically placed buttons. Just stitch them on with black thread!
How brilliant is that? 💡 Now when fall is over, I can simply snip the threads holding the buttons in place and the design is completely removable! Meaning I can use the cover for another design!
You would never know from looking at it that this design is removable! The white edging looks like piping!
I promised you TWO FALL pillows, and here is the next one.
Heat transfer fall pillow
You will need both a Silhouette or Cricut machine, as well as a heat press for this next pillow.
Supplies
- neutral pillow cover
- about 1/4 yard of white felt or natural cotton batting
- black heat transfer vinyl
- Silhouette or Cricut
- heat press (I have the Cricut easy press and it's perfect!)
- heat press mat (or towel)
- 4 black buttons
- needle and thread
- pinking shears (or very sharp fabric scissors)
This design is also removable, held in place just with the black buttons.
I used my Silhouette machine to create my design, "hello autumn" to the exact size I wanted it to be based on the size I cut my cotton batting. Then I reversed the image and cut it out onto black heat transfer material.
Prepare backing fabric
I cut my white natural cotton batting fabric to the size I wanted with pinking shears. I ironed it well with my heat press.
Iron on design
I got the Cricut Easy Press for Christmas last year, and while I haven't used it a lot, it's so easy to make my own t-shirts and add designs to any fabric! I just plug it in and heat it up, set my design in place, and press it until the timer goes off.
Then I gently peeled the plastic backing away to reveal my design. Easy peasy!
Stitch to pillow cover
The last step was to center the white cotton on my pillow cover and stitch a button in each corner to keep the design in place.
Both of these pillows were very easy to make, and I love how custom they look! But I think the BEST part is that each of the designs is removable! Perfect for commitment-phobes and pillow addicts like me! 😊
I hope you're inspired!!! Please do let me know if you decide to make this project, I'd love to cheer you on and answer any questions you may have along the way!
Pin for later
As promised, here are the links to the rest of the tour. Simply click on the link to head straight to that blogger's project!
Monday - Mantels
Tuesday - Tablescapes
Salvaged Living / Our Southern HomeWednesday - Wreaths

Petticoat Junktion / Lora Bloomquist / Exquisitely Unremarkable
Bliss Ranch / The Interior Frugalista / Chatfield Court
Thursday - Crafts & DIY

Domestically Speaking / DIY Beautify
Homeroad / Christina Faye Repurposed
not pictured Weekend Craft
Friday - Porches
The Chelsea Project / Vinyet etc / Worthing Court
Cottage at the Crossroads / House of Hawthornes / Hymns and Verses
Cottage at the Crossroads / House of Hawthornes / Hymns and Verses








I love the pillows you created, Cindy! I bought similar pillow covers last year at Ikea planning to make some new fall pillows. Now that I've seen how you made yours with the design being temporary, I need to get busy and make a few designs for my covers. I totally was fooled by your first pillow and thought that you used piping. I was happy when I read that it wasn't piping, I was seeing the fabric behind the houndstooth pumpkin pieces. Great idea and I'm definitely inspired!
ReplyDeleteThanks, I'm so happy to inspire you!
DeleteThese pillows are so fun! I want to try them out for my home!
ReplyDeleteHey Lindsay, thank you! Have fun making fall pillows!
DeleteI love that you can just easily remove the designs and go on to the next season. Very creative!
ReplyDeleteThanks Pam!
DeleteLots of new to me info in this post, as a non sewing gal. Pinned. I love the black and white, I think I just love pumpkins in any shape or color!
ReplyDeleteThank you!
DeleteBoth of your pillows are super cute Cindy and they go so well with all of your bright neutral decor.
ReplyDeleteThanks Patti, I appreciate that!!
DeleteOk, Miss Cindy. You get the prize for most practical! I adore the patterns and how they would fit into any style of decor. And the fact that they are little mini seasonal slip covers....so super smart. Excellent work, my friend. Happy Fall! XO
ReplyDeleteAww, thanks Susie!!! So glad you love them!
DeleteYou had me at no sew! I can't sew a lick but I surely can sew a button! :-) The pillow is so adorable!
ReplyDeleteHaha, thanks Christina!
DeleteI love these pillows! You had me at no sew and love the neutrals and black and white in your home! Just gorgeous!
ReplyDeleteThank you!
DeleteI love this project you did such a great job, I am pinning it to my craft board for the season.
ReplyDeleteThese are super sweet and look perfect in your lovely home.
ReplyDeleteThanks Kim!
DeleteLove your Fall pillows! I also use the same pillow inserts and just switch out the covers but your idea of using buttons to attach seasonal graphics is briliant! I got a Cricut maker and Easy Press for Christmas last year and haven't even turned them on yet. Seeing your pillows definitely has inspired me to learn how to use them.
ReplyDeleteAwesome Marie, you will love the Easy Press!!
DeleteBoth of these pillows are adorable! I love that houndstooth pumpkin! So classic.
ReplyDeleteThanks Amy!!
DeleteOk your pillows are ADORABLE!!!! LOVE them both!!!
ReplyDeleteThanks Maryann!
DeleteSuper cute! Yes, I've learned that when you want to swap up your pillows each season, you need to not have so many of the insides, just the covers. Great idea with the buttons. Love your built-ins; such a pretty space to photograph!
ReplyDeleteThanks so much!
DeleteOK...mind officially blown! The lighter on the fabric and then the buttons holding the image on the pillow!!!! Whaaat? So borrowing those ideas.
ReplyDeleteThanks for the inspiration.
So happy to join you on this fantastic blog tour!
Hugs, Lynn
Aww, thanks so much Lynn!! Happy to blow your mind lol!! 😊❤
ReplyDeleteWell, Cindy, my absolute favorite color is houndstooth, so you really got me on your pumpkin pillow cover!!!! It is adorable! I am, also, a big fan of cricut and use mine quite a bit. Good job on both pillows!
ReplyDeleteThank you so much! Houndstooth is such a classic!!
DeleteCindy,
ReplyDeleteThese are so adorable! And I love the fact that they're pretty much no sew. I have a cricut and the easy press but haven't really used them. You have inspired me to get cranking with them and start creating some cute things like these pillows. So glad you're on tour with us.
Thanks Angie, you will love how easy it is to make home decor using the Cricut and Easy Press!
DeleteAdorable fall pillows Cindy, and I love that they are no sew (as I didn't inherit the sewing gene).
ReplyDeleteHaha, thanks Kristi! They should be a cinch for you!
DeleteYour pillows are so cute! I especially love that the pumpkin is removable, that's really smart!
ReplyDeleteThanks so much Eileen! It definitely helps with storage!!
DeletePerfect for for commitment-phobes and pillow addicts like me too! These are just the cutest!
ReplyDeleteYes, exactly! Thanks so much Laurie!
Delete