How to Upcycle a Thrift Store Berry Wreath
Got a berry wreath with damaged berries? Don't toss it, upcycle it quickly and easily, with a brand new color! I'll show you how!
This post may contain Amazon or other affiliate
links. As an Amazon affiliate I earn from qualifying purchases.
My full disclosure policy can be found here.
Hello friend and welcome to the May edition of Thrifty Style Team. We are a
group of blogger friends who come together once a month to share thrifty decor
and DIY ideas with you!
Click here to see all my Thrifty Style Team projects.
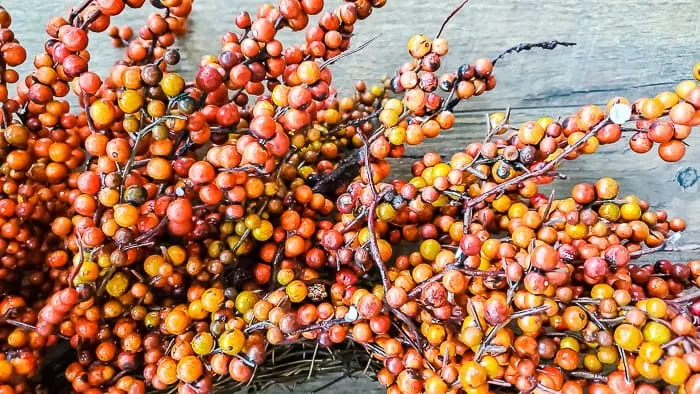
You've probably got one of these berry wreaths in your attic. Mine came from
the thrift store and I paid $4 for it.
I love the size of the wreath, it's a generous 24 inches. I find a bigger
wreath makes a bigger impact! What I didn't love was all the damaged foam
'berries'. These wreaths are quite fragile, and the berries have a tendency to
break and split.
Once they break, the white insides are very obvious and difficult to disguise.
As you can see, the wreath I purchased has fall colors but I found an
inexpensive and thrifty way to upcycle it for summer decor!
You know I love blue, my home is filled with blue. I think it's been my very
favorite color forever! My
dining room is filled with vintage blue and white dishes and I used some of them this spring to make a
vintage plate wreath. I've also painted an antique cabinet in my office the most
beautiful bold turquoise color. The cabinet holds craft supplies.
Click here to see my office
(I have the prettiest blue velvet office chair).
So it was no surprise that I chose to upcycle this berry wreath with blue
paint! With just a couple cans of blue spray paint, I transformed this wreath
into a blue berry wreath and made it something beautiful again!
How to upcycle a thrift store berry wreath
We have a Habitat ReStore in town, but it's only open a couple days a week and
usually when I swing by, it's closed.
I finally made it the other day and found some vintage blue dishes, as well as
this extra large berry wreath! It was even on sale and I knew just what to do
with it.
I made another stop at Lowes and picked up two cans of Krylon ColorMaxx spray
paint in Oxford Blue.
I love this paint and primer in one. Plus, it's made for both indoor or
outdoor use and will cover metal, wood, plastic and more so I knew it would
efficiently cover my berry wreath.
Designer tip: it's worth it to pay a little more for a quality spray paint; your job will go faster, be easier and you'll see better coverage!
How to spray paint a berry wreath
This was an outdoor job, even though our humidity has been in the 90's. I
waited until the middle of the day when the humidity was a little lower and
the sun was shining, and headed outside with my wreath and spray paint.
I set my wreath on a sheet of dollar store poster board, to protect it from
bugs, dirt and grass. I learned the hard way not to spray paint on top of the
sidewalk, driveway or path of any kind! Overspray is real, and it's very
difficult to remove! If you spray paint in the grass, it will be soon cut
away!
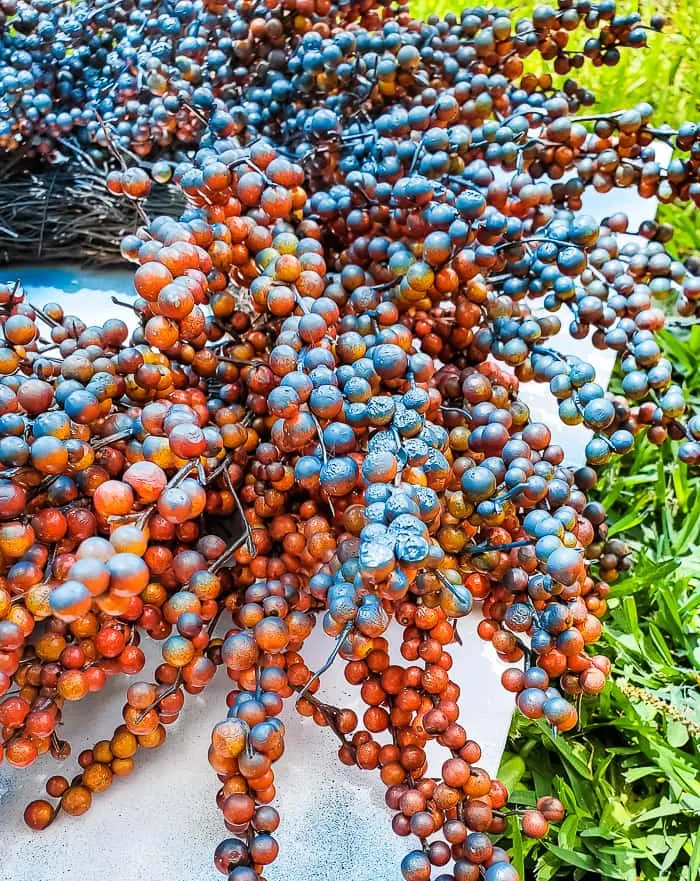
The tip to painting a berry wreath is to cover all angles! Keep moving and
spraying the wreath from different angles to make sure to get the best
coverage.
This sounds difficult because there's so much depth to a berry wreath but it
really isn't. Spray paint can reach all those difficult spots, just keep
moving. Spray from the right, the left, the top, the bottom. Then move around
the wreath and repeat until you don't see any of the original color (or very
little).
Once I had what looked like really good coverage on the top of my wreath, I
let it dry for about an hour, then flipped it over and did the backside.
Finally, I hung the wreath up outside so I could walk around it from eye level
and hit any spots that I missed.
I brought the spray painted wreath into the house overnight so it could dry
properly in the air conditioning.
I didn't bother with a top coat sealant, primarily because I didn't have any
on hand. But I think a glossy coat of sealer would look nice and I'll probably
do that in the future.
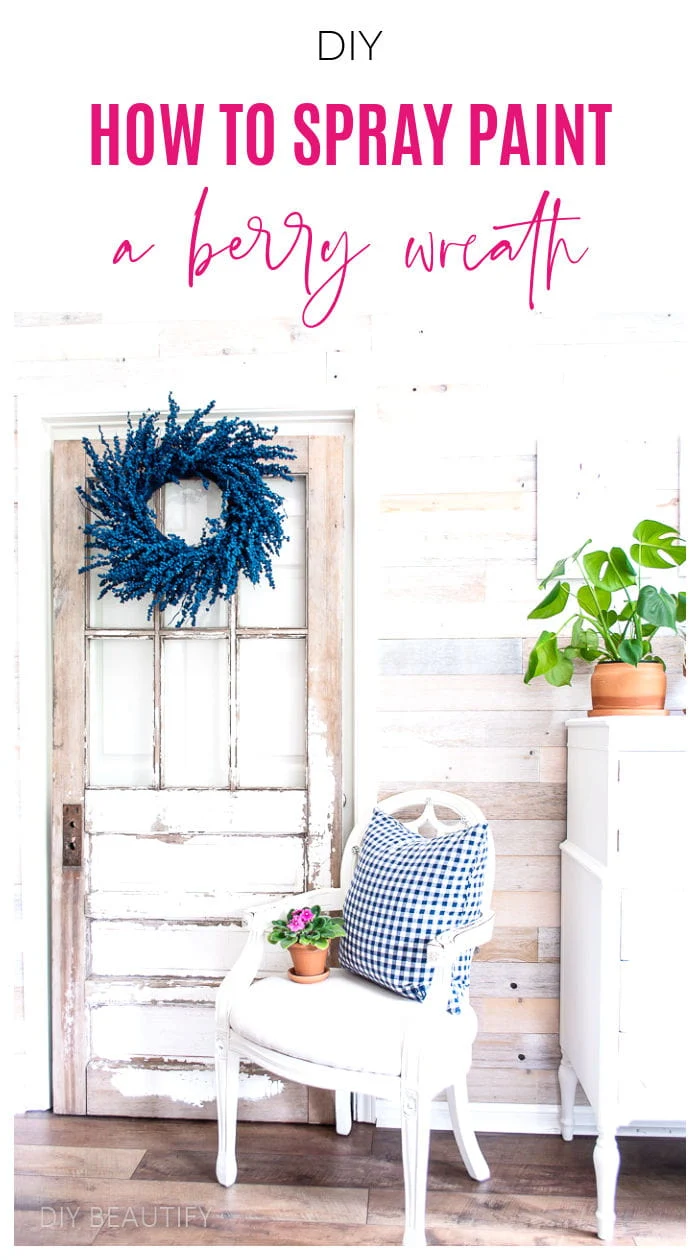
For now, I hung the wreath on the vintage door that I moved into our
sunroom. I love variety and moving furniture is an inexpensive way to get a whole
new look in a space. Once the paint has cured I'll move the wreath to my front
door and plan to decorate it with some Americana decor (coming soon!).
I love how unique this berry wreath looks now. It looks like it's covered in
blueberries!

SHOP THE POST
Spray painting a berry wreath is such a simple way to give it a completely
fresh look!

bringing beauty to the ordinary,
Before you throw that wreath out, ask yourself, "Can I spray paint this?"
What do you have to lose?
Here's what the rest of the Thrifty Style Team came up with this month!
Please click on the links below to head directly to their post.
More Thrifty Style Team Projects
Redhead Can Decorate -
Lily of the Valley Green Ball Jar Centerpiece
The Painted Hinge -
How to Repurpose a Cabinet Door to Add More Depth and Interest to Framed Art
Chaz' Crazy Creations -
DIY Candle Holders
2 Bees in a Pod -
Decoupage Vase with Napkins
Vin'yet Etc -
DIY Plant Stands From Vintage Stools
Sweet Pea -
How to Make Citronella Candles
DIY Beautify -
How to Upcycle a Thrift Store Berry Wreath
Our Crafty Mom -
Round Side Table Makeover with Napkins
Cottage on Bunker Hill - DIY Cottage Garden Tower
White Arrows Home -
Vintage Brooch Magnets
I Should be Mopping the Floor -
5 Ways to Display Free Printables
Lora B Create and Ponder -
Upcycled Old Garden Fencing Cloche How To
What Meegan Makes -
Vintage Embroidery Hoop Shadow Box
The How-to Home -
DIY Hurricane Candle
Pin it to Remember

Have you ever spray painted a berry wreath? I'd love to hear about it!
Need more DIY wreath ideas?
Click here to see all my wreaths.
bringing beauty to the ordinary,


Cindy, that is just beautiful and looks awesome on that door. I do a lot of repurposing but would never have thought of doing this.
ReplyDeleteDenise TX
Thanks Denise, always happy to inspire!
DeleteGreat idea! I seriously thought it was a wreath already made in blue. Pinned
ReplyDeleteThanks Cindy, so happy to fool ya 😉
DeleteYou are so clever, Cindy! I never would have thought to spray paint a berry wreath like yours to give it a new look. I love the blue and it looks great on your door. It's also going to be the perfect base for a patriotic wreath to enjoy this summer.
ReplyDeleteThanks Paula, I figured I'd try it and see what happened!! And yes, I've already added some patriotic decor to it ❤💙
DeleteThis looks just like the wild blueberries we have here!! So stinkin' cute!!!
ReplyDeleteThanks Jennifer, it's such a great color now!
DeleteWhat a simple and creative way to make a fresh new wreath for Spring and Summer. Thanks for all your tips and tricks, Cindy. I can't wait to try this soon. Have a great weekend.
ReplyDeleteThanks Meegan!
DeleteWhat a great idea! I love how it turned out and great color! Wonderful hoping with you and I hope you have a great weekend.
ReplyDeleteThank you Chaz!
DeleteHi Cindy, I don't currently have a berry wreath, however I will no longer look at them the same, spray paint is just a game changer isn't it! I LOVE your pretty blue wreath, excellent idea! xo
ReplyDeletePaint IS a game changer! Thanks Laurie 😉
DeleteWhat a genius idea! And I love that pretty blue color <3 So happy to be part of this super fun blog hop with you!
ReplyDeleteGreat way to fix those styrofoam balls, Cindy! This is going to look great with your patriotic decor, and will be adorable with yellow lemon decor, too!
ReplyDeleteThanks Lora, it definitely suits my home decor better and I love that I can use it year round!
DeleteCindy - you are so smart! We never would have thought to spray paint a wreath like this. And you know that we love the color blue. Now we will be on the hunt to find a berry wreath that we can makeover. Just beautiful!
ReplyDeleteThank you, I'm so glad you like it!
DeleteI never would have thought to do this, Cindy! You are so clever and it turned out beautifully. What a wonderful way to repurpose decor.
ReplyDeleteThank you so much Mary Beth!
DeleteGirlfran, you've done it again. This is such a fun makeover...one that leaves me thinking, "why didn't I think of this?". Loving the blue. xoxo
ReplyDeleteAww thanks Kristi, I wasn't sure it would work because I'd never seen it done before but I think it was successful!
DeleteI am in love with this! The blue color is outstanding!!! Thanks for the inspiration!
ReplyDeleteThanks so much Kristin, I'm glad you like it!
DeleteCindy,
ReplyDeletel love how this turned out and I'd have never thought to paint a wreath like that. I'd love to share a link to your post on my Sunday Dirt road Advetures if that's ok. It will link directly back to your tutorial. Thanks for so much inspiration. Rachel - The Ponds Farmhouse
Thanks Rachel, of course!
Delete