How to Make a Pinecone Scale Pumpkin
Use foraged pinecones to craft a charming pinecone pumpkin! Tutorial shows step by step how to make your very own textured pumpkin with pinecone scales and a stick bundle stem
This post may contain Amazon or other affiliate
links. As an Amazon affiliate I earn from qualifying purchases. My full disclosure policy can be found here.
Hi friend! Welcome to another fall tutorial, this time it's a pinecone
pumpkin!
We've been having a lot of rainy days and being stuck inside the house means
crafting! I've been crafting up a storm this fall and have so many new items
in my fall decor that I've made for very little!
Every Fall, I always love pulling this pumpkin out of storage! It's my very
favorite, and I wanted to try to recreate the look using actual pine cone
scales. The scales on my inspiration pumpkin are foam but look like birch.
Now the thing you need to know about living near the Gulf coast of Texas -
pinecones are not readily available in the wild. We have some scrubby
pines but nothing large enough that produces the large pine cones I needed for
this project. If you live up North, you can probably go in your backyard and
forage what you need to make some DIY pinecone pumpkins! If you live in the
South like I do, you can purchase pine cones from the craft store or even
on Amazon. I bought sugar pines last year to use on my
Christmas mantel!
Luckily, I have been collecting pine cones from around the country...I even
have some large ones from our backyard when we lived in Oregon! I have foraged
pinecones from my in-laws home in North Carolina, and when we visit Colorado,
I always pick up a few on our hikes.
So I grabbed a couple of mid-size pinecones (4-5" tall) and ended up using
every last scale to create my pine cone pumpkin! You may have already spotted
this DIY pinecone pumpkin if you toured my
Fall bedroom last week and today I'm going to show you how to make it!
How to make a pine cone pumpkin
Supplies
- medium sized pumpkin (I used a foam one from Dollar Tree - did you know they're now available in white?)
- pinecones
- hot glue (I love these glue sticks, they hold so strong!)
- skinny sticks from backyard
- jute twine
- heavy duty crafting sheers (not pictured but VERY important)
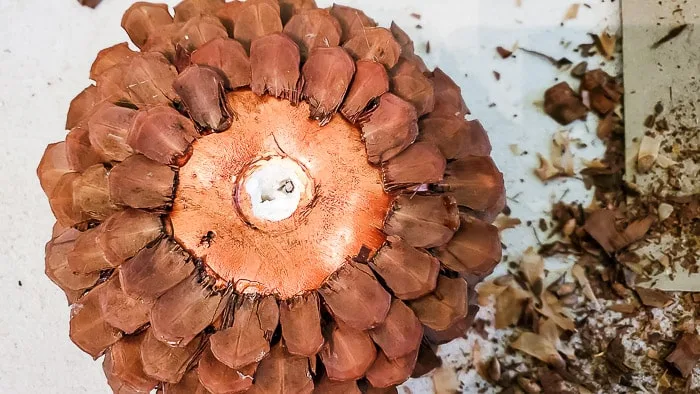
The pumpkin I'm using is a dollar store one that I painted copper last year. I pulled the stem out and decided not to paint the pumpkin. In hindsight, maybe I should have painted it brown because as you'll see once my pinecone pumpkin is finished, there are a few spots where the copper peeks through. It's honestly not a big deal, but if I make another one, I'll remedy that!
A quick word about pinecones
Here's a funny thing - you look at the two pinecones above, and they look the
same, right? But when I started removing the scales, I quickly realized they
were totally different, like from different pine trees! The scales of one
pinecone were thinner while the scales of the other pinecone were noticeably
thicker and sturdier (and looked more like "real" pinecone scales, if you know
what I mean). I ended up using the thinner scales on the bottom of the pumpkin
and the more realistic scales at the top where they'd be more visible. You'll
see more of what I mean as we go through the tutorial.
Step 1: Remove scales from pinecones
Start by bending the scales a little to loosen them where they're attached to
the center of the pinecone and then cut them off using
sturdy shears. Cut them as close to the cone of the pinecone as possible!
Like I said above, I chose to start gluing the pinecone scales at the bottom
of my pumpkin so the prettier scales would be at the top. I didn't cover the
bottom of my pumpkin, but glued the first row of scales along the bottom edge
as you see below. For subsequent rows, I overlapped the scales over the
previous row.
Step 3: keep gluing!
Making a pinecone pumpkin is a perfect rainy day project, but it does take a
little time to glue those scales on one by one to the pumpkin! My poor
fingers...that hot glue is HOT!
At this point I had to dismantle the other pine cone because I ran out of
scales. The thicker pinecone scales popped right off when I wiggled them, so I
thought I would get out of trimming the ends. That was a mistake as it caused
me some problems when I got to the next row! See that thick part at the
pointed end? I ended up trimming that off.
I just worked my way around the pumpkin until I had it completely covered in
the pinecone scales.
Step 4: create stem
I wanted my pine cone pumpkin to have the same kind of stem as my inspiration
pumpkin. As you can see it's just a bunch of small sticks tied together. I
went into my backyard and gathered several small sticks to create a bundle.
Step 5: finish pumpkin
I wrapped the sticks with twine and then inserted the bundle into the hole in
my pumpkin. I used hot glue at the base to secure them.
Finally, I filled in the last little section with the smallest pinecone
scales.
This wasn't a difficult DIY but it did take a little time. However, my DIY
pinecone pumpkin is sturdy and so cute and I know I'll enjoy it for years to
come!
I left it plain for now, but am considering giving it a little whitewash so it
more closely resembles the inspiration pumpkin - what do you think? Should I
leave it at is or add a little white paint?
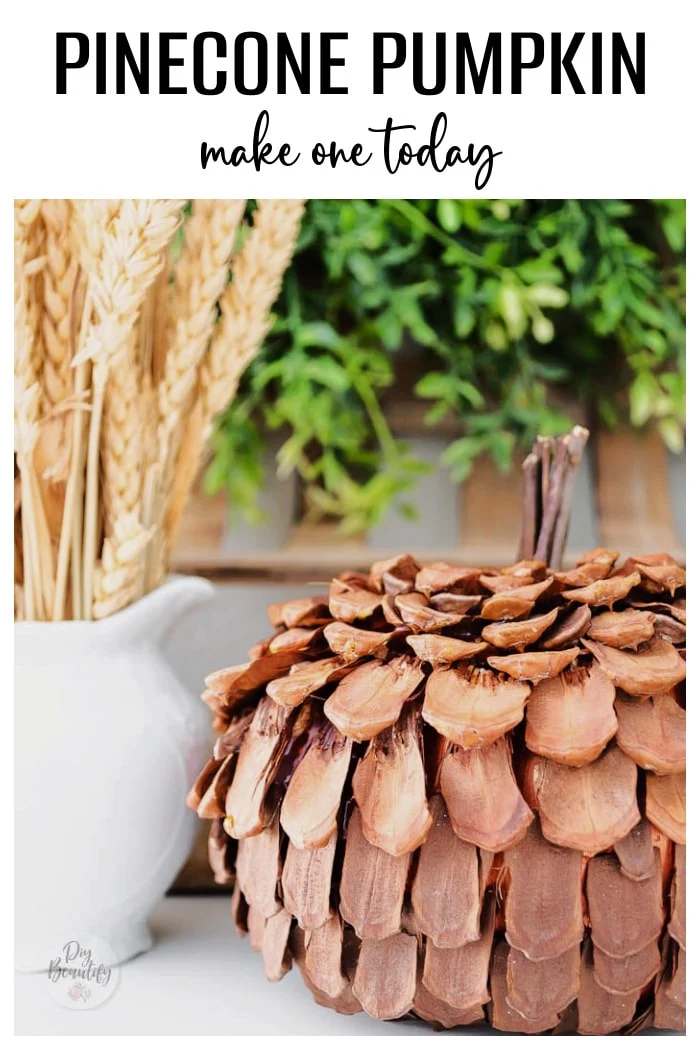
The finished pinecone pumpkin
I truly love texture, and this pumpkin certainly has texture in spades! I
styled it on my little white bookcase-turned-china-hutch in my
Fall dining room, alongside my
DIY farmhouse pumpkin. Click
here to see how I made the farmhouse pumpkin stem.
What do you think? Would you consider this rainy day project and craft a
pinecone pumpkin for your Fall home?


I LOVE, LOVE, LOVE the pinecone pumpkin! I would not white wash it. Let the rich natural color add warmth to your space! I’m sure it took time, but so worth it! I made a pinecone wreath many years ago with tiny pine ones and it’s still one of my favorite wreaths!
ReplyDeleteThank you Dorothy! It did take a little time but I know I'll be able to enjoy it for years!
DeleteI think it is so cute and so original! I think it looks great as it is, but it would look good painted also. Thanks for sharing this cute craft!
ReplyDeleteThanks so much! I'm thinking I'll probably leave it as is, but I want to make another and I'll paint it!!
DeleteI love this idea. I live up "north" but evidently it's not far north enough (lol) because we don't have the really big pinecones in this part of NJ. We have a range of smaller ones. I have my "spots" that I get mine. I found the tiny ones on a tree in 1996 while delivering phone books in my town across from Home Depot. HA! I found some longer thin ones under the trees that grew behind the shopping center where I lived in the late 80s ad early 90s. (They had just planted the trees then. They are HUGE now!) I get the rounder ones in front of the restaurant at a golf club near me. All are 25 minutes away but I drive that way a lot. I have few boxes of them in the garage. I would LOVE to have a tree that produced BIG ones!!! Next time I see a big one in the thrift store.....it's MINE! LOL I do have some that are a little larger that I bought. They are in a basket at Christmas time. I can't wait to make this!
ReplyDeleteThat is awesome I love that you have your "picking spots" LOL! Have fun making your pumpkin 😉
DeleteTurned out very cute. Unfortunately, those heavy-duty snips are unavailable and they seem critical to the project.
ReplyDeleteThank you! You can use any heavy duty sheers!
DeleteLove this craft and with my bag of pine cones in the basement you can rest assured I will be making this! Thank you so much for sharing and the great tutorial. I love white but love it just the way it is. So glad you might make another and white wash it…if so please be sure to post about it!!
ReplyDeleteThanks so much Carrie so happy you are inspired to make some! Send me a pic!
Delete