French Rabbit DIY Wood Hanging Sign
How to make a vintage French chippy rabbit sign from a $5 store-bought wood rabbit cutout.
This post may contain Amazon or other affiliate links. As an Amazon
affiliate I earn from qualifying purchases.
My full disclosure policy can be found here.
Don't you just love the Target Dollar Spot? You never know what you might find
and when I spotted this wood rabbit for just $5, I grabbed it!
Unfortunately I can't find a link for this exact wood rabbit but if you're
unable to find it in your Target Dollar Spot, you can buy
this one, also from Target. It's quite a bit larger but would still be great for this
Spring DIY project, and it's only $20!
I say "spring" but really, I'm seeing rabbits in home decor all year 'round,
and I think this French-i-fied rabbit would look cute anywhere, any time! 😉
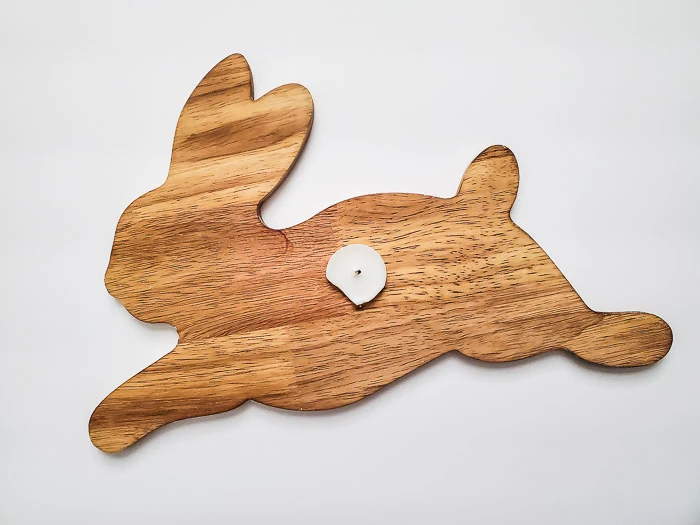
It wasn't until I got home that I realized my little wood rabbit board was
labeled as a "rabbit charcuterie board". Well, I had other plans for it!
How to make a French rabbit DIY sign
The steps are really quite simple, and if you're a crafter and have supplies,
you probably won't even need to purchase anything additional!
Supplies
- wood rabbit board ( here's one from Amazon)
- white candle
- scraper tool (razor blade)
- white chalk paint ( this is my current fave)
- black HTV (you could also use regular matte vinyl)
- French typography* (or stencil or rub-on transfer like this)
- Silhouette or Cricut
- heat press or hot dry iron
*
if you're a subscriber to my newsletter, you'll be able to find my custom
design in my Resource Library, free for personal use (look for link in my
Sunday newsletter; click
HERE to sign up)
Step 1 - Wax and paint rabbit
I knew that I wanted my sign to be chippy, so I followed the easy steps I
shared here
Chippy White Spindles in Minutes.
Because this rabbit board already has a stained base, that saved me a step! I
waxed it by rubbing a white candle across the top and edges. This allows the
paint in the next step to be scraped off, resulting in an authentically chippy
look!
I painted the board with two coats of chalk paint, allowing the first coat to
dry before repainting. Then I scraped it with a razor blade to create the
chippy look; don't forget the edges!
Step 2 - Create and cut design
While the paint was drying, I moved onto creating my design. I love my
Silhouette machine and use it for everything (best investment ever!). I
thought long and hard about what to say. I wanted to keep it simple and in the
end decided on
"the little white rabbit". In French it sounds so much better,
"le petit lapin blanc". Everything sounds better in French, right? Did
you know I grew up taking French in school in Canada?
One thing I love about creating your own designs with the Silhouette is
customizing the exact size that you need for your specific project! After
flipping the text, I cut it out onto HTV.
Now I realize that not everyone has a Silhouette or Cricut. Don't let that
stop you from creating a similar sign! Look for vintage style French stencils
that you can use with basic black acrylic craft paint.
Here's one with several designs that might work.
Why heat transfer vinyl?
HTV is normally used for fabric projects, but I love it for wood DIYs as well!
The HTV will give your projects crisp edges, and is especially favorable with
thin lines. The easy method of ironing it on ensures that the entire design
transfers without much effort.
I used HTV on my
Man in the Moon signs
and it worked so well, I decided to use it again for this French rabbit sign!
Of course, if you don't have HTV, feel free to use regular matte black vinyl.
Step 3 - Iron design onto rabbit sign
I have a Cricut Easy Press, which heats to the exact temperature you set. I
used an
pressing cloth
between my sign and the iron and pressed the iron into the board in 15 second
intervals.
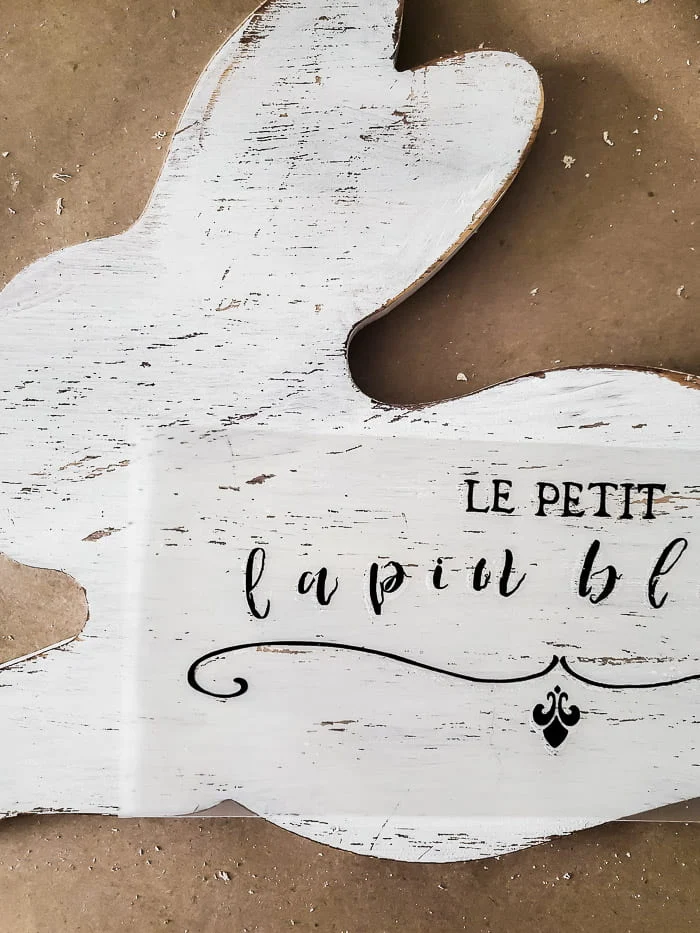
You want to allow it to lightly cool and then test an edge to see if the
design is staying put or peeling off the backing. Look at all that chippy
white goodness up close! Don't you love it?
Is it safe to iron on wood?
Yes! We're not holding the heat onto the board for more than a few seconds, so
it's totally safe, even using on a painted surface.
Just be sure the chalk paint is totally dry before ironing the HTV design onto
the surface.
Step 4 - Make holes for hanging
The last step before hanging up this chippy French rabbit sign is to make
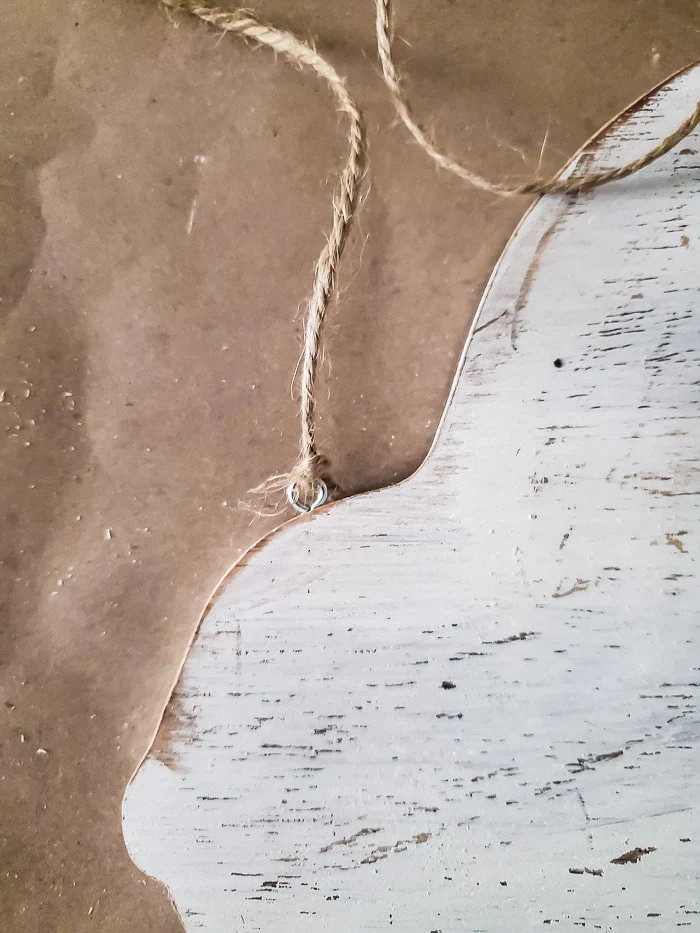
holes for hanging. I marked where I wanted the holes and Mr DIY used a drill
with a tiny bit to make holes for me.
We used
small threaded eye screws
and screwed them into the holes and then I tied on a long piece of jute cord
because I like the rustic look.
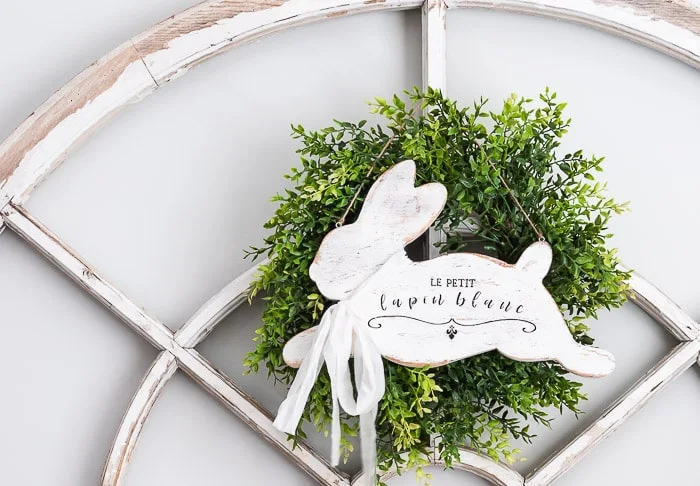
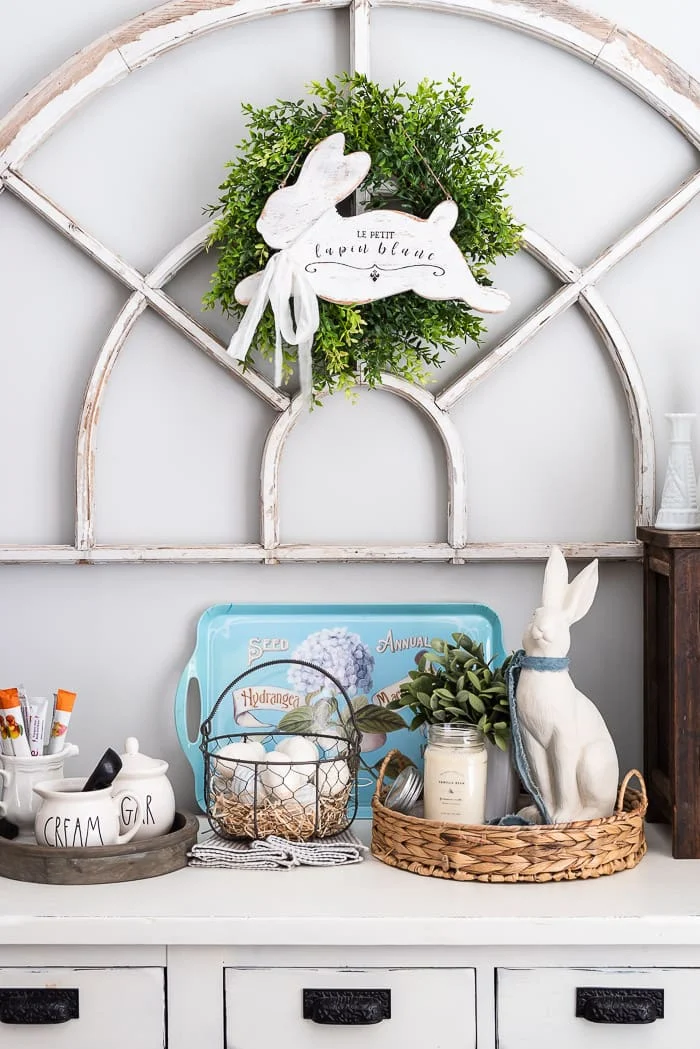
This chippy rabbit sign was simple to make and it looks so cute hanging on the
antique arch window above my coffee bar in the kitchen.
It felt like too much white on white, so I hung a greenery wreath on the
window, with the rabbit hanging on top of it.
Isn't this the cutest thing? A French rabbit wood sign for just $5! I'm
seriously in love with it.
You can take a tour of my Spring coffee bar, kitchen and living room
here.
And if you're looking for more ideas for using this chippy paint technique,
here are a few projects you might like to try.
-
Easy Chippy White Spindle Technique
-
Chippy White Spindle Tree
-
How to Make Spindle Candlesticks
-
Easy Spindle Ornaments











I love your little French rabbit! So cute and such a great DIY! I wanted to go see your spring coffee bar and kitchen but the link didn’t work.
ReplyDeleteThanks so much Melanie, the link will be active on Friday! Hope you stop back 😉
DeletePerfection, I love this project, I love how you finished it.
ReplyDelete