How to Make an XO Valentine's Pillow from Drop Cloth
Make a neutral Valentine's pillow cover with drop cloth XO letters. Because it's not Valentine-specific, this sweet pillow can decorate your home all year!
Updated 1/2024
Affiliate links may be included for your convenience;
my full disclosure policy can be found here. If you click through and make a purchase I'll receive a small
commission at no extra cost to you!
Hello, hello! I'm so excited to share this project with you today!
I have a sew and no-sew version of this cute XO Valentine's pillow. I
was going to share them both with you today, but decided to split them up into
two separate posts. I like to share a LOT of details, and this post would have
been way too long!
If you are looking for the no-sew version of the XO pillow, you can find
that
here.
If you know how to sew, this project will be a piece of cake! Even if you're a
beginner (or novice) seamstress like me, you can do this! I consider myself
pretty much a straight-line seamstress, with the occasional curve thrown in
just to make life interesting! 😉
Bottom line, this is straightforward sewing, nothing too difficult!
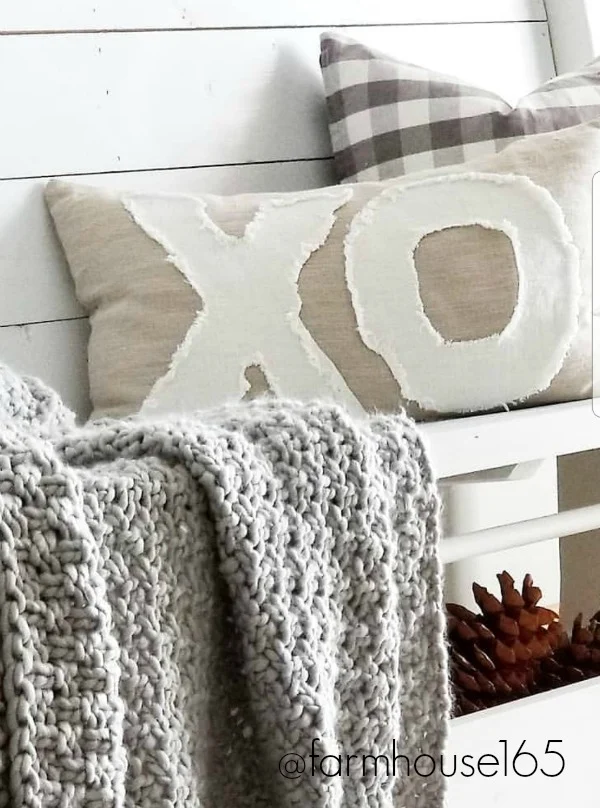
Let me share the pillow that inspired this project before we get to the
DIY. My friend Amanda shared this picture on Instagram recently. I love
her style and am always inspired by her decor! It's obvious by scrolling
through our accounts that we like many of the same things! If you're looking
for an awesome account filled with bright beautiful images, make sure
you follow Amanda! Her Instagram handle is @farmhouse165.
Amanda found her XO pillow at Marshall's for $20. As soon as I saw it, I
knew I needed another pillow in my life...right, hehe...so I headed
out to the store, looking for it. I would have gladly paid the $20, but
obviously I didn't find it...which is why we're making one today!
How to make an XO Valentine's pillow from drop cloth
Supplies Needed:
- pillow form and cover, 12"x20" (here is a set of two (covers only) in the right color) or check stores like HomeGoods and Marshalls
- drop cloth (pre-washed)
- XO pattern (free template available for subscribers)
- sewing machine
- straight pins
- sharp scissors
- embroidery scissors (not necessary but very helpful bc they're very sharp, have a fine needle-nose point and are perfect for detail cutting)
Let's talk for a sec about the actual pillow. I love that the inspiration
pillow is elongated. I found a feather pillow with removable case at HomeGoods
for only $9!
As you can see, it's elongated too and I love the blue pattern on the front.
The reason I bought it is because the back was just the color I wanted! But I also don't hate the front!! So win-win, this turned into a
reversible pillow for me!
You can certainly sew your own pillow cover, or even purchase just a cover.
However, I found that buying a ready-made pillow was more cost effective
because inserts can get pricey (especially elongated, feather inserts!).
Make sure if you go this route that you buy a pillow with a zipper so you can
remove the cover (absolutely essential for this project!).
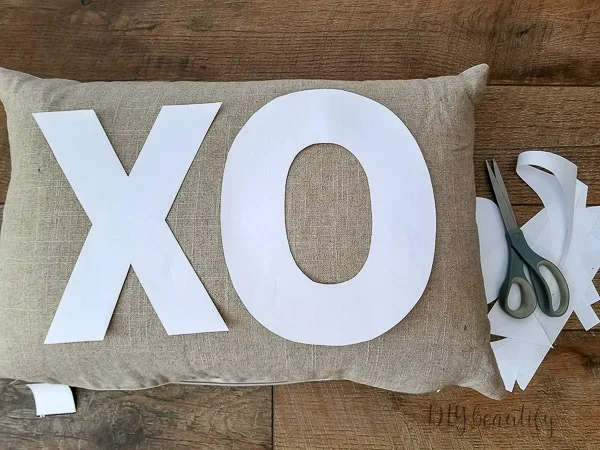
Step 1: Make XO template and cut out letters
I enlarged the letters so they'd each fill up a sheet of copy paper, and
printed them out in grayscale so not to waste all my printer ink!
The templates are available for free for
subscribers, you'll find the link to my Resource Library in every email I send!!
Step 2: Pin pattern to drop cloth and cut out
Make sure you have pre-washed and dried the drop cloth!! And when you cut,
leave about 1/4" for a seam allowance. I found it was helpful to lightly draw
a cutting line with pencil! See my tips below for cutting out the center of
your 'O'.
Step 3: Pin drop cloth XO to pillow cover
Remove the pillow insert from the cover and insert a piece of cardboard or a
cutting mat
so you only pin through the top layer. Lay your drop cloth letters where you'd
like them and pin them to the pillow cover, making sure the zipper is at the
bottom! Use lots of pins so letters are securely in place and won't shift
around when you're sewing.
Step 4: Sew letters to pillow cover
I used the widest stitch on my machine
(yep, I have my mom's vintage Pfaff from the 70's...still works great!).
Some sewing tips:
- Take it slow! It's a little awkward because you're having to sew with the other side of the case attached! Before stitching, and every time you turn your fabric, just make sure you're not accidentally catching the other side!
- I found it helpful to turn the pillowcase edges almost inside out, to keep that bottom from getting caught!
- Remove the pins one at a time only as you get to them so the letters don't shift
- Use a backstitch at the beginning and end to secure stitches
Step 5: Fray the edges
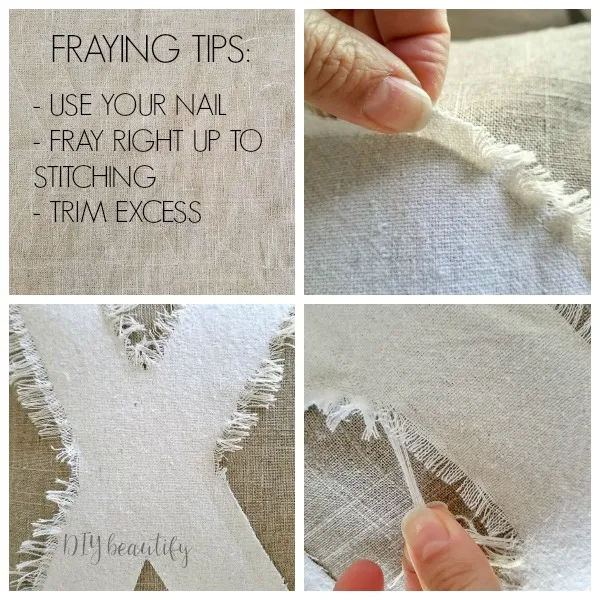
The beauty of drop cloth is that it frays really well. In fact,
if you have a machine-washable pillow cover, you can now throw it into the
wash and the agitation will do much of the work for you!
Unfortunately, when I checked my label, it said the fibers were
'undetermined'. That's not a problem because drop cloth is easy to fray by
hand!
The thing about drop cloth is that it can continue to fray if you don't do it
all now. Not a big deal, but it's not fun to stand up from the sofa and find a
long thread hanging off your leg!!
Here are some tips for fraying the edge, and YES, we want to fray right up to
the stitching lines!!
You can either use something sharp to get the fibers started, or just drag
your nail across it! The 'O' was a little more difficult because of the curve,
but just take your time! It will look a hot mess when you're done because
you'll be left with fibers of all different lengths!
That's where the embroidery scissors come in very handy!
Step 6: Trim the edges
You can see here that I've already trimmed the X but the O needs some work!
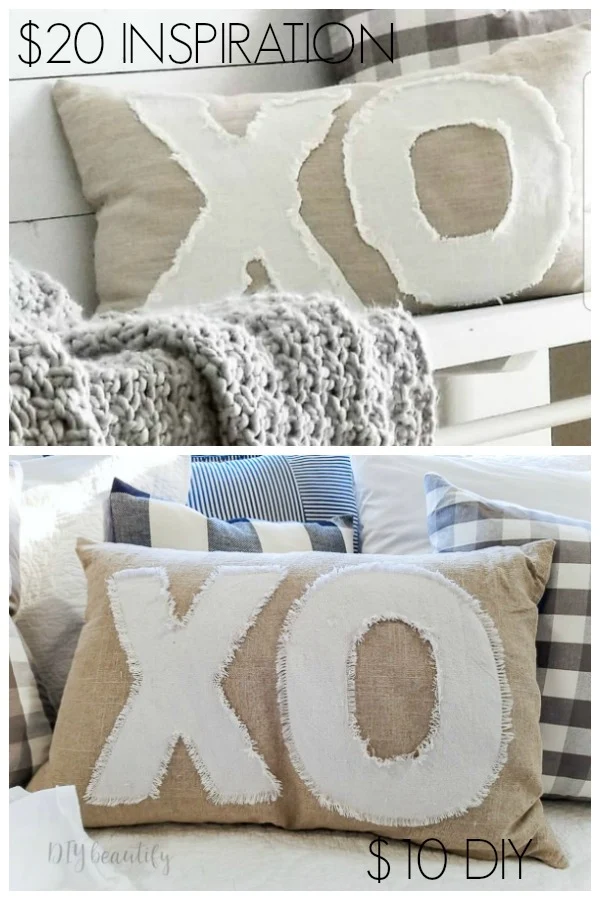
That's it! The end result looks pretty much exactly like the inspiration,
wouldn't you say?? And I saved money by making my own XO pillow!
I am loving this sweet pillow everywhere I put it, but for now it's living
with the other neutral pillows on my cottage daybed in the sunroom!
Of course, because this is a DIY pillow, you aren't limited to XO and Valentines! Why not make a number pillow to represent your family, or your initial, or the year you were married? There are lots of ideas here and these would make thoughtful gifts!
I'd love to know if you're inspired to make this cute XO Valentines pillow! And by the way, love isn't limited to Valentines day only, so feel free to leave this pillow out year round ❤
p.s. because I know many of you will ask about that beautiful ruffled chenille
throw, you can find it
here 💗


It is adorable and I love the throw with the ruffle. Where did you get that?
ReplyDeleteThanks Di!! You'll find a link to the throw in the p.s. of my post ;)
DeleteSo so cute!
ReplyDeleteThanks so much Amber!!
DeleteWas wanting the XO pattern but didn’t find it in my email, or the post I sent yesterday. Did you happen to get my message? I’m new at this! Lol!
ReplyDeleteHi Elizabeth, just seeing this now. Please reply with your email and I'd be happy to send!
Deleteso cute! I would love the xo pattern. Thanks a bunch! tvoyles67@gmail.com
ReplyDeleteWas hoping to find a link to the "XO" pattern in your blog. Didn't see it... are you sharing via email? 9steph12@gmail.com if you are. Thanks for the inspiration!
ReplyDeleteHi Stephanie, I emailed you the templates yesterday!
DeleteCan I have the link for the XO? My email is sewsohappy1@gmail.com. Thanks!
ReplyDeletePlease send me the XO templates castlemanjjc@aol.com Thank you!
ReplyDeleteI would love the XO templates! aubie.davis@gmail.com
ReplyDeleteXo template please. afischernurse@gmail.com
ReplyDeleteWould like the X and O template please.
ReplyDeleteriggsk349@yahoo.com
Can I get the free pattern for theXO ladydij@comcast.net
ReplyDeleteI subscribed to your newsletter and am assuming I need to wait for the next newsletter to access your resource library for the XO templates but is there a way to get it sooner? Thnx!!
ReplyDeleteIf I have you email, I'm happy to send you the link
Delete